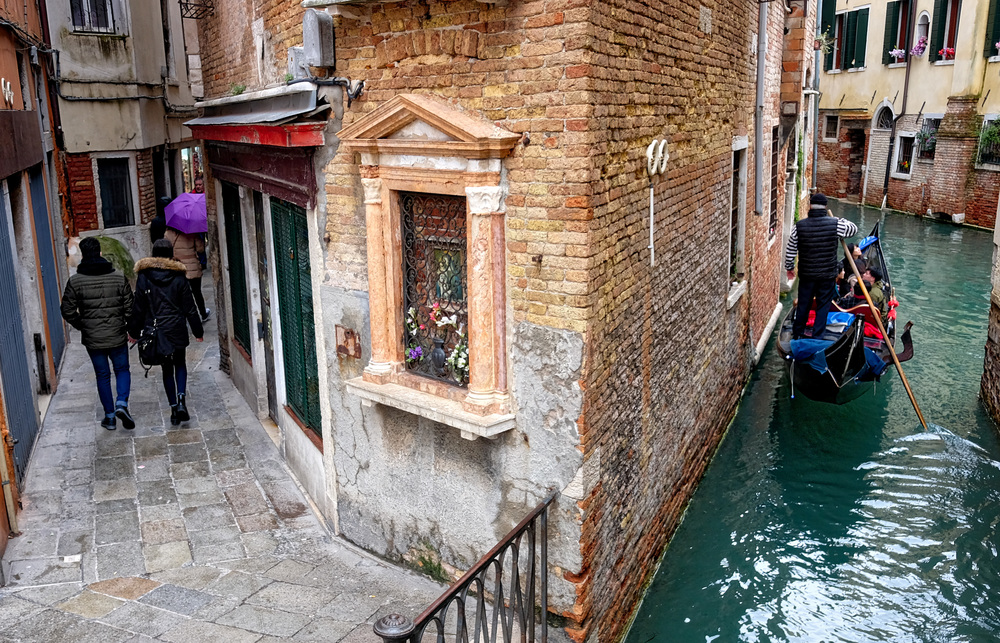
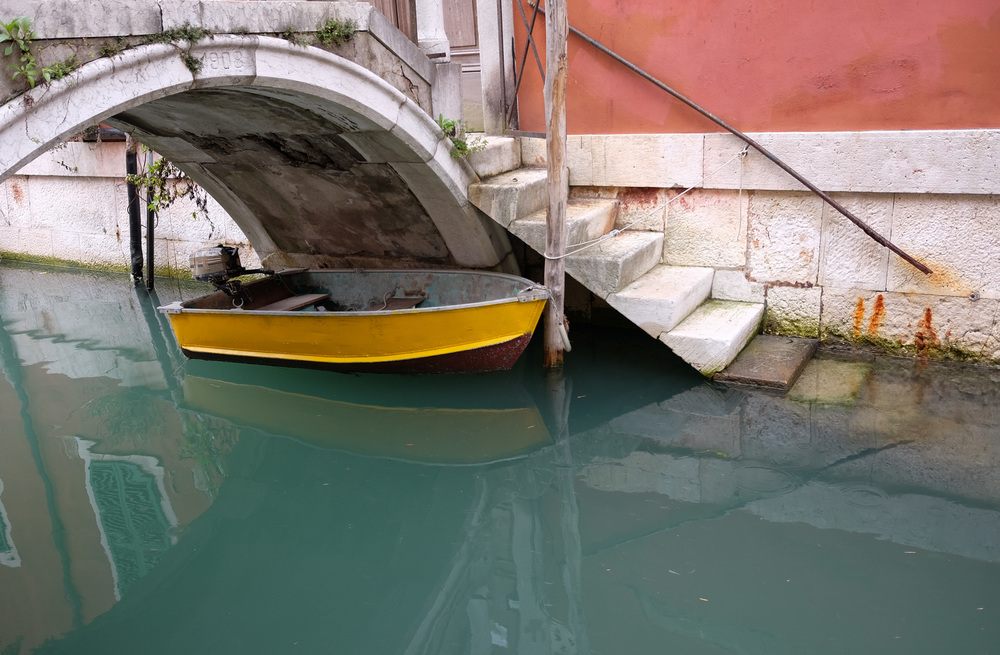
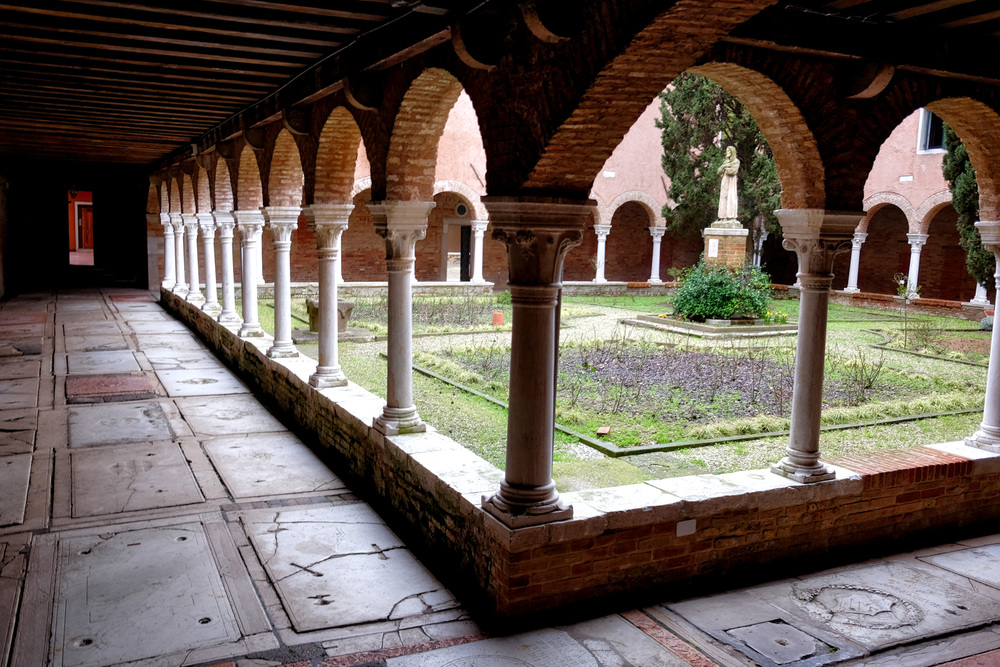
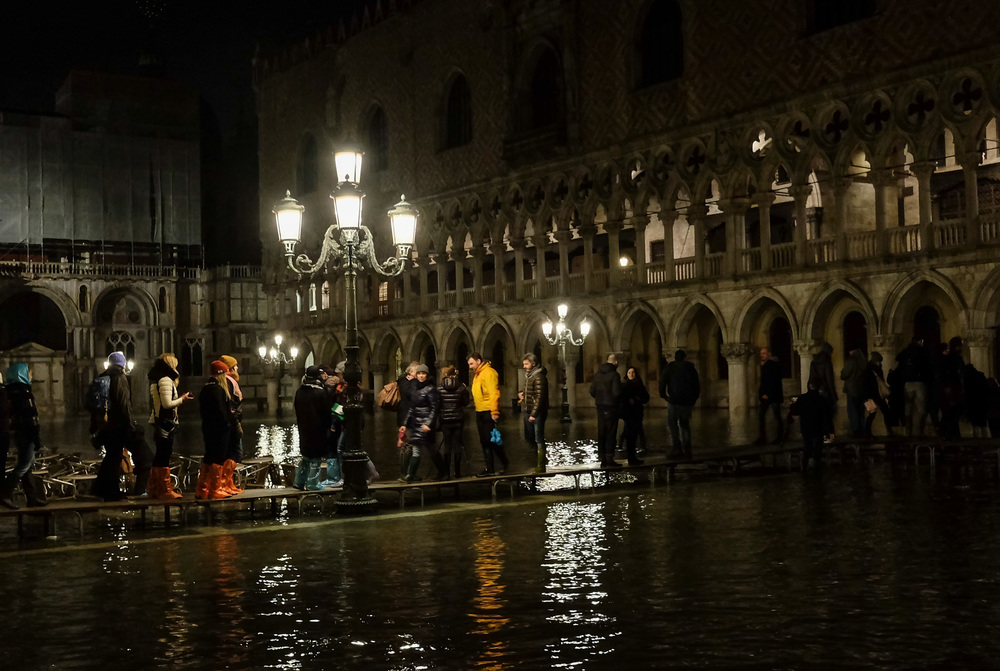
Mastering the Light: A Photographer’s Greatest Tool

Light is the essence of photography. It shapes our images, evokes emotion, and transforms the mundane into the extraordinary. As photographers, we often obsess over gear, but the truth is that understanding light is far more impactful than any piece of equipment. Let me share my approach to working with light and how it has shaped my photography over the years.

Natural Light: The Original Canvas

Natural light is a gift—it’s everywhere and ever-changing. Learning to read and adapt to it is one of the most valuable skills a photographer can develop. Here are some ways I harness it:

  • Golden Hour Magic: The soft, warm light during the first hour after sunrise and the last hour before sunset is a photographer’s dream. It creates beautiful, directional light that adds depth and texture to images. I often schedule shoots around these times, especially for portraits and landscapes.

  • Overcast Days: While some may lament cloudy skies, I embrace them. The diffused light eliminates harsh shadows and creates an even, flattering tone—perfect for street photography or portraits.

  • Backlighting: Positioning the light source behind your subject can create dramatic silhouettes or ethereal rim lighting. It’s a technique I love using with both people and objects to add a touch of mystery.

  • Hard Light: Midday sunlight can be challenging, but it’s not something to avoid entirely. Hard light creates sharp contrasts and bold shadows, which can be creatively used for graphic compositions or dramatic effects.

Artificial Light: Taking Control

Sometimes, natural light isn’t enough, and that’s where artificial light steps in. It gives you complete control over intensity, direction, and quality. Here’s how I work with it:

  • Speedlights and Strobes: These are lifesavers for low-light situations or when I need to overpower harsh sunlight. I often use them off-camera to mimic natural light or create dynamic, multi-light setups.

  • Continuous Light: LED panels or tungsten lights allow me to see the effect of the light in real-time. They’re great for portraits or product photography, especially in controlled studio settings.

  • Practical Light Sources: Don’t underestimate the charm of practical lights—lamps, neon signs, or even candles. They add character and context to images, especially in indoor or nighttime environments.

Direction, Quality, and Color

Mastering light isn’t just about finding it; it’s about understanding its direction, quality, and colour.

  • Direction: The angle of light dramatically affects how a subject is rendered. Side lighting emphasizes texture and shape, while front lighting creates a flatter, more even appearance. Experiment with different angles to discover what works best for your subject.

  • Quality: Is the light hard or soft? Soft light is diffused and forgiving, while hard light is sharp and dramatic. Understanding when to use each type can elevate your storytelling.

  • Color: Light isn’t always neutral. Golden hour brings warm tones, while overcast light leans cooler. Artificial lights come in a spectrum of colors, from warm tungsten to cool fluorescent. Adjusting your white balance or embracing the light’s natural hue can add mood and authenticity to your images.

Playing with Shadows

Light is only half the story—shadows are its silent partner. They define depth and dimension, turning a flat scene into something sculptural. I love using shadows to frame subjects, add mystery, or create patterns. Don’t shy away from them; instead, let them be part of your composition.

Tips for Mastering Light

  1. Observe Constantly: Train your eyes to notice how light changes throughout the day. Look at how it falls on objects, creates shadows, or bounces off surfaces.

  2. Experiment: Don’t be afraid to try different approaches. Shoot directly into the light, bounce it off a reflector, or diffuse it with a simple sheet of paper.

  3. Practice Minimalism: Start with one light source and master its nuances before adding complexity.

  4. Edit with Care: Post-processing can enhance light’s impact but don’t overdo it. Aim to preserve the natural feel of your image.

Final Thoughts

Light is the paintbrush of photography. The more you study and work with it, the more confident and creative you’ll become. Whether chasing golden hour or crafting your own light in a studio, remember that light isn’t just about illumination—it’s about emotion, depth, and storytelling.

What’s your favorite way to work with light? I’d love to hear your thoughts in the comments. Let’s keep the conversation glowing!

Unlocking the Potential of Image Licensing: How Google's 'Licensable' Badge Benefits Photographers

Introduction:

In the digital age, images circulate with ease, crossing borders and screens in a matter of seconds. While this has democratized access to visual content, it also presents a challenge for photographers: protecting their copyrights and generating revenue from their work. Enter Google's 'Licensable' badge, a feature in Google Images that is changing the game for professional photographers and visual artists.

The 'Licensable' Badge: What Is It?

Google has introduced a 'Licensable' badge in its image search results to help users understand which images are protected by copyright and how they can be licensed for use. This small, yet significant, badge provides a visual cue that an image is not simply free to take — it is a product of someone's hard work and creativity that is available for legal use through proper channels.

The Importance for Photographers:

  1. Visibility of Copyright Information: The badge brings a layer of transparency to image copyright. With a quick glance, potential users can see that an image has licensing information available. This is a step forward in copyright education and respects the photographer's property rights.

  2. Direct Path to Licensing: Google allows photographers to link directly to a page where the image can be licensed, streamlining the process. This makes it more likely that interested parties will follow through on proper licensing rather than resorting to unauthorized use.

  3. Improved Monetization: By providing a clear and easy way to license images, photographers can better monetize their work. The licensable badge can lead to increased sales and better control over where and how images are used.

  4. Reducing Infringement: With licensing information just a click away, there’s a reduction in unintentional copyright infringement. Users can no longer claim ignorance as easily when images are marked as licensable.

How It Works:

To take advantage of this feature, photographers need to embed IPTC copyright and licensing metadata directly into their image files. This metadata remains with an image no matter where it is used online, providing a persistent link back to the photographer's licensing information.

Embedding Metadata: The IPTC Standard and the Importance of Web Statement URL

The International Press Telecommunications Council (IPTC) has developed industry standards for metadata that go beyond simple tags and descriptions. This metadata includes vital information like copyright status and licensing terms, and crucially, it also allows for the inclusion of a Web Statement URL.

The Web Statement URL is a direct link to a page where the copyright and usage rights of the image are explained in detail. It's an essential tool for educating users about the legal considerations and restrictions associated with an image.

Web Statement URL and Licensor URL: The Dynamic Duo

Incorporating both a Web Statement URL and a Licensor URL creates a comprehensive framework for image rights and licensing:

  • The Web Statement URL educates users about the rights attached to the image. It often includes a general statement of the copyright terms under which the photographer's content can be used.

  • The Licensor URL goes a step further, providing a direct line of contact or a form through which users can obtain licenses to use the image. This could link to a marketplace, a contact form, or any platform where the license can be purchased or negotiated.

Here are the two pages on my Archive

  • Web Statement URL: https://www.marcosecchi.org/p/rights

  • Licensor URL: https://www.marcosecchi.org/p/licensor-url

By embedding both types of URLs in their image metadata, photographers ensure that anyone who comes across their work on platforms like Google Images can instantly understand not just that the image is licensable but also exactly how to obtain those rights and what the terms of use are.

Conclusion:

The introduction of the 'Licensable' badge by Google is a pivotal move for the photography industry. It represents a step towards better copyright practices online and offers photographers a powerful tool for managing their work. As the digital landscape evolves, embracing these tools will be key to protecting and profiting from your creations.

NFTs for Photographers I

The world of photography is rapidly changing. When you think about it, a photo is really just a bunch of information—a ton of metadata. And that means it can be tokenized and sold in new ways.

The power of the blockchain means that photographers, in theory, can take control of their images and make them into NFTs on the Ethereum blockchain. It means they can set the rules for their photos, including how many times they're allowed to be licensed, how much money they're worth in real-time, how long each license lasts, and so on.

More importantly, it means that photographers can finally say goodbye to the big platforms and agencies that've been taking huge cuts from sales for years.

Now, with the Ethereum blockchain, there's no gatekeeper to pay off. All the profits can stay in your pocket—and all the power stays in your hands.

Imagine what could happen if a photography startup built a blockchain-based marketplace? Photography lovers could buy, sell, protect and track their photos.

What are NTTs

Non-fungible tokens (NFT) are a digital representation of a single, unique asset. It can be a collectable, like a CryptoKitty, or ownership in a house or artwork. The great thing about NFT is that they are cryptographically secure and easy to use.

Projects like CryptoPunks have created the first wave of NFT assets, and we've seen them proliferate across games like CryptoKitties. This is just the beginning of what this new asset class will allow us to do online.

NFTs redefine digital art as something unique and irreplaceable, like a photographic print or a painting. Now there is the greater reason to own artwork as an NFT; digital media is no longer just a source of entertainment or stimulus, but a repository of value and an object of scarcity. For the artist, this means more money to be made from each piece of art produced, and vastly increased viability for digital art as a business or career.

Wallets

There are 3 main types of crypto wallets: hot wallets, cold storage, and hardware wallets. For this post we will concentrate on Hot Wallet

Creating a wallet is easy. It can be as simple as installing a browser plug-in. Creating and securing your wallets (including backups) is the responsibility of each user. If you lose your private key, you lose your bitcoins. So be sure to keep it secret and secure, and don't share it with anyone.

The following wallets can be used on multiple platforms and devices, including iOS and Android systems:

  • Coinbase Wallet – Best for Beginners.

  • Electrum – Best for Bitcoin.

  • Mycelium – Best for Mobile.

  • Ledger Nano X – Best Offline Crypto Wallet.

  • Exodus – Best for Desktop.

  • Metamask (Is the one I use regularly) and Being both a browser and mobile-based wallet, is hugely popular among crypto admirers.

Here are some of the best NFT marketplaces right now.

  1. OpenSea. OpenSea is the leader in NFT sales. ...

  2. Axie Marketplace. Axie Marketplace is the online shop for the video game Axie Infinity. ...

  3. Larva Labs/CryptoPunks.

  4. NBA Top Shot Marketplace.

  5. Rarible.

  6. SuperRare

  7. Foundation.

  8. Nifty Gateway.

How To Create Moody Monochrome Landscapes

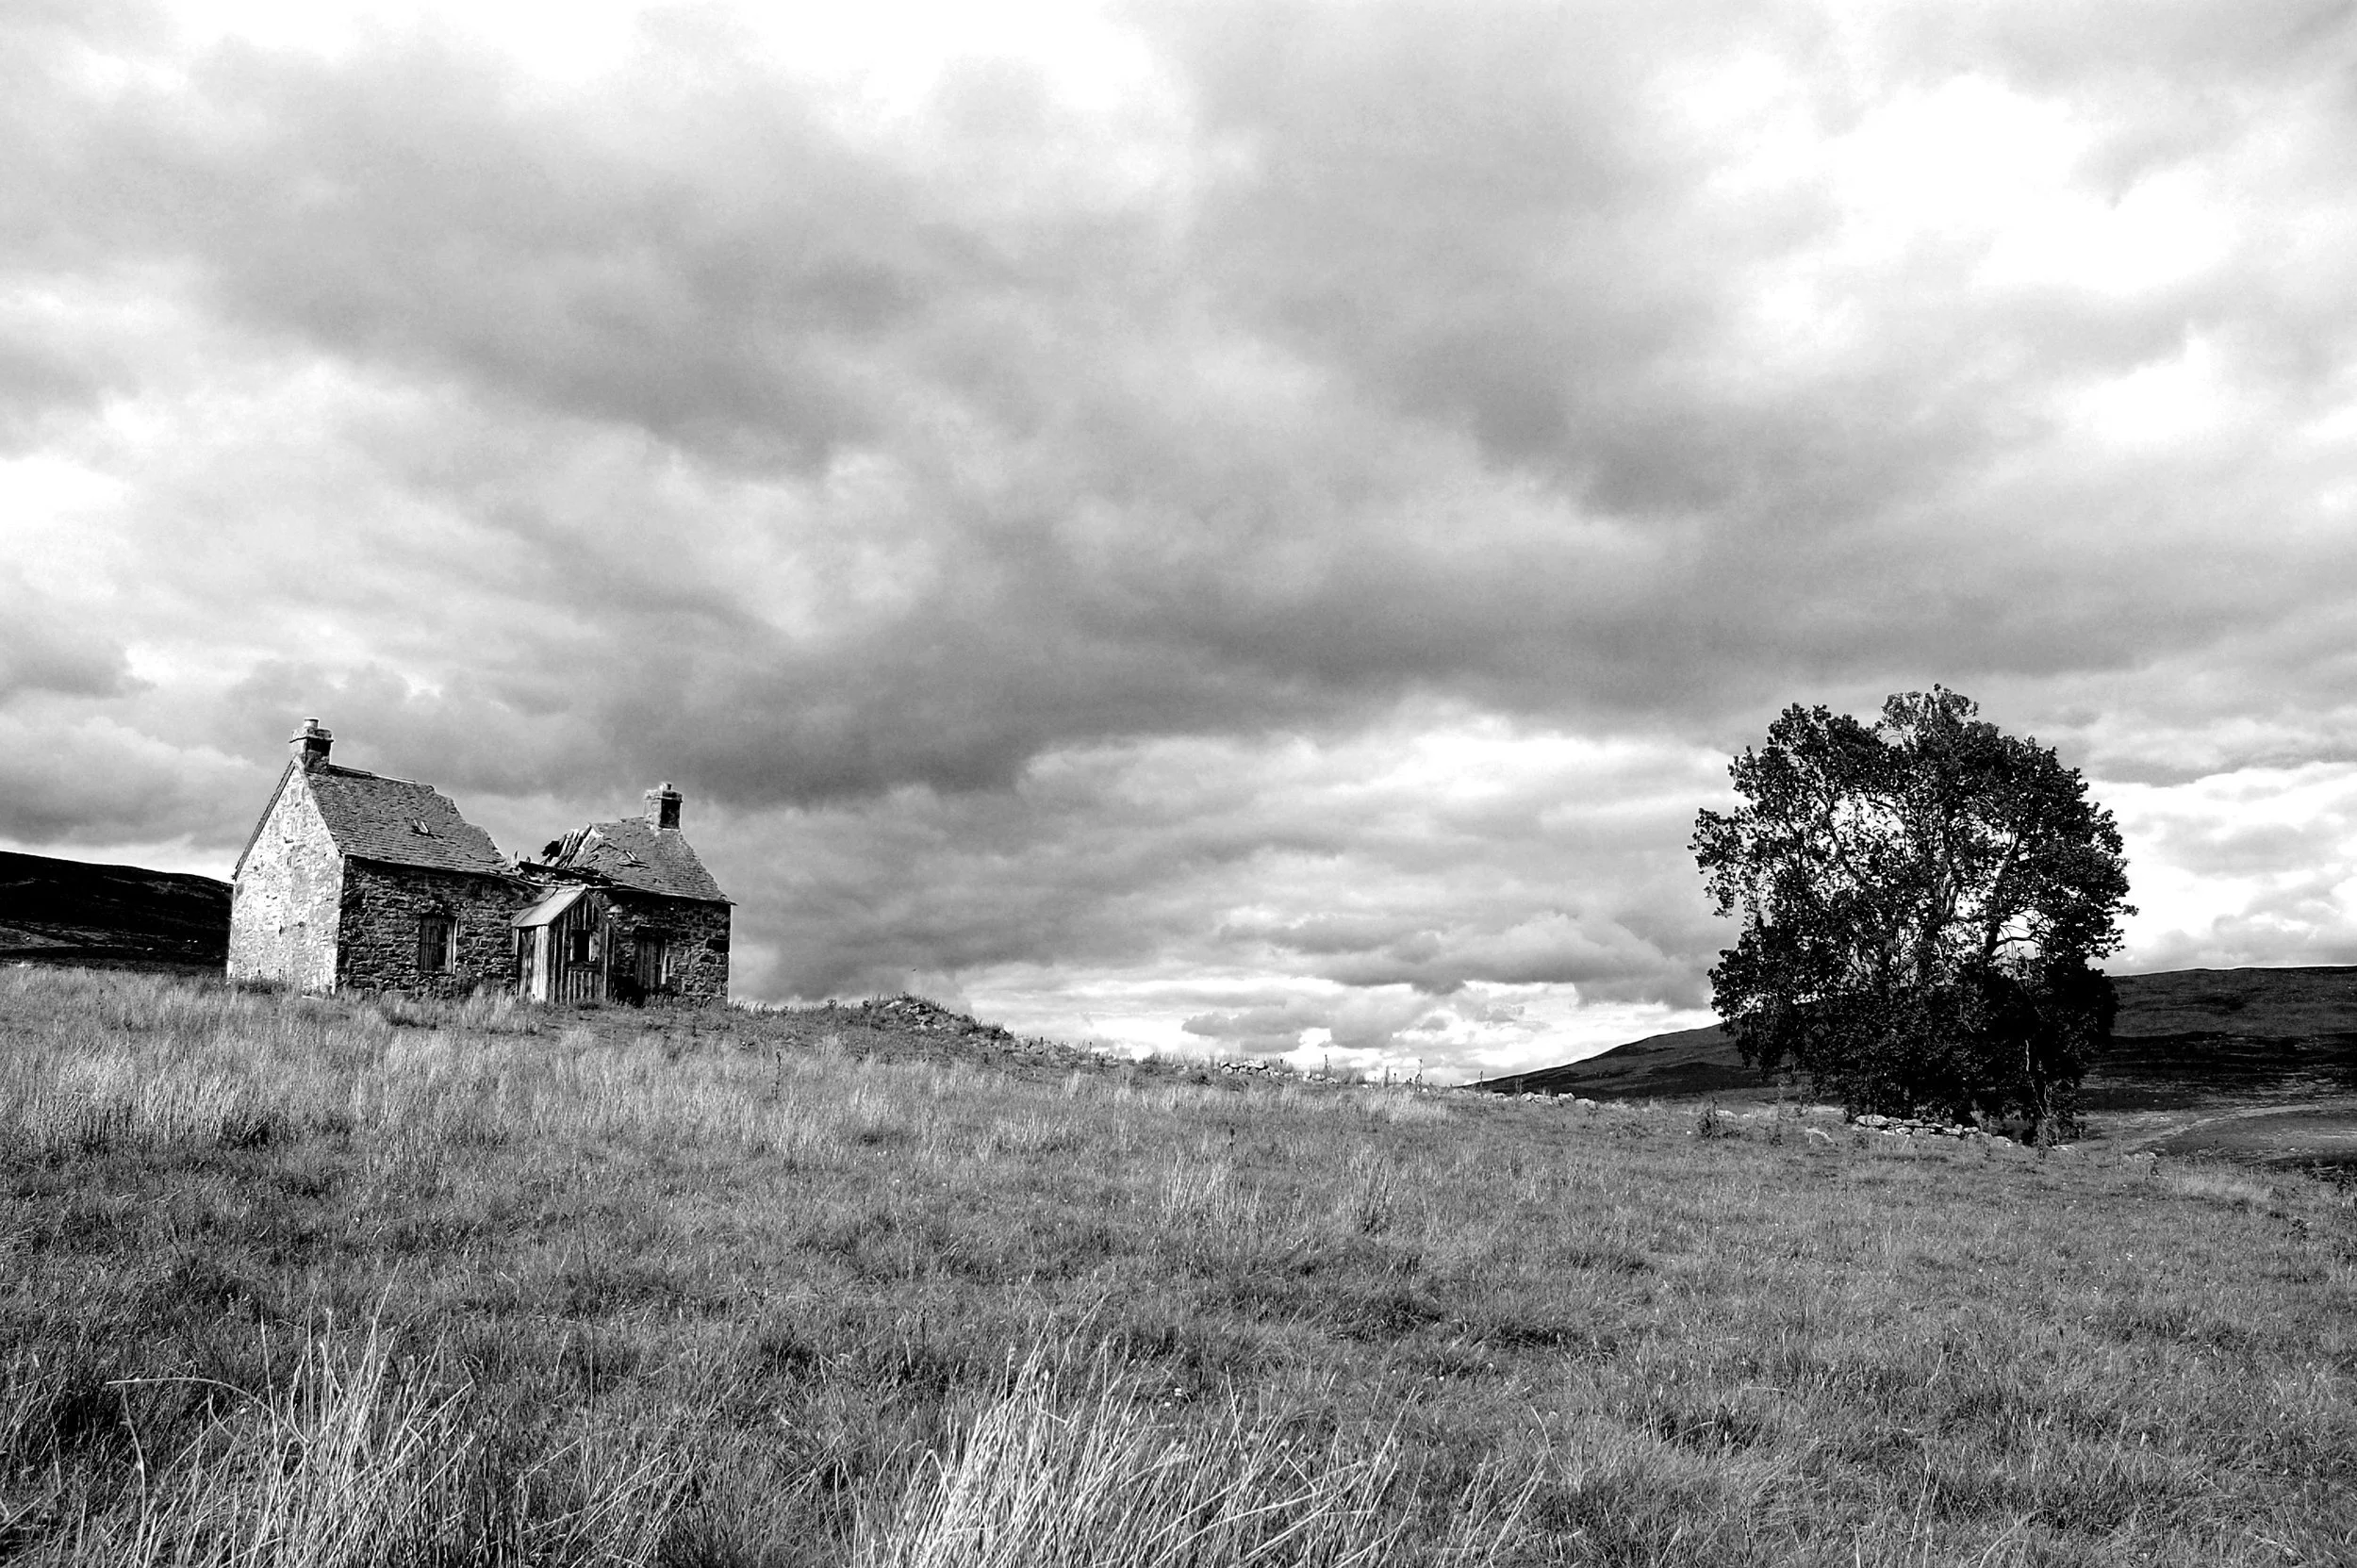
Moody monochrome landscape photography is an art. With just a change in how you see the landscape, through your eyes and through the camera lens, you could get some great black and white photos of the outdoors. This article will give you tips on how to capture those magical moments for making the best out of all kinds of outdoor photography. We will look at techniques, equipment, and other important factors for creating timeless masterpieces in monochrome.

Monochrome photography is one of the more challenging types of photography to master. Even with the right gear, it can be difficult to get the proper depth of field that helps create a moody and compelling image. In this blog post, I'll share my tips and tricks for shooting in monochrome, so you can learn how to create your own moody landscapes in no time.


Monochrome photography can be a great niche for your e-commerce photography business. It's not very common to see monochrome product photography, and people often have a hard time imagining what it looks like. But monochrome is a versatile and interesting style that lends itself to a variety of photographic applications.

The most striking thing about monochrome images is their simplicity. There's no color to distract you from the subject. Whether it's a person or an object, all you see is black and white, which makes it easy to imagine the subject as it really is — something quite different from the way you perceive it in colour.

Monochrome pictures tend to be gloomy and serious, but they can also be quite cheerful. In fact, one of the benefits of shooting in monochrome is that you don't have to choose between warm tones and cool tones, because there are no warm tones at all. Any colour tone in the scene will look good with black and white, so you don't have to worry about "matching" one tone with another.

Black and White is an effective strategy to create your own style. When shooting in monochrome, the composition is the most important aspect of a photo. It's not about whether you use colour or not, it's about how you see the world as a photographer and how you capture that vision with your camera.

Tone and mood are very important when shooting in black and white because it changes the way people perceive a scene. For example, if your goal is to create a dark and moody atmosphere, then different elements need to be emphasized within your frame.

Below are some tips to achieve this particular look:

Forecasts that include the proportion of cloud and rain, the wind speed and direction, and the temperature become crucial. A forecast indicating a 50% chance of rain and a wind speed of 15 to 20 miles per hour can be encouraging. Essentially, seek out sunny spells punctuated by periodic showers.

Clearing (or approaching) storm clouds against a deep blue sky with dark patchy shadows scudding across the terrain are photographers' dreams, yet such dramatic settings come at a cost. By definition of desiring storm clouds, the likelihood is that you may become wet, chilled, hit by hailstones, or perhaps snowed on, but trust me on this one, it will be worth it.

Days with fog, low clouds, rain or snow could be perfect for Black and White photography

The more contrast on an image, the darker it looks. If you have a lot of light areas in your photo, then it will tend to look brighter than if there aren't any bright spots in the image at all. Shadows can add a lot of contrast to an image, so if there aren't any shadows present in your scene, try adding them with artificial light sources or reflectors.

Because brightness values are inverted when converting from colour to black and white, you can use your camera's exposure compensation function (often found under the "manual" mode setting) to make scenes brighter or darker in post-processing.

Creating moody images is about creating drama, and you can do this with filters such as gradients. When you're shooting in monochrome, you can use these filters to darken a scene, by introducing more shadow. You can also use them to brighten a scene if you want more light contrast. One of the most popular monochrome filters is a three-stop graduated neutral density (GND) filter: these come in a circular shape and darken skies evenly. A six-stop GND filter is also available, which allows you to darken skies even more. Another popular filter for landscapes is an 81B warm-up filter; this adds warmth to the sky, which can be useful when shooting in overcast conditions or at twilight.

Possibly the best-known software for creating black & white images is the superb Nik Silver Efex Pro. It is a very creative and powerful program with many presets but it too has its limitations. It can be a very aggressive piece of software so you need to check your images carefully for any deficiencies and imperfections that it may create.

Taking a B&W photo means choosing which colours are important enough to preserve and which ones to discard. This isn't hard if you're taking a picture of something like a red barn with a blue sky behind it. The blue sky is irrelevant and the red barn becomes the subject of the photo. But take a landscape photo where every detail is equally important — for example, an image shot in soft light with a lot of subtle colours — and you'll have a lot more decisions to make about what stays and what goes.

Black and white photos appear timeless because they work with the viewer’s imagination. You see the value of a black and white photo very quickly and easily, while color often distracts us. The fact that no one has created the same image before you will free you up to create your own vision.

How to Photograph Your Winter Landscape

Winter presents a photographer with a unique set of challenges and opportunities. The cold temperature and lack of sunlight in winter can make it hard to take good photos, but they also create some beautiful effects. Snow reflects the light differently than other subjects and brings out the contrast in your images.

Take advantage of the low light and contrast of a snowy scene

If you're brave enough to go outside, you can capture some breathtaking scenes. Here are some tips that will help you photograph your winter landscape: Use the right equipment. When it's cold out, it's important to protect your camera from the cold. Bring along a protective cover for your camera and use gloves or hand warmers when handling your gear. Even if you don't feel like it's that cold, keep in mind that your fingers will get cold and start to lose feeling after just 15 minutes of exposure at 0 degrees Fahrenheit. Setting up a tripod is important because camera shake is more prevalent during very low-light situations and will result in blurry pictures that you don't want to have to deal with later on. Work fast. The only real way to capture winter light is right at sunrise or right at sunset, so work quickly when shooting those times of the day. If possible, try to time your shoot so that there is still some light left in the sky while

Play with shadows

Lighting is what makes landscapes special. There is something about the way a camera sees these natural scenes that is different from how the naked eye perceives them. The difference between a landscape photo and any other photo is the way light plays on the scene. It can be harsh, or soft, but it is always special. The most important part of photographing a landscape is getting the exposure right. This means making sure there isn't too much light or too little light on your subject. You measure this by using your camera's histogram to see if the image has bright areas, mid-tones and dark areas all in proportion to each other. While you are at it, check your overall composition as well. Try taking several photos of your subject with different exposures (your camera will do this automatically) and then choose which one looks best.

Be patient with your camera

There are a few ways to photograph the winter landscape: some more complicated than others. The following tips will help you get great winter pictures of your surroundings in any season. The first thing to remember is that with a digital camera, you can take as many pictures as you want without paying for film or worrying about whether you have enough room on your card. It's easy to shoot several frames of the same scene, and then choose the best one when you're done. Be Patient With Your Camera If you're just starting out with taking pictures, it can be tough to get everything lined up perfectly on the first shot. When photographing the winter landscape, it might be tempting to walk around the area until you have everything framed the way you want it - but if it's windy out and there isn't much snow on the ground, that could be dangerous. Be patient, and try to get everything lined up as well as possible before pressing the shutter button.

Go wide

Going wide is a photography term meaning, "zoom out." It's the opposite of getting in close. And in landscape photography, it is often the way to go. When you're photographing mountains or valleys or any other expansive vista, you want to get as much of it in your frame as possible. You want an environment that feels big and open and full of possibilities. Going wide gives that to you. The best way to do this (if you're using a standard point-and-shoot camera) is to simply zoom out all the way, which will probably put your lens out of its normal focal range. That's fine—you can switch back and forth between that and the zoomed-in view on your LCD screen until you find the combination that works for you. If you're using an SLR camera, there are a couple of extra things you can do: Stack lenses: If your lens has a smaller focal length than what you want, you can use an additional telephoto lens with it to get closer to your subject while maintaining the wide-angle view. You just have to make sure both lenses are compatible before buying them.* Use a wide-angle lens and shoot at a longer focal length: This is particularly handy

You don't need a lot of gear to take great photos of your winter landscape

There is nothing quite like a winter landscape. Trees and bushes are covered in snow and the ground is blanketed with pure white powder. It's a magical time of year, and you'll want to capture this beauty for future enjoyment. There is a lot you can do with your camera to make the most out of your winter landscape photos. You don't need a lot of gear to take great photos of your winter landscape, but there are some tricks that improve the quality of pictures significantly.

Choosing the Right Lens

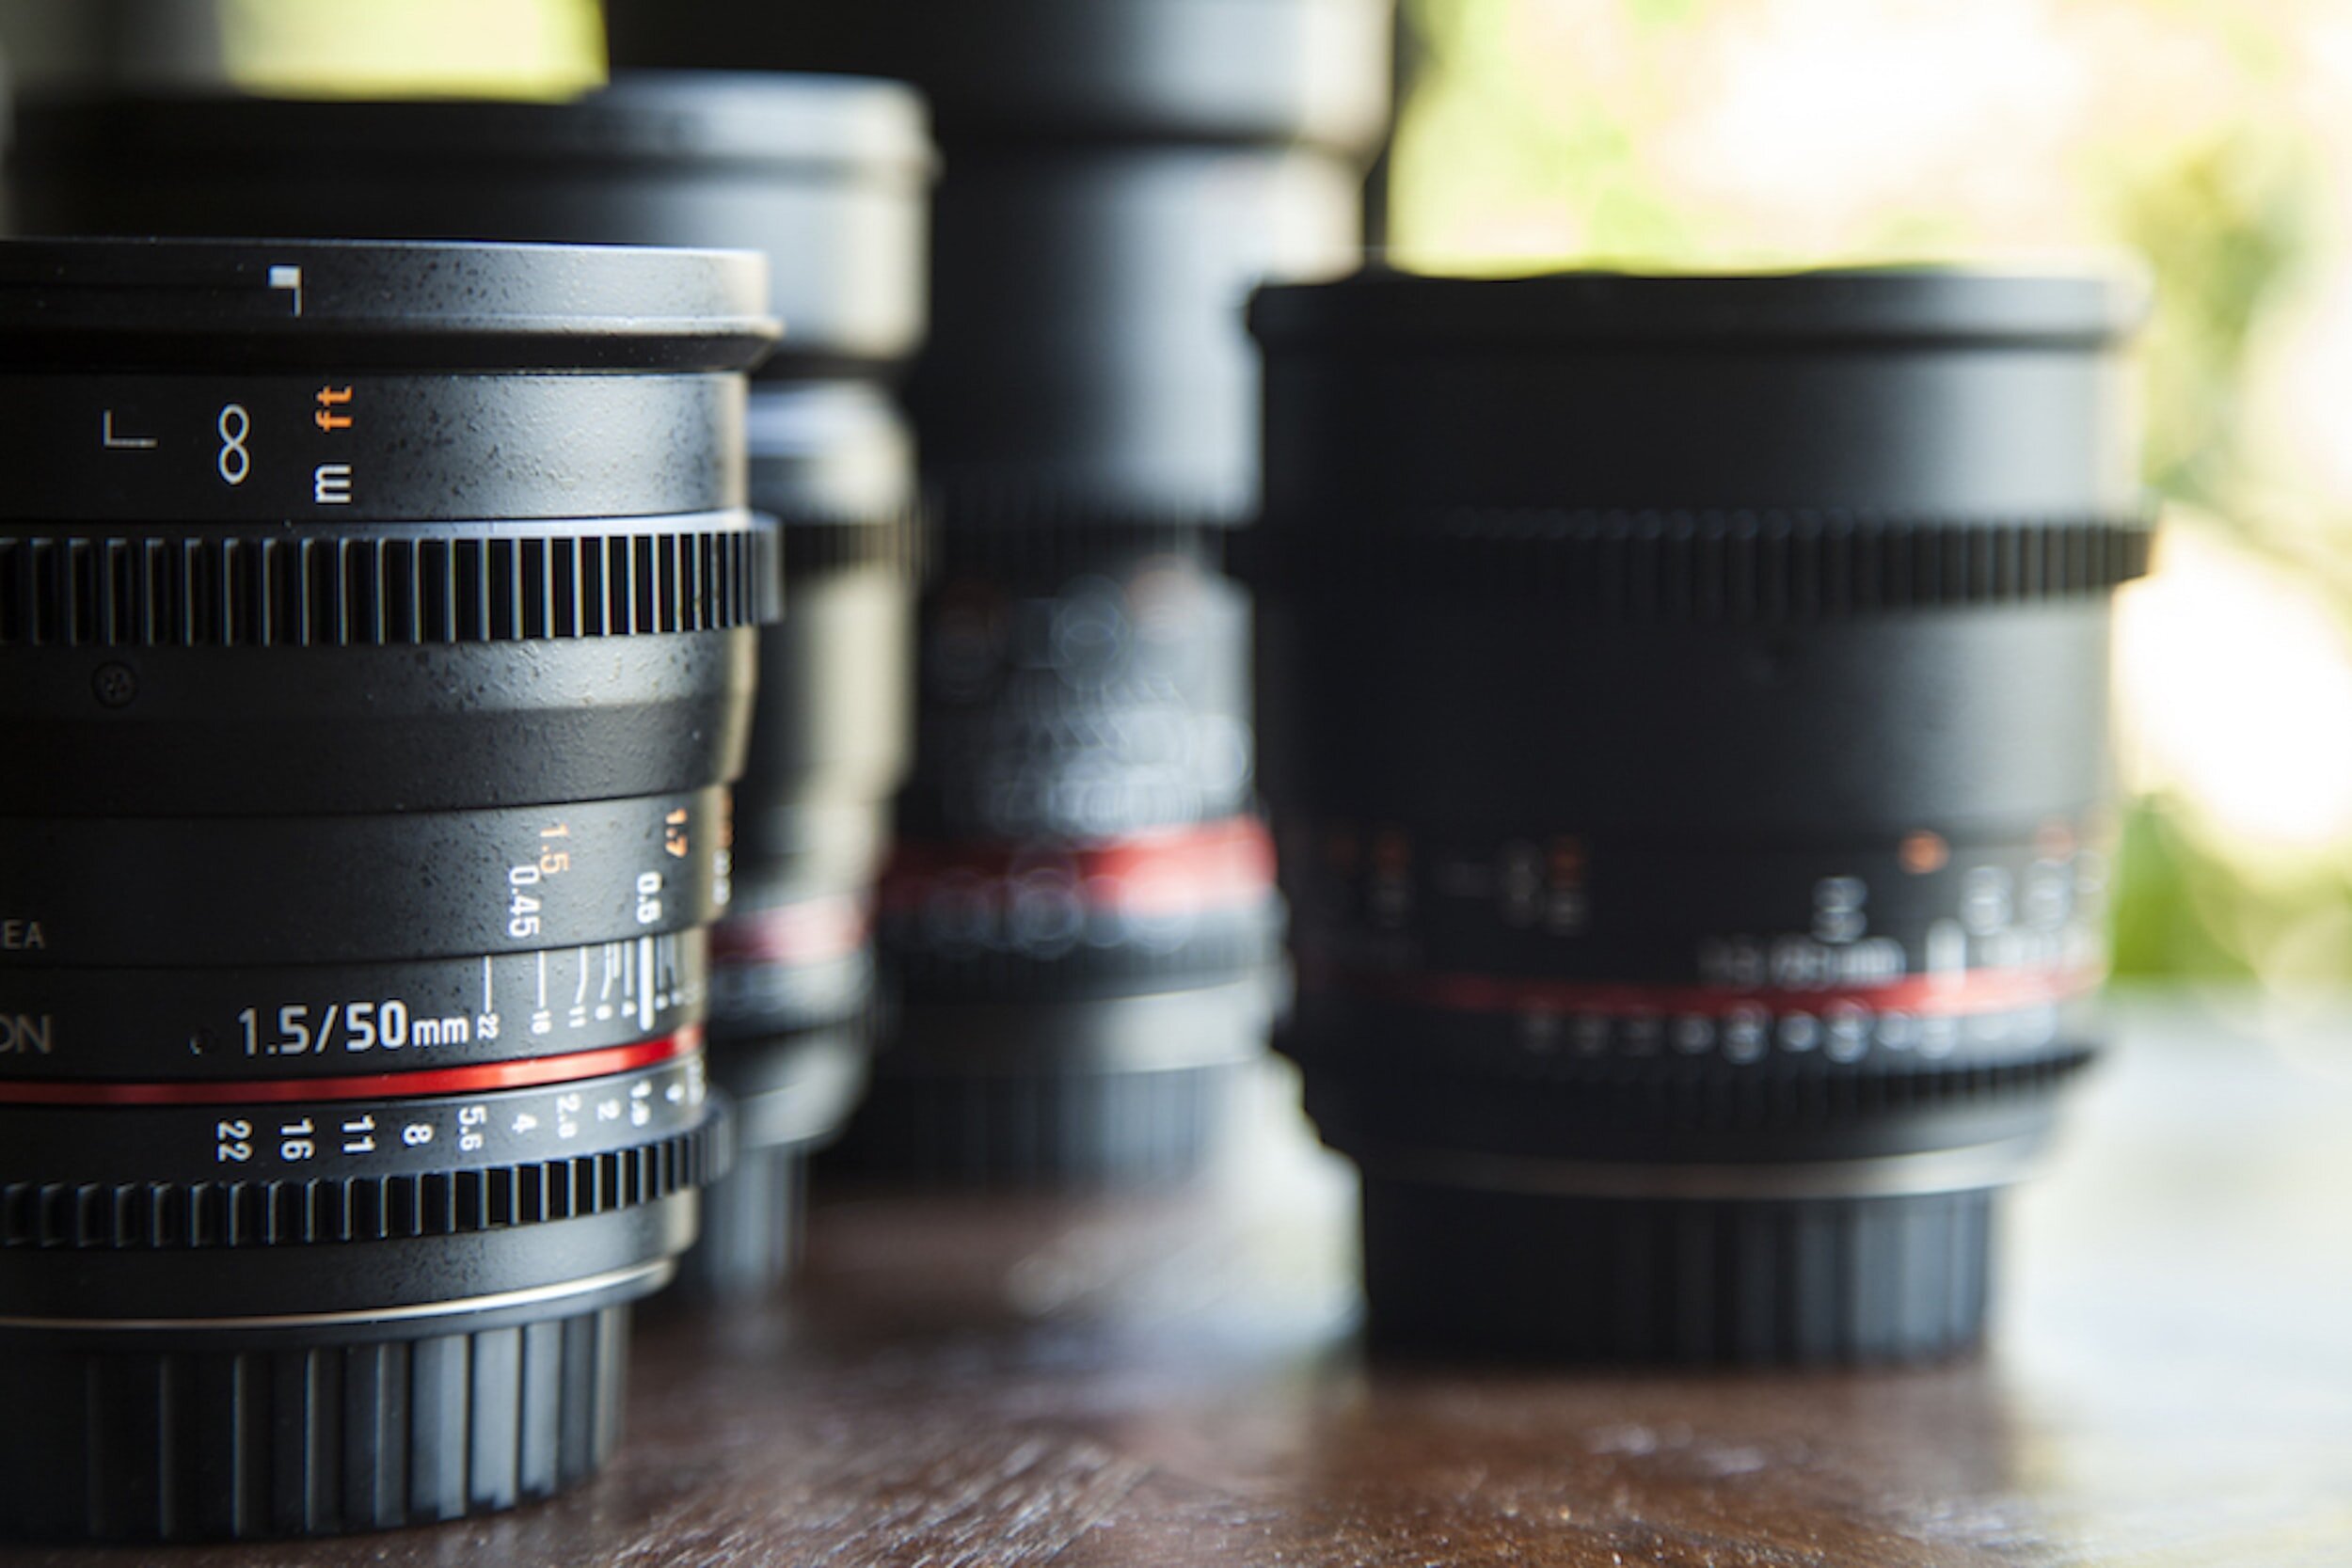
Every owner of an interchangeable-lens camera is faced with the pleasant dilemma of picking the most appropriate lenses to buy, then deciding which to use. However, there are no rules to go by; much depends on your personal style and what you already own. To help you decide which lenses to buy and how best to use them, we offer the following.

Every owner of an interchangeable-lens camera is faced with the pleasant dilemma of picking the most appropriate lenses to buy, then deciding which to use. However, there are no rules to go by; much depends on your personal style and what you already own. To help you decide which lenses to buy and how best to use them, we offer the following.

Normal lenses: Today, many 35mm photographers opt for a short zoom instead of a 50mm, but both have their virtues. If you need a fast, general-purpose lens in the f/1.4-f/2 range for available-light work, nothing can beat a 50mm. Positives: Usually more compact, lighter than a short zoom; often less costly; generally very sharp; provides brighter viewing image. Negatives: No zooming; you must compose by moving the camera.

Short zooms offer framing flexibility, often in a package not much larger than a 50mm lens. A 35-70mm f/3.5-4.5 is usually the smallest and least expensive, but a 28-70mm f/3.5-4.5 is more useful for shooting interiors, vistas, and cramped quarters because it gets down to 28mm. If you shoot portraits, nature, or sports at close range, consider a compact 35-105mm or a 35-135mm zoom. Normal zoom positives: Equivalent to two or more single focal length lenses in a handy, responsive package, it provides intermediate focal lengths; there's less need to switch lenses. Normal zoom negatives: Moderate aperture (typically f/3.5-4.5) limits low-light shooting and focusing precision with manual focus, affects viewing brightness. Zooms tend to be larger, heavier, more expensive than 50mm lenses.

Wide-angle lenses: They range from 24mm (bordering on ultrawide) to 35mm (bordering on semiwide). As with normals, the choice is between very compact, single-focal-length lenses of relatively wide aperture (f/2-f/2.8, a few f/1.4s) and moderate-aperture zooms (around f/3.5-4.5), which provide superior framing flexibility. For positives and negatives on both types, see normal-lens section above.

Many wide zooms, such as 24-50mm, 25-50mm, 28-50mm, etc., encompass normal as well as wide-angle focal lengths, which is an advantage. A few (for example, 21-35mm, 18-28mm) combine ultrawide (21mm and below) and wide focal lengths (see ultrawide section below). Many are not much larger or heavier than a 50mm. Although 25-50mm or 21 -35mm may not sound as impressive, it's the zoom ratio (long divided by short focal length) that counts. If you need a really fast wide-angle (for example, 35mm f/1.4, 28mm f/2, 24mm f/2) for available light or shooting handheld with slow film, stick to single focal lengths.

Ultrawide-angle lenses: With focal lengths of 21mm and below in 35mm format, they provide extreme angular coverage of 90 degrees or more. Positives: Ultrawides, by virtue of low image magnification, provide great depth of field; more likely to yield sharp-looking images when handheld at slow shutter speeds. Excellent for expanding tight interior spaces, capturing vistas; for intimate photojournalism, street photography. Negatives: Apparent perspective distortion, though useful for dramatic or comic effects, is problematic in portraiture. Avoid placing subjects near edges of the frame or prominent features, such as noses, in the foreground.

Medium tele lenses: Sometimes called portrait lenses, these optics in the 85-135mm range are fine for portraiture, minimize apparent perspective distortion, and provide convenient working distance when shooting faces close up. Many tele zooms work well in this range, but they're heavier, longer, and slower than single focal length lenses. If you shoot a large percentage of portraits, you should consider getting an 85mm f/2, 100mm f/2, or 105mm f/2.5, even if you own a tele. Positives: They allow discreet photography of people without the perspective-flattening effect of long teles; single focal length type combines fast aperture, bright viewing image, good image quality. Negative: For zooms, see above; for single focal length, fairly specialized.

Long tele lenses: Traditionally, any lens over 135mm for 35mm photography is a long tele. Today, the most popular by far are zooms in the 80-200mm or 70-210mm range. Unless you need a lens that's very fast and very long (such as the optically superb but large, heavy, and very expensive 300mm and 400mm f/2.8s used by professional sports photographers), a tele zoom is the most flexible and economical choice. For many photographers, a 70-210mm f/3.5-4.5 (especially one with macro) is the only long tele they'll need. Positives: Reasonable size, weight, and price, wide range of usesónature, sports, people, portraits, scenics. Negatives: Moderate and variable aperture; mediocre performance unless stopped way down. A number of suprisingly compact 100-300mm f/5.6s are now offered for those who need a bit more reach, and there are a few fine 200-500mm f/5.6s for those who need really long teles for such things as long-distance sports close-ups. Long tele zoom negatives: larger size and weight.

5 Beginner Tips For Shooting Winter Landscapes

Winter brings out the toughest elements in our climate, with many people putting away their camera bags ëtill early spring. But, if you do put away your camera you are missing out on the raw beauty that this magical season brings.

Here are a few tips to make the trip more enjoyable.

1. Wear the right clothes: Itís very important to wrap up warm when out and shooting winter images. The winter season brings the toughest elements, so if you are planning to spend a few days out and about always be well prepared.

2. Watch the weather: Itís very important to know what the weather is going to be like. You donít want to travel for a couple of hours and then hear a weather report that tells you that: the weather is wet for the next few days. During the winter months the weather can dramatically change in a matter of hours.

It ís always advisable to let someone know where you are going and which route youíre planning to take. If you do get injured or ever caught in a storm someone may be able to help.

Snow.jpg


3. Carry only what you need: Carry only the essentials. You donít need to upload your camera bag with every piece of equipment you own. If you are going to be out taking pictures all day you are much better off going as light as possible. Carrying a light load will also help preserve energy. You could be climbing icy rocks or crossing snow filled hills; a warm flask would serve you a lot better than a third camera.

4. Look for detail: Snow, ice and frost bring out texture and atmosphere in most subjects. The early frosty morning is an ideal time for close-up photography. The frosty morning also brings out patterns in our landscapes.

Take care where you place your camera: if you are taking pictures early in the morning try placing it at oblique angles to the sun - this will give your images strong shadows. This will also add mood to your landscape images. Once you have found the perfect spot pay extra attention to foreground interest as this will add depth to your image.

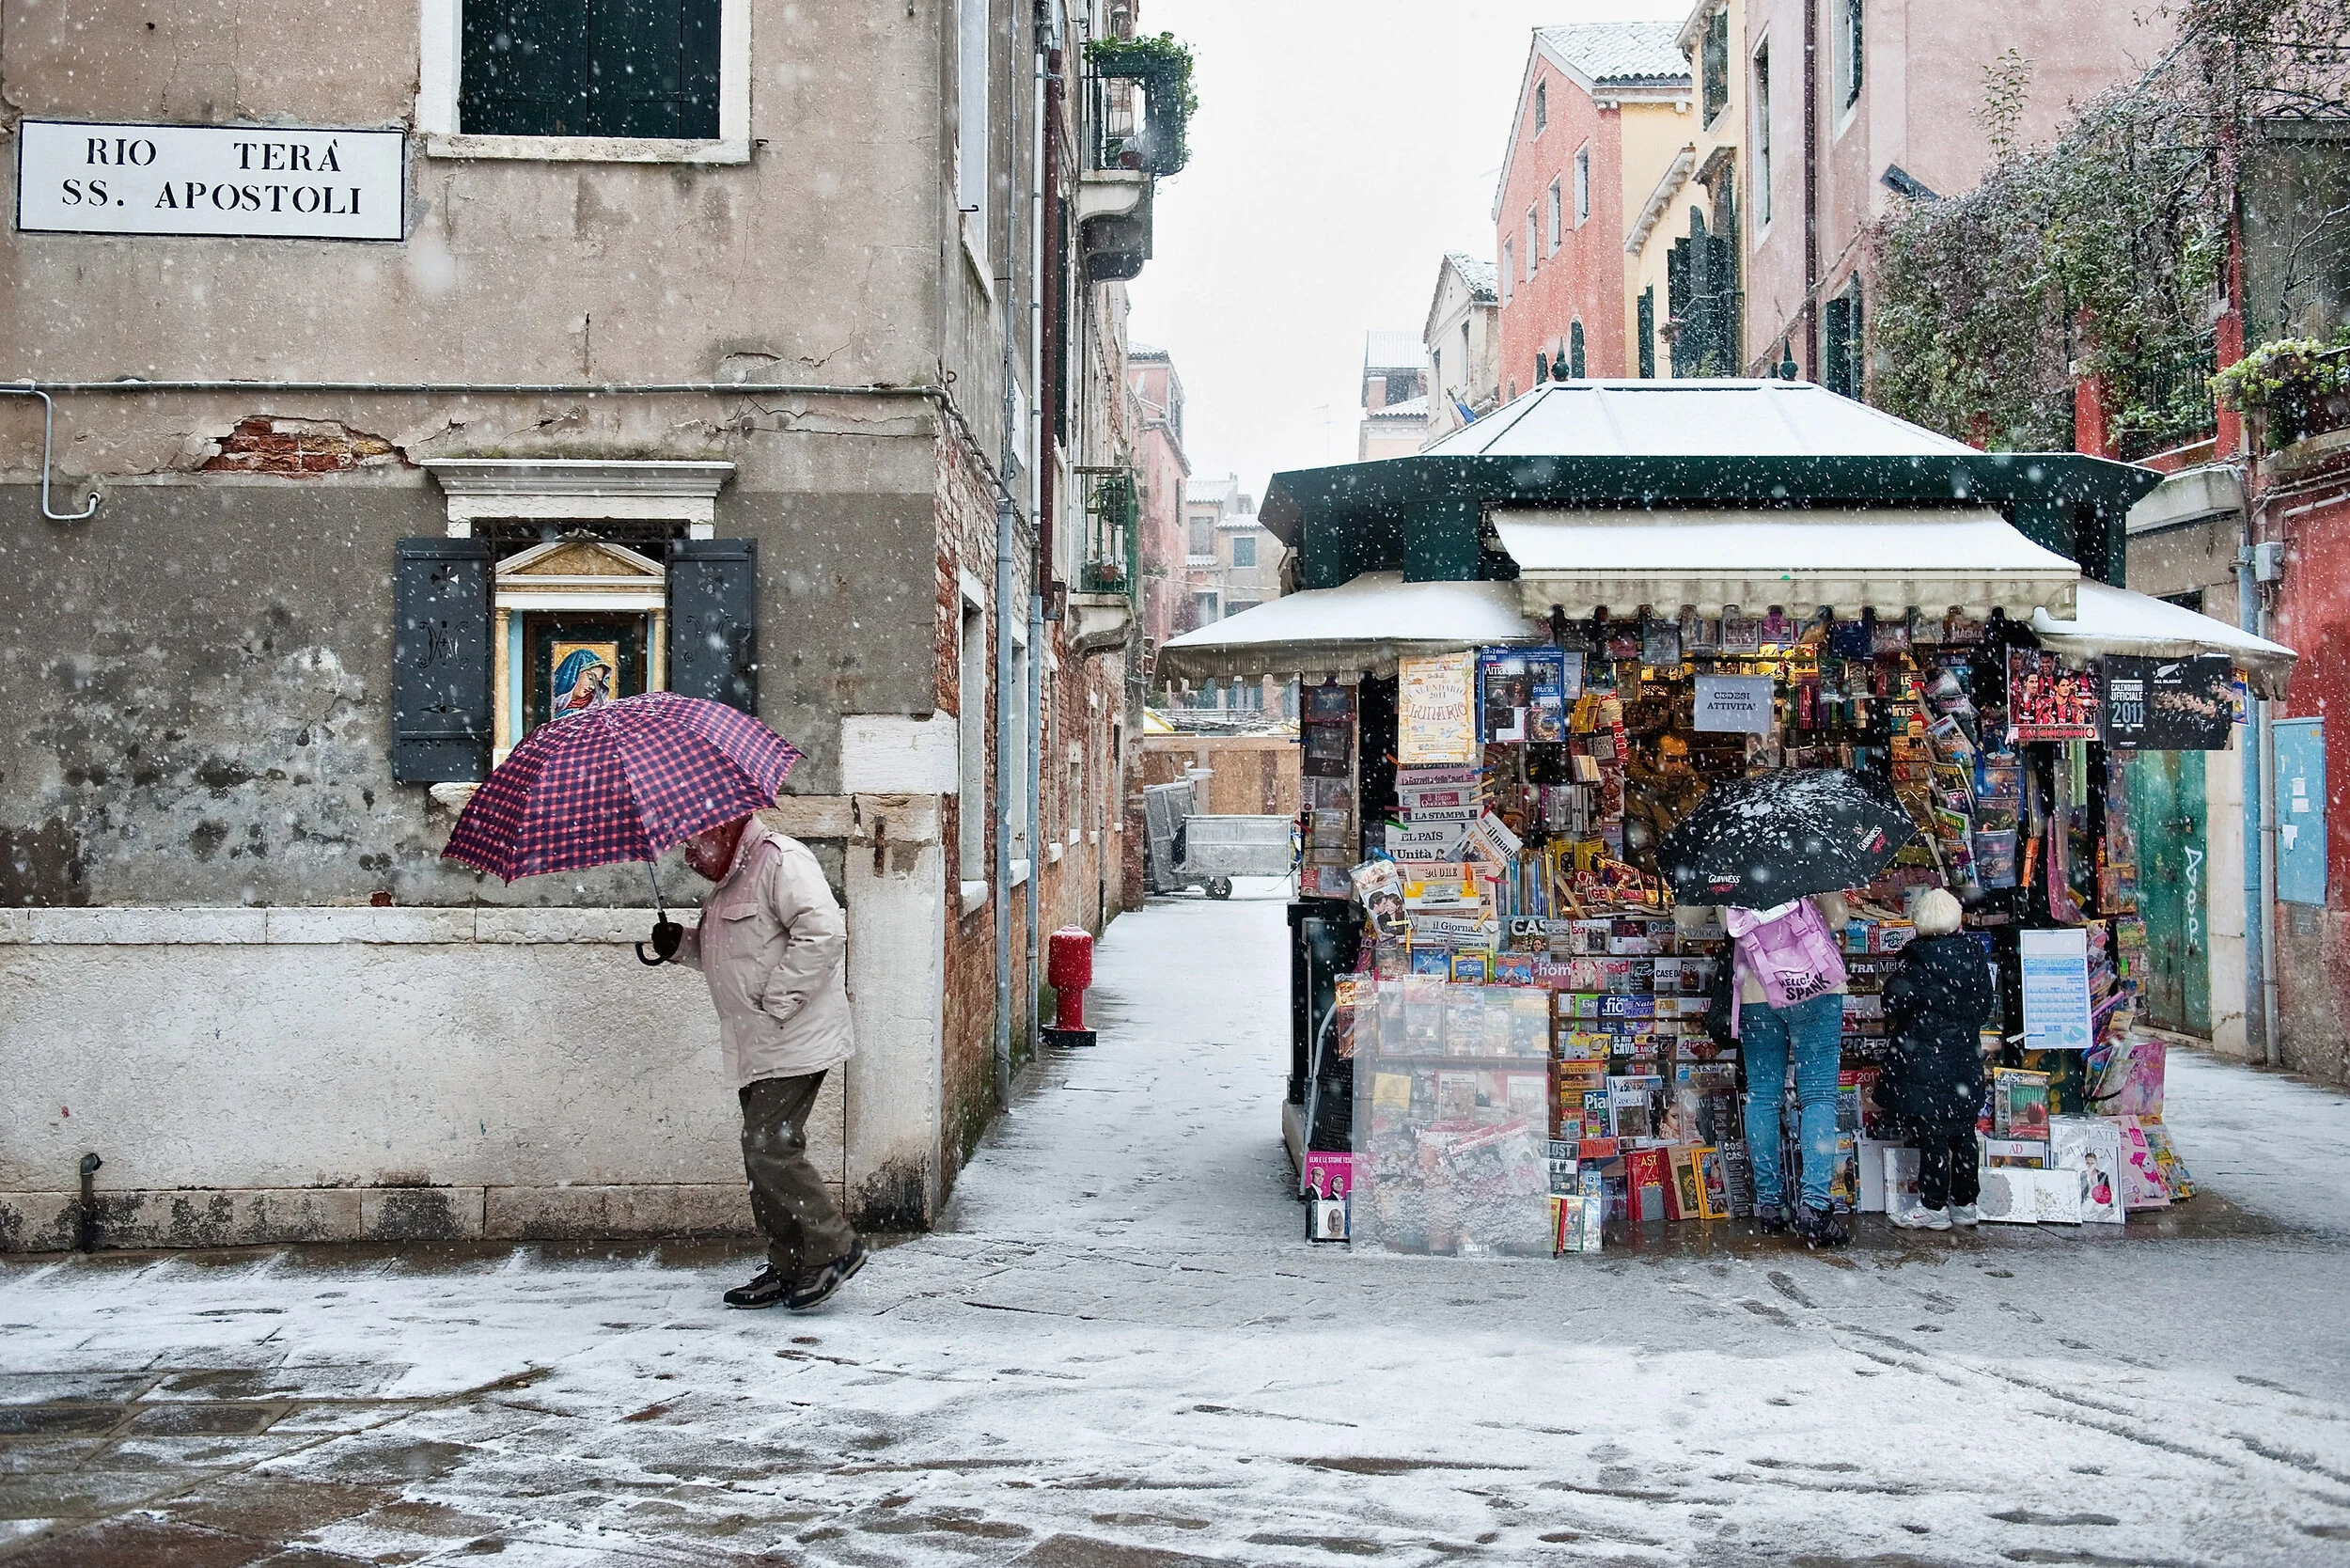
Snow in Venice14.jpg


5. Expose carefully: Snow and ice are extremely difficult to expose properly. Snow usually confuses your cameras metering system or your hand held light meter. When you take a light reading from snow you will automatically get an underexposed image. The meter will record the snow as grey.

Now is the time to start bracketing your shots. If you bracket your shots add 1 - 2 stops of light to compensate for your light meter reading. Using an 18% grey card, which I described in a previous article, should also give you a perfect light reading.

Snow in Venice04.jpg

Improve your Long Exposures Photography

Long exposure photography is a technique where you allow your camera’s sensor to gather light for a longer period of time. One major goal of this is revealing more detail in the darker areas of the scene. For more creative purposes, you may want to use a long exposure to create a sense of motion in your images.

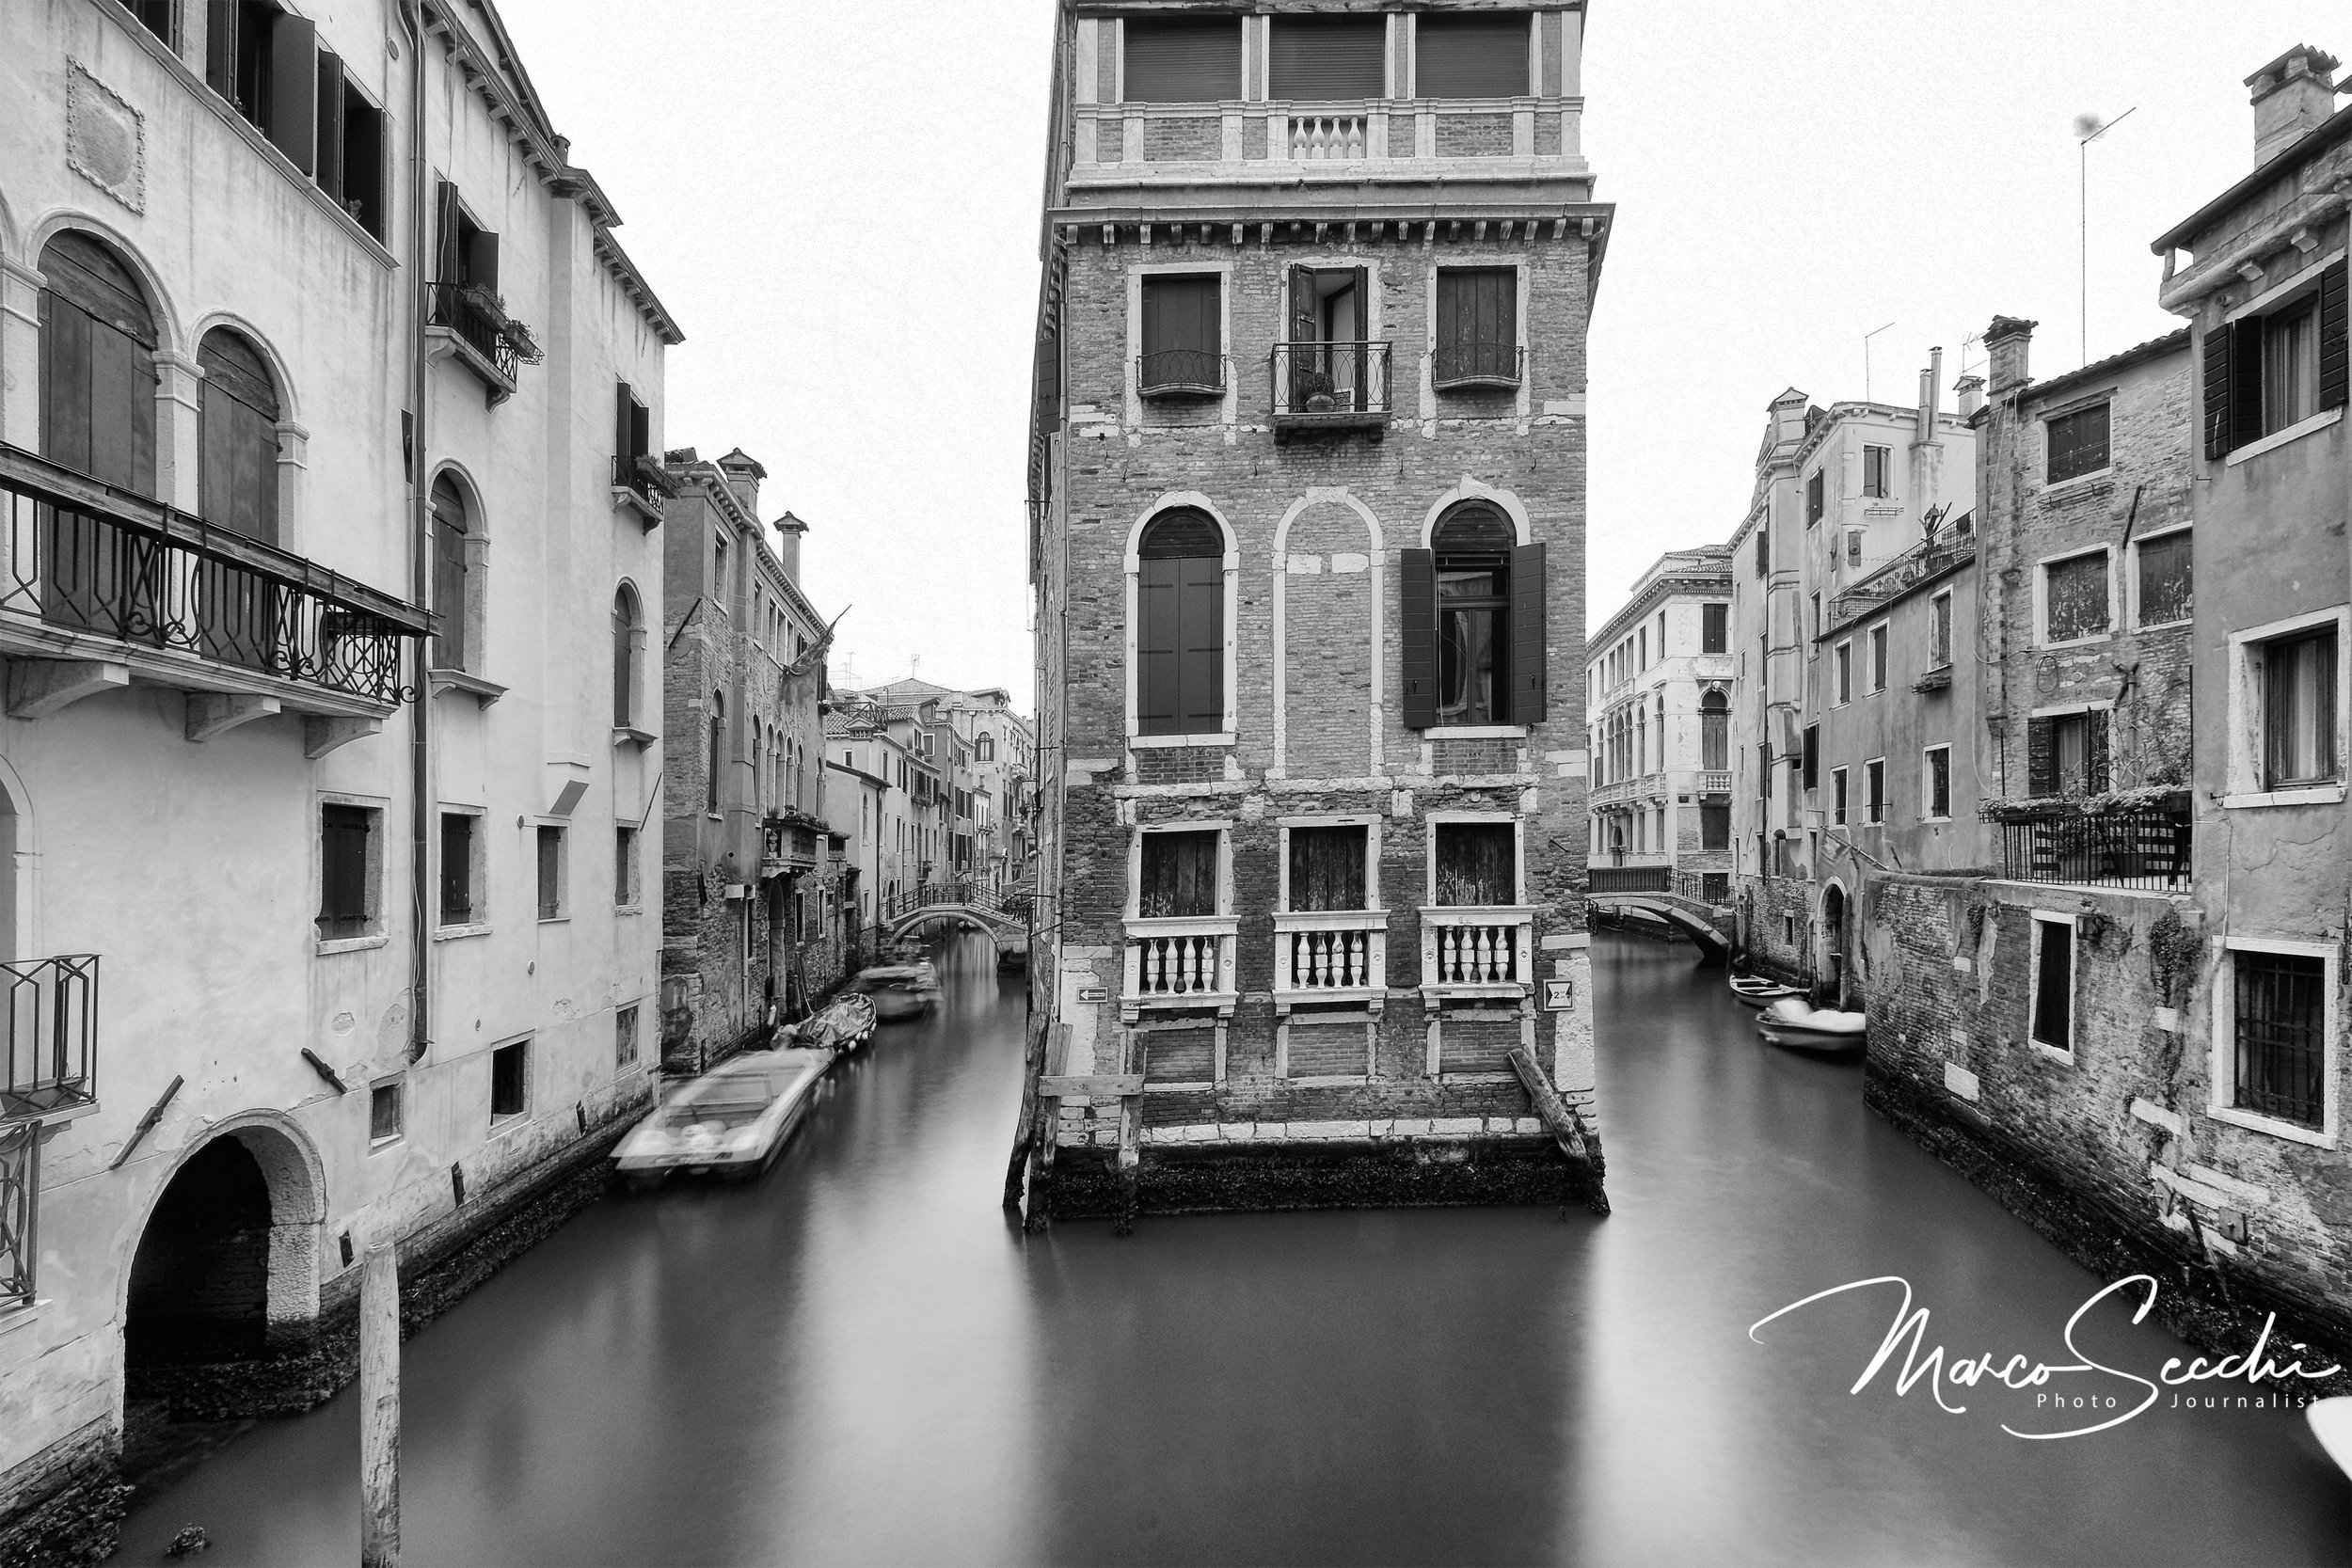
Venice with Long Exposure

Venice with Long Exposure

Filters

When you want to use a long exposure to produce a creative effect such as blurry water but there is too much light to allow a slow shutter speed, it’s possible to increase the exposure time by using filters. Neutral density filters are solid “grey” looking filters of uniform density that have no effect on how colours are recorded but are used to reduce the amount of light entering the camera. They can be either circular screw-on type or square

Create a visual Composition and Calculate your exposure

Depending on the tones in your scene, many cameras can calculate a good long exposure up to 30 seconds. But if you’re doing an exposure that’s longer than 30 seconds, or you’re adding any ND filters, you must calculate the settings for your exposure.

Cable Release

The shutter button on your camera releases the mechanical shutter inside of the camera. Using a shutter release button allows you to capture images without touching the camera at all. A shutter is a curtain that lets light into the camera sensor for a period of time; using a wired or wireless shutter release, you can initiate the opening and closing of this curtain without touching your camera.

Tripod

Although it’s one of the most important elements of any photo set up, it’s also one of the most undervalued, ignored, and overlooked. A good tripod will cost you money, while a cheap one may not even do its job. However, the downside is that some people won’t buy a new tripod because they think that they don’t need a sturdy one yet.

My favourite brand is Manfrotto I have been using then for so long I cannot even remember, One of the latest ones I have been using is the Manfrotto BrFree 3-Way Live Advanced. I will review on another post in the next few days. You can find it here

Manfrotto Befree Tripod

Manfrotto Befree Tripod


Set your camera on manual or bulb mode

Many DSLRs have multiple pre-programmed modes that can set your shutter speed and aperture for you. But these modes will also be automatically metering for you, which is unlikely to get you the results you’re looking for. So instead opt for Manual mode, or Bulb mode if you will be doing an exposure of over 30 seconds. When using Bulb mode the shutter will stay open from when you press the shutter release button, to when you let go.

Shoot at the lowest ISO possible

Although newer cameras can shoot with relatively little noise at higher ISOs, long exposures can create noise. So shoot with the lowest ISO possible on your camera. Most cameras come with long exposure noise reduction features, but at higher ISOs using this feature can make the noise worse.

Cover your viewfinder to prevent light leaks

Although light leaks rarely occur with regular exposures, with longer exposures the images are subject to light leaks through the viewfinder. Even a small leak can create big issues like hazes on an image with a long exposure. Don’t cover the viewfinder with your thumb, as this can create camera movement. Instead, try covering it with gaffers’ tape or a custom viewfinder cap and compose your image in your camera’s live view.

Shoot in RAW

Shooting long exposures can be tough, especially the first few times. Shooting in RAW will give you more latitude to recover a slightly overexposed image and will give you greater control in your post-production.

Foggy Day in Venice - Long Exposure

Foggy Day in Venice - Long Exposure


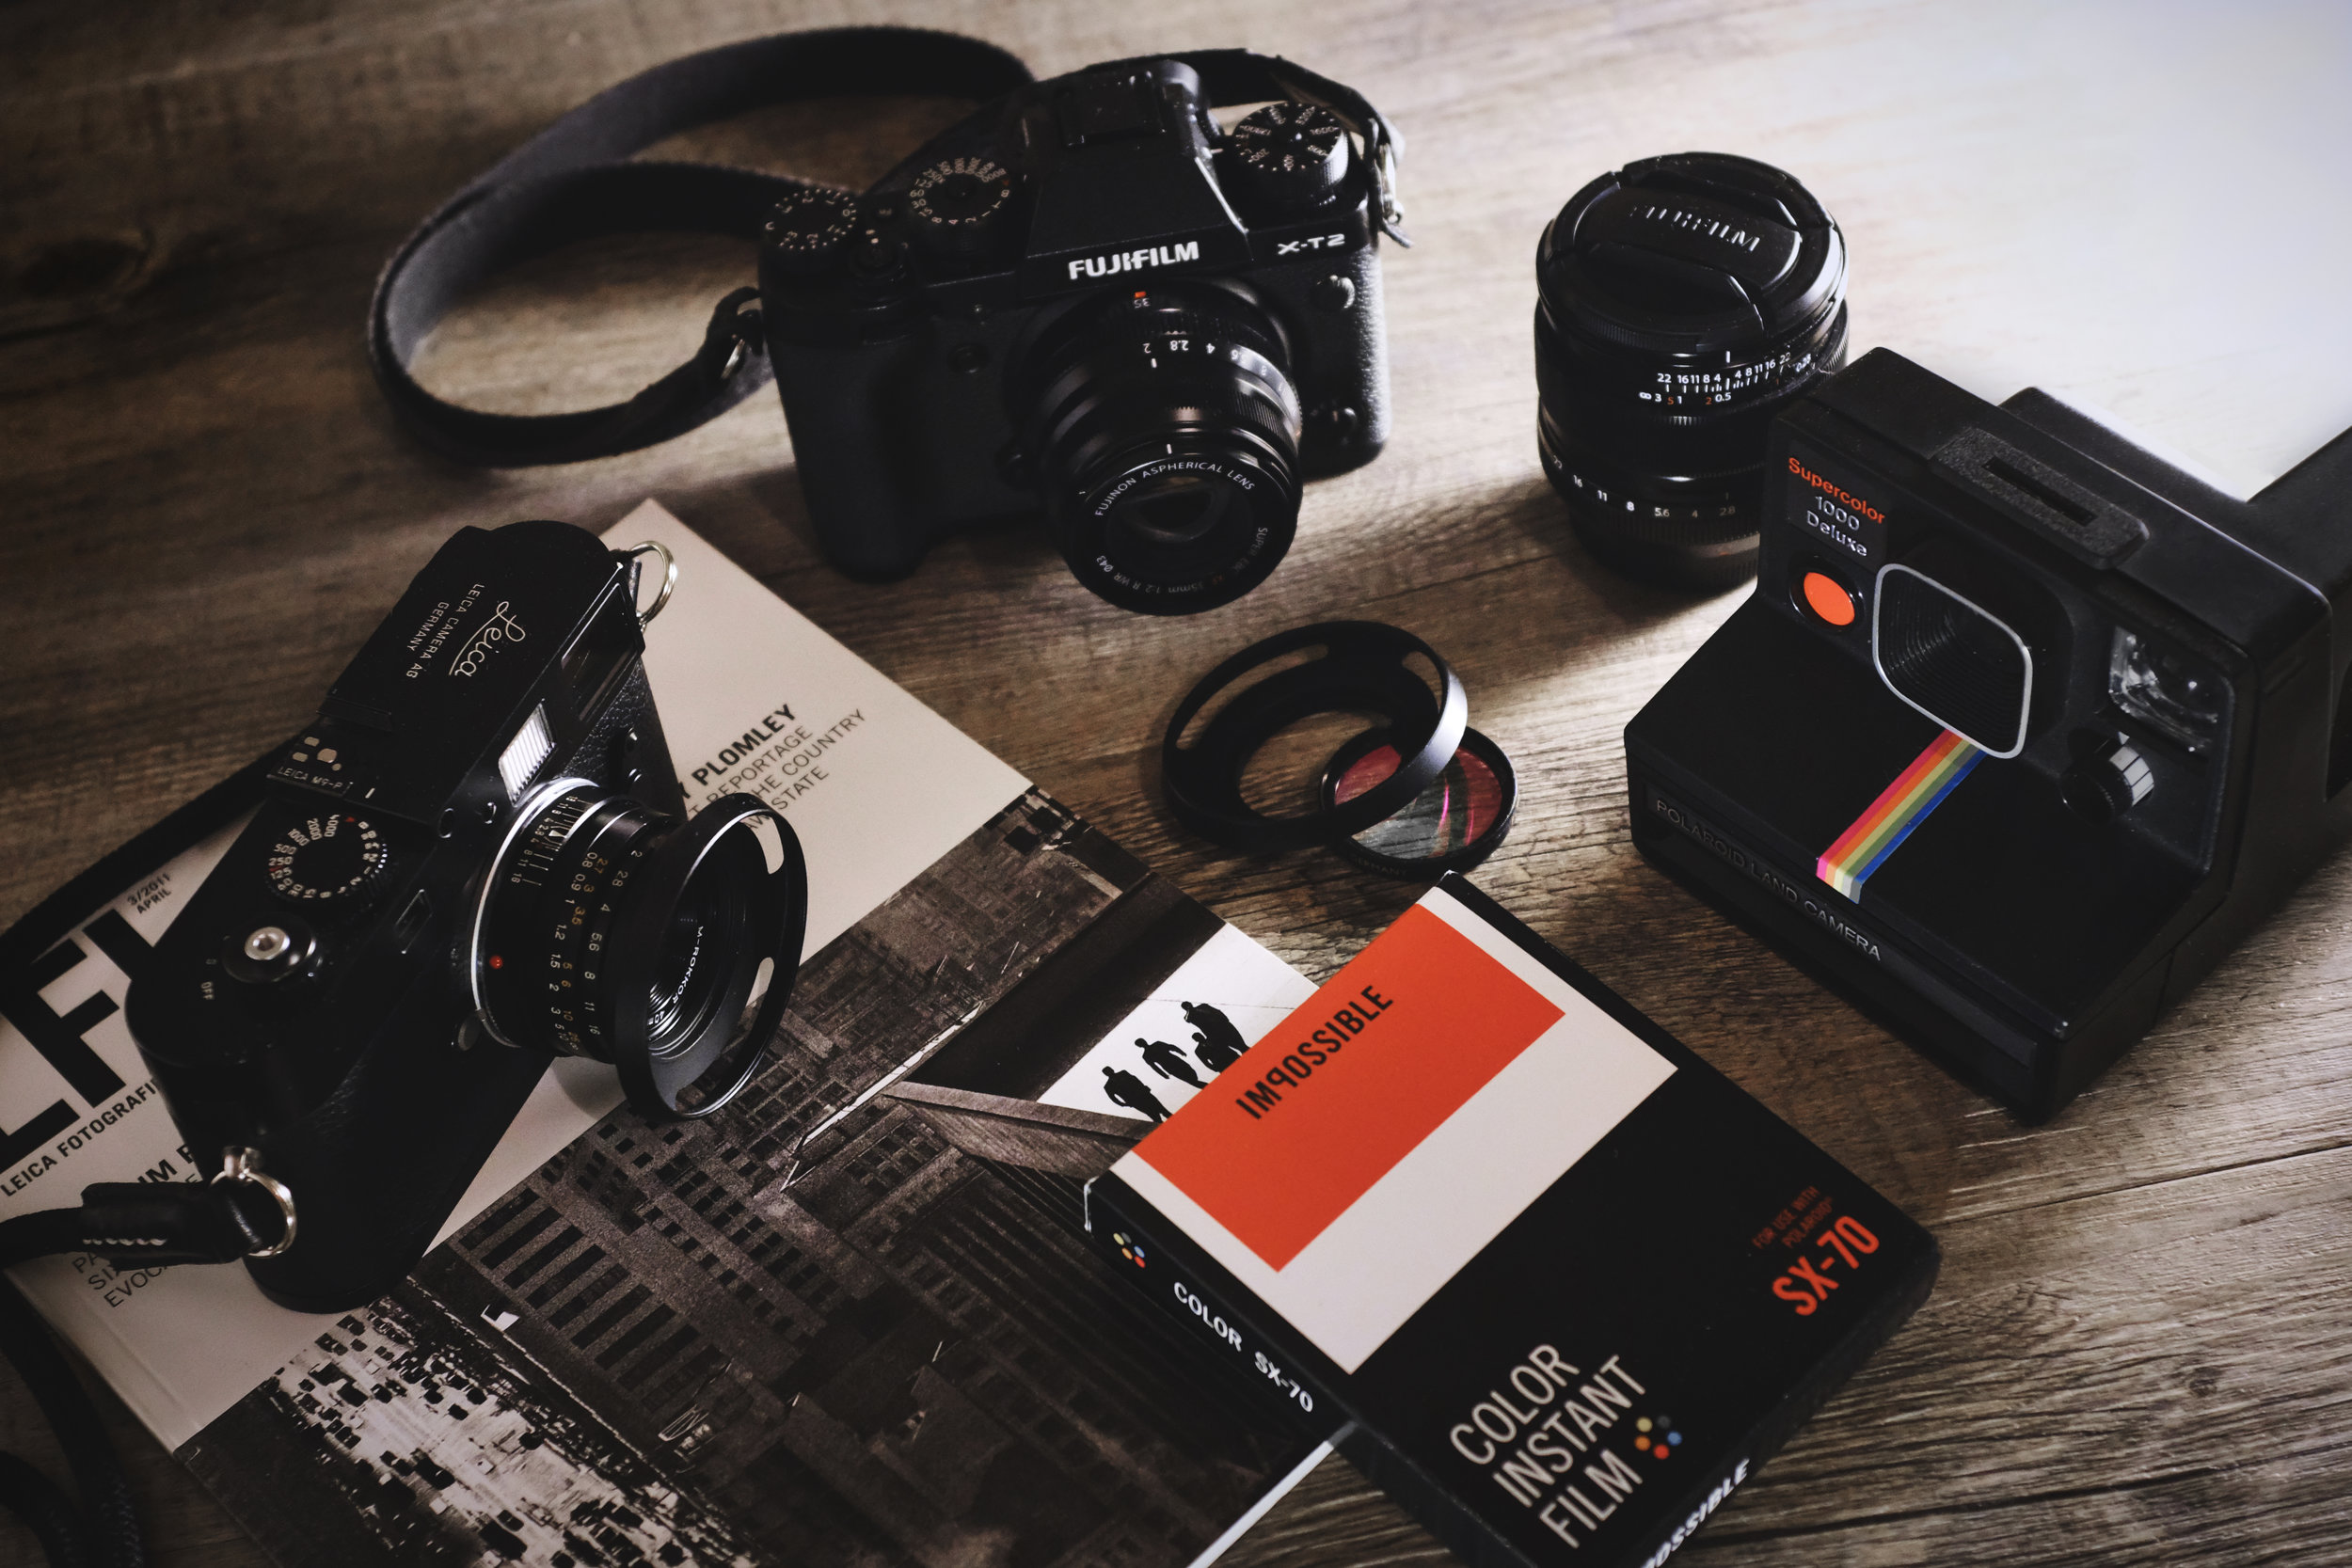
My Fav Settings for Fujifilm XT2

I love my Fujifilm XT2 and these are the settings I tend to use most

I Shoot RAW + Fine JPG - set to M (12Mp) size so I get a full 24Mp RAW plus a super clean super sharp 12Mp JPG which is good enough a lot of the time for event work

To avoid Haloing in the JPGs I have sharpness to Minus 2 .... Noise reduction to Minus 3 seems to be a good balance between detail and leathery low NR artifacts - using the 12Mp size on these settings is superb and reminds me of the old Bayer 12Mp X100 and its almost Perfect ultrasharp JPG engine , if I need to crop or more rez, I`ve got the RAW..

I set boost to ON

Smallest single AF point with the full number of points available set in the menus

Choose Film sim depending on shoot / subject ..

For portraits I love the look of Astia with DR200 and +1EV.  It brings up the mid tones and preserves the highlights.

This is some text! Hi everyone, and welcome to this blog post on the camera settings I use with the Fuji X System. This is a question I have received several times and it often comes up during workshops where I see so many folks struggling with their cameras and settings. Now, while the focus of this post is centered around my Fuji cameras, I will say that the best set-up is the one that works for you and makes you feel confident as you operate your camera. And in order to do that you need to learn the operations of your camera system forwards and backwards, develop an understanding of how you want to approach your photography, and then practice until it becomes automatic. The last thing you need to be doing during the moment of capture is to fumble with your camera or the settings. I set up my X-T2 and my X-Pro 2 in exactly the same way. The reason for this is simple; no matter which camera I grab out of the bag, I know what the settings are and that the two camera bodies will function in the same way. With only some subtle variations, I use the same settings and set up for all of my various photographic endeavors - landscape, street, architecture, and portraits. It is all about simplicity my friends. I can take any of my camera bodies out of the bag, and with confidence, know that I can be shooting within seconds of turning the camera on. Fuji X cameras have a lot of technology under the hood but once you have settings established you rarely have to go back to the menus for anything. The three main things you really need - aperture, ISO, and shutter speed - are right on top of the camera. So let's take a look at the settings I use. Basic Settings, Set-up, and Functions File Type: For landscape work I shoot in RAW Mode only. All files will be processed from RAW using Lightroom, ACR, or Iridient Developer, and then finished in Photoshop. RAW Recording is set to Uncompressed. For street work, or people, I will use RAW + JPEG Fine and I will employ the Fuji Film Emulations. White Balance: Auto. I hardly ever vary this as it can be manipulated in post processing. Noise Reduction: I have this set to 0 as my default. Long Exposure Noise Reduction: Off. I never have this on unless I am shooting a very long exposure such as a star trail. Dynamic Range: I leave this set to DR100 as my default. Brackets: I will occasionally shoot a defined bracket set of images. More often than not I don't do this as I am always making my brackets while looking at the histogram. But if I need a quick bracket set I can switch to this in the Drive Mode. I have my Exposure Brackets set to 1-Stop apart. So this will be one shot at my defined exposure, then at shot 1-Stop Under, and a shot that is 1-Stop over. I do wish Fuji would change the Firmware to allow 5 to 7 stop differences. Brackets in the X-T2 can be set in the Shooting Menu > Drive Setting > Bracket Setting. Brackets in the X-Pro 2 can be set through the Drive Button on the top D-Pad of the camera. Color Space: Adobe RGB Card Slots: Both my X-T2 and the X-Pro 2 have dual card slots, one of the endearing features I love about these cameras. My Card slots are set to Sequential, which means, that when one card fills up, the camera switches to the other card. You can set it to BackUp and RAW/JPEG as well but I never use these. On occasion I used the BackUp Mode but I usually do not sweat card failure. Image Size: I typically leave this at the default range of L3:2. Any relevant cropping I will perform in post-processing Film Emulations: I love the Fuji Film Emulations and use them often when shooting in the RAW + JPEG Mode. But I use them even in shooting RAW as a Live View Screen setting to get a sense of what a final image might look like. The Velvia and Astia Emulations give the LV Screen image a color boost and the ACROS Emulation lets me view the potential of a B+W image. Function Buttons: The Function Buttons are a way for you to customize the settings you want close at hand. For my camera's I have made sure that the button assignments I use are the same on each camera body. There is a slight difference in what you can assign on the X-Pro 2 versus the X-T2, relative to the Front FN Button and the top of the D-Pad. But the other buttons set up the same for each camera. You can assign the various FN Buttons by going to the Set Up Menu > Button/Dial Setting > FN/AE-L/AF-L Button Setting, and work through the diagrams. The following list is how I assign my buttons: Front FN Button On my X-T2 it is set for Face and Eye Detection. On the X-Pro 2 it is set for Bright Frame Simulator and indicates image framing when using the OVF; FN Button > Wireless Communication; Left D-Pad > Film Emulation Mode; Right D-Pad > Timer Setting; Having this handy is very useful when I am shooting a longer exposure without or without my electronic shutter release. Bottom D-Pad > AF Mode; This is Single Point, Zone, or Wide Tracking Top of the D-Pad > AF Custom Settings on X-T2, (This is similar to the Drive Mode on the X-Pro 2). The Drive Mode on the X-T2 is just under the ISO Dial. AE-L Button: This is set to AE-L Only AF-L Button: This is set to AF-L Only Having these set in a similar fashion for both cameras just keeps the mental gyrations while shooting to a minimum. I think setting Function Buttons comes down to your personal way of shooting and camera operations you want at your fingertips. Focusing: I switch between S, C, and Manual focus depending largely on what I am shooting. In operation the S Focus Mode puts the focus at a single point or zone. The C Focus Mode continually seeks focus and is good for moving objects. For my landscape work I shoot in entirely in Manual Mode - manual focus and manual settings - and at the native camera ISO of 200. (more on some of this below). For street work I typically use AF and utilize the Joystick to move the focus point. I will often switch to C Focus Mode and select Continuous Low CL, or Continuous High CH Modes which fires the shutter in high speed bursts when shooting sporting events. CL will shoot from 3 to 5 burst frames and CH will fire from 8 to 14 burst frames. In addition you can couple this with one of the five Custom AF Settings in the X-T2. I am not afraid to work the ISO when shooting on the street and invariably go over 800 to 1000. For Manual Focus I use Focus Peaking. This coupled with the Focus Distance Scale is a great way to dial in your focus and know you have the shot. To set Focus Peaking go to AM/FM Setting > MF Assist > Focus Peak Highlight > Then select your Peaking Option. I use the Red (High). The portrait/street images below were all captured using the concepts I am discussing in this post. All were shot in either AF, S Mode, or Manual Mode using Back Button Focusing, and I used the Joystick to place the Focus Point exactly where I wanted it to be. I love having this kind of control that allows me to craft the image I want. You will notice that I have pushed the ISO around quite a bit and especially so in the lead image of the Lincoln Memorial. While I could set the camera to Auto ISO and set ISO parameters, I tend not to do this and simply select the ISO I feel is right for the scene I am photographing, or to react to my sense of the light, and perhaps what shutter speed I might need for a clean and sharp capture. Jason Masi • Breaux Vineyards, West Virginia. Fuji X-Pro 2 and a Fujinon XF34mm f1.4 R. Image exposed at ISO 200 at f 3.5 for 1/800 of a second. Karolin • Bradenton, Florida. Fuji X-T1 and a Fujinon 55-200mm f2.5 at 120mm. Image exposed at ISO 200 at f4.5 for 1/500 of a second. Nathan • Downtown St. Louis, Missouri. Fuji X-Pro 2 and a Fujinon XF16mm f1.4 R. Image exposed at Iso 400 at f4 for 1/250 of a second. Skyline • Downtown St. Louis, Missouri. Fuji X-Pro 2 and a Fujinon XF16-55mm f2.8 R at 16mm. Image exposed at ISO 200 at f11 for 1/250 of a second. Abby and Maise • Montgomery County, Maryland. Fuji X-Pro 2 and a Fujinon XF16-55mm f2.8 R WR at 23mm. Image exposed at ISO 200 at f4 for 1/500 of a second. Free to Move About the City • Downtown St. Louis, Missouri. Fuji X-Pro 2 and a Fujinon XF16-55mm f2.8 at 23mm. Image exposed at ISO 200 at F5.6 for 1/500 of a second. Kevin • Denver, Colorado. Fuji X-Pro 2 and a Fujinon XF23mm f1.4 R. Image exposed at ISO 800 at f2.8 for 1/100 of a second. The Power of "T", Back Button Focus, and the Distance Focus Scale Now, let's take a look at some other incredible components built into the Fuji X cameras. But, before we go there, I want to talk about the Screen and Viewfinder set-up. The screen set-up is entirely customizable on the Fuji's and can be accessed in the Toolbox Menu. Aside from the usual things you might want such as AF Mode, Film Emulation, and File Type, the four items that are set on each of my cameras, both in the Viewfinder and on the Live View Screen, is the Electronic Level; the Exposure Compensation, set to Scale; the Histogram; and the Manual Focus Scale, set to Feet. Everything else notwithstanding these four singular settings are the most important to my shooting. I almost always shoot in Manual Mode, and to be clear I set the Aperture, the ISO, and the Shutter Speed. I work quicker this way and it is the way that my mind thinks while in the process of making an image. My Exposure Mode is set to Evaluative Metering and I take my light readings using the Exposure Compensation Scale and the Histogram, and more so than not I base my exposure judgements on the Histogram. For street work I will periodically check the meter readings using the Exposure Compensation Scale and set it to 0. This usually gets me to within a stop or so of the right reading when I take a shot. Despite what camera you shoot with I believe having the Histogram viewable while you are making exposure adjustments is a must. With aperture and ISO set then it is a simple matter of just turning the Shutter Speed Dial to manipulate the exposure while looking at the effect in real time using the Histogram. After choosing a shutter speed you can use the front Command Dial to adjust the exposure, up 1-stop and down 1-stop, in 1/3-stop increments. This is quite handy for micro manipulation of the Histogram. But, here is where the Power of the "T" can simplify this even more. The "T" is located on the Shutter Speed Dial, and when set it allows you to use the Front Command Dial (or rear if you set it that way), to manipulate the shutter speed ranging from 30 seconds all the way to 32,000. So, with my aperture and ISO set, and the Shutter Dial set to "T", (see the image to the left), the only thing I have to manipulate is the Command Dial. It could not be more simple and I can quickly change aperture to suit conditions, and manipulate the exposure quickly while using the Histogram. Because the Command Dial moves in 1/3-stop increments as well, I can make micro adjustments to the exposure too. I have both of my cameras set this way and with the turn of the on-button, and a quick read of the light, I am shooting instantaneously. I think at the heart of this set-up is simplification - to simplify the mechanical process and make it automatic - so that I can concentrate on making images. Back Button Focus Now a small word about Back Button Focusing. If you are in Manual Focus Mode and you have the AF-L Button set to AF-L Lock you can use the Button to Back Button Focus. This is a great help for street photography or even for shooting portraits. When in Manual Mode you can use the Joystick to move your focus point, and once you have it where you want it, hit the AF-L Button. The camera will lock focus at that point and you can then press the shutter button as many times as you wish without the camera changing focus. Additionally, if you go to the Set-Up Menu > Button/Dial Setting > AE/AF Lock Mode, and set it to AE&AF On/Off Switch, this will decouple the buttons and allow you to lock focus and exposure when the camera is set to C or S, AF Mode, and you are in Aperture or Shutter Priority. So, much like the Back Button Method, once you have achieved focus, you can select the AF-L Button and it will lock focus until you press the button again. This is the same for the AE-L Button. You will know you are locked in when you see the AF-L and the AE-L indicator in the lower left corner. In the image below I had already locked focus in the zone around the grill using the Back Button Focus, and when Chef Chris hit his Usain Bolt pose, which caught me completely by surprise, I was ready to make a capture without worrying about the autofocus kicking in and perhaps missing the moment. Striking the Pose • Shepherdstown, West Virginia. Fuji X-T2 and a Fujinon XF35mm f2 R WR. Image exposed at ISO 200 at f4 for 1/400 of a second. Fuji's Distance Scale is nothing short of brilliant. Shown below on my Live View Screen, it is the linear graph at the bottom of the screen, just above the shooting data. The White Tick Mark on the graph is the point where I have focused the lens, in this example at 2 feet. The blue line indicates the hyper focus zone of the lens, in this case from just inside of a foot to 5 feet. Since Fujinon lenses are all chipped this information is conveyed to the camera for each focal length. I use this information in concert with Focus Peaking for all of my landscape work and it is extremely accurate. Much like the other settings described in this post this is another technical innovation from Fuji that allows me to focus on image making and not wondering if I am in focus or actually where my hyperfocus zone is located. The Depth of Field Scale has two options - Pixel Basis, and Film Format Basis. Pixel Basis is for images that will be viewed on screens and Film Basis is for images that will be printed. For my work I use the Film Format Basis. To set this go to the AF/MF Setting Menu > Depth of Field Scale > Film Format Basis. The Distance Scale can be set in feet or meters based on your preference, and to set this go to the Set Up Menu > Screen Set Up > Focus Scale Units > Feet. The image below illustrates the base set-up for my Live View Screen which is also mirrored in my Viewfinder. To the left is the Exposure Compensation Scale; to the lower right, the Histogram; and the Focus Distance Scale along the bottom. The Green Line is my Horizon Level Line. Additionally I have the Composition Grid set in thirds. To set up your screen go to the Set Up Menu > Screen Set Up > Disp. Custom Settings and place a check in the box for the items you wish to display. The landscape images below were all shot using the various tools and settings I have outlined. The only real difference comes from my all-manual process when shooting landscapes. This is largely centered around crafting an image with good foreground to back ground sharpness. Utilizing the information in the Focus Distance Scale and Focus Peaking you can achieve some amazing depth of field images, such as the Datura and Cabin image below. I think the creation of the image, and in fact the best images, come when you are free to experience and react to the situation. This can only happen when you are engaged with the scene before you and not buried deep in your menus. In photographic terms, almost nothing is worse than missing the key moment because you were not able to respond to the changing conditions or were buried within the camera settings. In my honest opinion, and largely one of the reasons I made the switch to Fuji, the beauty of the X System is that they have engineered cameras for photographers, that once set-up properly, magically get out of the way of making images. Hopefully the information contained in this post will give you some insights in to how I set up my cameras and help you see the possibilities for customization. The best camera is the one you have in your hands but it is even better when it gets out of the way of making images. It can be a painful process to go through your camera manual, and honestly, I would rather do anything else but wade through them. But if you tackle it in chunks it is not too bad and it will help you gain control over your camera. And when you have control of the camera , it does not have control over you. If you have any questions please drop me a comment. As always thanks for stopping by and I appreciate your support.
Improve your long exposure with photo stacking

Are you planning on shooting soft, silky waves? Do you wish to create dreamy, daytime landscapes with smooth, stretched clouds?

This post will help you improve your long-exposure skills and overcome the most common challenges that occur in daytime long-exposure photography.

Photo Stacking for Daytime Long-Exposures

When doing long-exposure photography–photography that requires light to hit your camera sensor for more than 2 minutes a lot of problems can arise and those can easily ruin your shot: false light, camera shake, accidentally tripping over your tripod, etc. 

With exposure time around 4 minutes, you can easily waste a lot of time trying to capture the perfect shot of soft clouds or silky waves.

But by dividing the shot into several shorter exposures of the same subject and stacking them together in Photoshop, you can overcome most of the issues, spend less time on wasted shots, and come away with better images.

Photo stacking is not a technique for every situation, but sometimes stacking your long-exposures is the only way to get a good shot. However, it is important to recognise when you need it during shooting.

When to Use Photo Stacking

False Light

During the day, you’ll often have too much light available for long-exposure photography. Long-exposure photography in daytime light using a 10 stop ND-filter might still result in an overexposed shot. 

At night or during the blue hour, when the light is limited, you can adjust your camera settings to give you a 2 or 4 minutes exposure even without using neutral density filters.

This long-exposure image consists of 4 shots of 40 seconds each. I was standing on a metal bridge and there is often passage of heavy trolleys and people

This long-exposure image consists of 4 shots of 40 seconds each. I was standing on a metal bridge and there is often passage of heavy trolleys and people


Photo stacking your daytime long-exposure photos will ensure that you get correctly exposed shots. Furthermore, if you don’t own a 10 stop neutral density filter, using a less strong ND-filter and taking multiple images to combine later will give you similar results.

Camera Shake

Next to false light, shaking is the most common reason for failed shots in long-exposure photography.

At night, factors that can cause your tripod and camera to shake are usually lessened: lighter wind, fewer waves, and less traffic, for example.

But during the day, these factors are stronger, heavier, and more problematic for daytime long-exposure photography; strong wind or heavy traffic can make your tripod shake or vibrate, resulting in blurred or unsharp shots. 

While we’re at it, remember to take the camera strap off your camera while shooting long-exposure. It acts as a sail in the wind and causes shaking to the tripod and camera.

And make sure the ground is sturdy enough to support your tripod and keep the camera steady for a long-exposure shot.


User Error

And then there are those unforeseen hiccups that can ruin a great long-exposure shot.

Regardless of whether its daytime or night, another common mistake is simply forgetting your remote. Without a remote, you are stuck with the longest exposure time your camera allows excluding bulb mode.

Bulb-mode without a remote requires that you press the shutter all the time, which is a no-go to avoid camera shake. My camera, like most, has a max of 30 seconds exposure.

How to Photo Stack Long-Exposure Photos

Factors like too much light, too much wind, or the risk of camera shake make it worthwhile to use photo stacking for your daytime long-exposure photos instead of doing a 2- or 4-minute exposure.

You now know when to use photo stacking; below you will learn how to use photo stacking–how to do it in the field and how to blend the exposures afterwards in Photoshop.

Equipment

This is the equipment I tend to use for Long Exposure shots


Setting Up Your Camera

At the location, set up your gear as normal, but make sure your camera settings and ND-filters gives a good exposure with a histogram peaking just over the middle to the right when using an exposure time of 30 seconds. To get the effect of a 4-minute shot, aim for 8 good shots, each at 30 seconds (8 x 30 seconds = 4 minutes).

Get some extra exposures just in case some of them get blurred due to camera shake from a sudden wind gust or bypassing bus. You can leave out a particular shot from your sequence in the photo stacking process.

Processing in Photoshop

In  Photoshop, go to File → Scripts → Load Files into Stack. In the appearing dialogue, choose Add Open Files to make the set of images appear under files to use for stacking.

Remember to check the boxes Attempt to Automatically Align Source Images and Create Smart Object after Loading Layers.

Click OK to begin the blending process. It usually takes some time for Photoshop to create a single Smart Object from all of the exposures.

Next, go to the menu Layer → Smart Objects → Stack Mode → Mean. This makes Photoshop automatically blend the images in the stack into a smooth long-exposure, to look like it was a single very long exposure.

At this point, you don’t need the layer to be a Smart Object anymore, and keeping it this way would prevent you from using a brush tool, for example, so you should convert it by right-clicking on the layer and choose to Rasterize Layer.

After this, you need to process the image as you would for a normal daytime long-exposure or any other image. To get the best results when you process your daytime long-exposure photos, be sure to only use selective sharpening of the areas in your photo that are not moving.

Long-exposures taken during daytime often have a lot of large white areas with clouds or silky soft water. If you apply sharpening to the areas that are supposed to be soft, you’ll cause an unwanted grainy look to your photo.


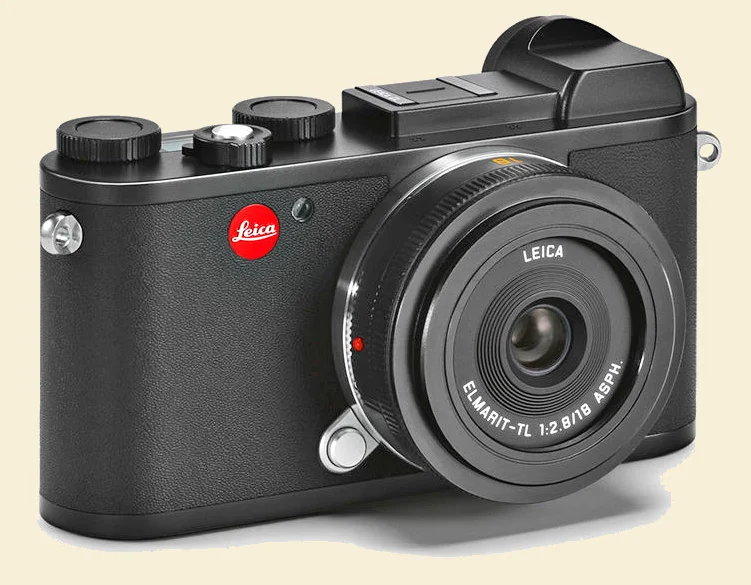
Leica CL

Here's a new Leica camera!! 

 Leica has now revived the old "CL" that use to stand for Compact Leica and was in my view an amazing camera.

I miraculously managed to try one for less than an hour, while a colleague passed in Venice... and no thanks to Laica Italy or UK that despite my vast collection of Leica never, even by mistake invites me for a try. I am now more than used and it gives me freedom of opinion. I decided not to publish any images because will be unfair. 20min are not enough to properly try a camera. Mine are simple considerations and feelings.

6a00df351e888f883401bb09da8402970d-800wi.jpg

I have quite a few Leica (see mygear) and love them to bits, I used them every day and I am really passionate. I do Leica workshops so I do tend to usually like them...but I have one tiny problem with the CL. And that is: why in the world would anyone ever buy one?

It makes no rational sense at all if you compare it, for instance, the CL with the Sony A6000 or Fuji X70 or XE3. The CL is a  pretty, small and handy little digital camera with a 24-MP sensor. The Sony A6000 is a perfectly small and handy little digital camera with a 24-MP sensor too  and IS MADE by the company that makes the sensor as well. The tiny difference is that the Sony is currently on sale for EUR 434 on Amazon (without a lens, but a lens will add just a bit more ) and the Leica CL with 18mm is going to sell for...EURO 3,600. We are talking about EIGHT Sony!!!

The 18 f/2.8 does not in any way feel, look, or perform like Leica glass that I have come to love. It’s a few ounces in weight, feels empty.

Using M lenses on the CL comes at a price! The “Adapter” is mega expensive. and I really mean Expensive aprox Euro 450

The CL camera in my quick test does not offer the richness of a full frame file like the M10

I wish Leica would just give us what many of us want…a full frame M type body with a built-in EVF.

Like the Leica TL2, the CL is not technically weather or dust sealed ( My Fuji are! )

The reconfigurable top dials look and feel cheap.

So who is going to buy this camera?

  • You do not mind about the cost of the camera. You have so much money in your bank that it makes no difference to you.
  • You are mainly  after the status and the exclusivity, not to mention the  prestige
  • You WANT IT and in less than 30 days is Christmas


Fujifilm X70

UPDATE MAY 2016 After two months I decided to sell the camera, it is too flimsy and too slow and in my humble view there are much better point and shoot for that amount of money. I got a Leica Q much more expensive but a real super camera!

The new Fujifilm X70 camera has a spectacular design and a magnificent look as well with the retro aesthetics just like the some of the other Fujifilm X series cameras which make it unique and special.

The camera is easily portable and fits in a jacket/coat pocket and weighs only 340g with in-fitted memory card and NP-95 battery which makes it a perfect for an adventurous trip and street photographers since it's highly inconspicuous. The lens is 28mm f2.8 and a 16MP APS-C sensor that provides an exquisite and high-quality image. The diaphragm has nine rounded blades and a close-focusing limit of only 10cm.

I was not in need of a new camera and just wanted to try one for a review.


It is super small but I really mean small but at the same time it is very nice to hold it with a rubberized front and rear grips which are well-sculpted, and the camera feels comfortable in one hand.   At the beginning was not easy for me to use the LCD and was always looking for the viewfinder but I got used quite quickly and was fun the possibility to shot or focus touching directly on the LCD screen.

It has the same functionality of my XT-1 and XE-2 (with the new firmware ver. 4 ) and I tend to use my Fuji in AF-S and focusing is very fast and precise. It seemed to me very good for street photography and I did not miss any frame even with people and boats moving.

Fujifilm X70 has an admirable feature which is the 1.04 million tilting dot LCD touch panel that is 3.0 inch and which is also capable of rotating at 180-degree angle.

The touch panel has the following functionality which includes in preview mode:

  • Image enlargement capability: this is achieved by double-tapping on the touch screen which also centers on the active focus. 
  • Image moving capability: just like the phone, one can move the image by dragging it with the finger on the touch screen.
  • Image zooming capability: one can enlarge the image by widening it by the use of the two fingers just like in a touchscreen phone. 
  • Image scrolling: one can scroll the image upwards or downwards by swiping either way by the use of a finger. 

In shooting mode you will have access to:

  • Focus Area Selection: Move the focus area before taking the image: one can achieve this by tapping on the touch screen.
  • Touch Shot: Touch to focus and shoot on a specific point.

There is a small icon in the mid right side of the screen where you can switch between the two modes as well as turn the touch function off.

Adjustments in exposure compensation can easily been achieved by the dial.

Additionally, the lens control ring can also be used to adjust continuous shooting, film simulation, ISO speed, and white balance.

On the left hand side of the camera there is another function button. It sits quite well hidden. Very useful. I have decided to assign it to external ring control.

There is also a dedicated switch with an automatic mode, that I think may come handy to less photography savvy users. The camera also has a built-in Wi-Fi connectivity and an in-camera time-lapse.

The new 18.5mm f/2.8 lens in the X70 is a super performer. The quality of this pancake design lens is outstanding.
It’s an entirely new design by Fujifilm. It consists of 7 elements in 5 groups with 2 aspherical elements. It’s constructed in a  compact way,  and because there is no collapsing necessary when turning on/off the camera, this results in a much faster startup time when you switch your camera on.

The lens autofocus quickly thanks to the X70 hybrid autofocus system with both contrast detection and phase detect AF  which offers a 49-point Single Point AF mode and a Wide/Tracking mode that offers a 77-point autofocus area. Autofocus is fast, with reported autofocus acquisition said to be of as little as 0.06 seconds.

The X70 can start up in 0.5 seconds in High Performance mode, it is amazing and has a shutter lag time of just 0.05 seconds, can continuously shoot at up to 8 frames-per-second for around 12 frames and can use a completely silent electronic shutter with exposures at 1/32,000s.

Another feature that is is packed in the X70 is the digital crop feature or “digital tele converter” as Fujifilm calls it. When shooting jpeg mode you can chose to use either a 28mm, 35mm or 50mm crop mode.  The camera does some magic so you actually get a full 16mp file, obviously you can see some compression.

The  camera has additional accessories that include the LH-X70 Lens Hood, WCL-X70 wide conversion lens, VF-X21 optional viewfinder and BLC-X70 half leather case. The camera is available in two colors, silver or black. 

The X70 is in my view meant for people who needs a compact camera, and for street photographers who needs something  inconspicuous for getting candid moments of streetlife.


This post has not been sponsored and I did not get media samples or freebies. For more information, check out my full disclaimer policy.

Fujifilm XE-2 Firmware update ver. 4.0

Fuji had always promised they were going to issue a firmware update for the nearly 3 years X-E2, mid-range mirrorless camera, to bring it in line with the XT-1 but after the release of the new camera X-E2s many were dubious.

On February 4th Fujifilm has released the new firmware update which adds a host of feature and operational improvements, including the AF upgrades, also a revised user interface and multiple Auto ISO settings. The update brings the camera into line with most of the latest X-series models and continues Fujifilm's habit of supporting existing users.

This is one of the reasons why I moved from DSLR professional Nikon to Fujifilm. Just thinking at myXE-2 that I had since the very beginning in October 2013 I believe that thanks to the Fujifilm supportI have had a new camera probably 2/3 times with major updates in those 28 months and for sure it is is not something I was used to.
I am always surprised that not many camera brands release updates as phones, computers, tablets etc.   In my view extending the functionality with updates or fixes is always a good thing and would make for more the reason to purchase oftheir brand, especially as these cameras become more computer like and sophisticated.


Improvements and function enhancements with this firmware 4.0 update

New AF System
(1) New AF system with Zone and Wide/Tracking modes for effortless capture of moving subjects
(2) Improvement of AF accuracy
(3) Eye Detection AF
(4) Auto Macro mode
(5) AF improvement in the Movie mode
Function enhancements
(6) High-speed electronic shutter with a maximum speed of 1/32000sec.*
(7) White Balance Bracketing
(8) Enhanced ISO Auto Setting to AUTO1/AUTO2/AUTO3
(9) Exposure Compensation control in Manual.
(10) Natural Live View function is just like the naked eye.
(11) Finer lines on the framing grid enhances visibility
(12) New Video Frame rates (50P / 25P / 24P)
(13) Manual Shooting in Video mode
(14) Phase detection AF support for Instant AF
(15) Expansion of shutter speed in Program Shift mode
Operability improvements
(16) The new user interface
(17) Improved Shutter Speed Dial operation
(18) Name of Silent mode changed to avoid confusion
(19) Direct selection of AF area
(20) Unlocked AE-L / AF-L Buttons
(21) Variable Focus Area during MF
(22) Q. Menu customization
(23) Interlocking of Metering and Focus areas
(24) Movie Recording
Other changes with the update
(25) Supports focus limiter function for XF100-400mmF4.5-5.6 R LM OIS WR
(26) “BACKGROUND COLOR” menu
(27) The maximum number of images taken in the continuous shooting mode

After this update, I really feel my XE2 ismuch faster and it added many useful things that will help my workflow

What I was really hoping with this update was to get

-Autofocus brought inline with X-T1 speeds, especially continuous focus
-Electronic shutter option
-Auto Macro Mode

I got them all

PRO
Autofocus - Single, Fixed subject isfor sure an impressive upgrade. Works in a fantastic way and really seems a new camera.
Autofocus - Single, Moving subject a great improvement
Autofocus - Continuous + Tracking again asubstantial improvement on continuous focus and very happy with it
Auto Macro mode will save time and makes life easier
Electronic shutter for still subjects it's a dream, 1/32000th in the daylight wide open and completely silent is superb.

This new firmware is very very good, make sure you update your camera right now, these added functions bring the X-E2 in line with X-E2s and XT-1

New Firmware 4.0 can be found here

CONS
Grrrr....Why did the firmware not include 36 megapixel upgrade, tilt-able screen, IBIS, and the possibility to make an Espresso?? That was mean.
Just Joking of course.

Thanks Fujifilm! You've shown that the most important factor are (we) the end users.


This post has not been sponsored and I did not get media samples or freebies. For more information, check out my full disclaimer policy.

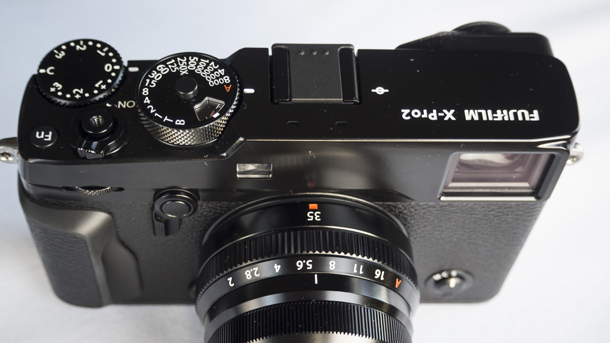
Fuji Xpro2 my take!

Fujifilm X-Pro2

The most awaited upgraded premium camera finally arrives!

During the last couple of months I was lucky enough to try the Fuji X Pro 2 thanks to Fujifilm Slovenia! I used to own the original Xpro1 and I shoot on a daily bases with 2 Leica and I use 2 XT1 and  1 XE2 with an array of fuji lenses so was really looking forward to try this new gem.

The Fujifilm has released the long-awaited modern, advanced model, the Fuji Xpro2 compact system camera. It is one of the coolest, hippest and most desirable APS-C cameras available in the market today.


The details and Capability

The Fuji Xpro2 is a mirrorless interchangeable lens camera with a Hybrid Viewfinder system that incorporates both electrical and optical viewfinders. It has an ultra advance image sensor, X-Trans III technology, for a remarkable image quality and sharpness similar to full-frame DSLRs: brand new 24.3 megapixels. It features a Hybrid AF system with 273 points, of which 77 are phase-detection and cover about 40% of the frame, while the rest is covered by contrast-detection areas for accurate focusing from edge-to-edge.

When paired with the X-Processor Pro, the sensor is delivering clean image quality with minimized noise value, along with a sensitivity range of ISO 12800 that can be expanded to ISO 51200. Besides benefitting the low-light performance, the sensor contributes to faster overall performance, including shutter lag time of 0.05 seconds, AF speed of up to 0.06 seconds, start-up time of 0.4 seconds and shooting interval of 0.25 seconds. The mechanical shutter speed is up to 1/32,000 seconds, with an enhanced flash sync speed of about 1/250 seconds, and a new X-Processor Pro that brings extraordinary improved response time for superior performance. It simply delivers the best ever result from Fuji X-Series camera.

Body and Interface Design

Fuji Xpro2 has a robust, weather-resistant body to meet the unique needs of any professional photographer in a touch shooting area. Its chassis is made of four pieces of magnesium alloy, which are sealed with more than 60 points, making it a splash-proof, dust-proof and even capable of operating at low temperatures. Besides, it features two SD card slots for reliable video and image storage.

The exposure compensation dial, shutter speed dial and finder switching lever are milled from high quality aluminum for a comfortable feel and premium look. It also features water and dust resistance command dial on both the rear and front of the camera, plus a push function that are easy to use. Its design also includes various customizable function buttons together with a 3.0" 1.62m-dot rear LCD for live view shooting, image playback and menu navigation. The built-in Wi-Fi allows you to share images wirelessly to mobile devices, or remotely control the camera from your Smartphone.

What I think

The X-Pro2 is something special, the performance and capabilities of the X-Pro2 make it my instant go-to camera during my travels. The X-Pro2 excels everywhere, the camera is starting to focus before I even decide to take the shot and with the speed, accuracy and amazing colour rendition I found all I had to do was focus my attention on composition. I do not need to shoot anymore in Raw I can simply use jpg.  Put simply the Fujifilm X-Pro2 is a joy to use, it is a phenomenal upgrade to an already superb camera.

The camera will officially be sold in the market in February 2016 for £1,349.00, so get ready for a new world of photography.


Follow my blog with Bloglovin


This post has not been sponsored and I did not get media samples or freebies. For more information, check out my full disclaimer policy.


Fuji X Custom Settings

Today arrived the new firmware for most of the Fuji X series cameras.  When you update all the custom settings are wiped out as well as cache memory and frame numberHere are more or less my latest  custom settings.

Name ISO Dynamic Range Film Simulation White Balance Colour Sharpness Highlight  Shadow  Noise 
Standard AUTO DR100 Provia (standard) Auto 0 0 0 0 0
Landscape Normal 200 DR100 Astia (soft) Auto -1 +1 -1 -2 0
Landscape  High Contrast 400 DR200 Astia (soft) Auto -1 +1 -1 -2 0
Portrait Neutral 200 DR100 Pro-Neg Standard Auto 0 0 0 0 0
Portrait Neutral Higher Contrast 400 DR200 Pro-Neg High Auto 0 +1 -1 -2 0
B&W Landscape 800 DR100 Mono+Red Auto 0 +1 0 0 0
B&W Portrait 800 DR100 Mono+Green Auto 0 +1 -1 -1 0


I have set them according to the subjects I tend to shot so I can change a whole group of settings with a push of the "Q" menu button and a quick turn of the dial.   Finer tweaks to color and highlight/shadow tone were done from experience of using the camera and the above are what I  eventually arrived at after some months of use.

I tend to play quite a bit with Highlight Tome, Sharpness and Shadow Tone so I change them often. For the ISO thee are times when I like to have in AUTO with Standard 200, Max 3200 and min shutter speed at Focal length I am using x1.8

While I like the more saturated colors and higher contrast in Astia (soft) for landscape generally, I found it tended to clip into the shadows too easily so I somewhat reduced the contrast there by making a -2 adjustment.

For portraits the Provia (standard) or Pro-Neg film simulations work well as they are rather neutral and subdued in colour, so render skin tones well.  The Pro-Neg Hi gives the same colours but more contrast.  I reduced the contrast at the shadow end as I found it was clipping to black too readily.

The dynamic range settings work really well and allow the camera to record more detail in highlights and shadows than in a normal exposure.  For the higher DR setting (DR200 is all I have needed) the camera needs to be set to ISO 400 but the sensor/processor is so effective that there is no discernible noise penalty.  It isn't an HDR feature....my understanding is that it works like many other similar features and the camera basically underexposes the image then processes in an exposure and tone curve that avoids clipping at each end.

The Jpeg output is so good on this camera that I shoot Jpeg almost all the time, whereas I only shoot RAW on my Nikon DSLRs.  Images from the X-E1 print superbly and have amazing pixel level sharpness.  The camera seems to resolve beyond what its 16MP sensor should, probably due to the absence of the anti aliasing filter.  Strangely, when 100% images are viewed on a computer monitor, detail can look somewhat mushy due to the unusual colour filter layout of the X-Trans sensor, but images view nicely at normal sizes and print in a very natural way, giving what I would describe as an organic look to textures that look real enough to touch and bitingly sharp.


Fuji X100s for street photography

I am often asked what settings I use for street photography. First, let’s make sure you have everything you will need, extra batteries and extra memory cards. A fast memory card is essential when shooting raw. ...do not forget your camera! (Marco Secchi)

Here are my settings for street shooting: Auto ISO: 200-3200 Min. Shutter speed limit: 1/125 Focus AF-C mode Drive Mode S or C: most of the time I am in s mode, c-mode if the situation really calls for it. While in AF-C mode , always awake/never sleep doesn’t work, keep half pressing the shutter from time to time, especially when you spot a potential shot, make sure the camera is not asleep Shutter priority at 1/250 or higher in regular light Optical Hybrid finder vs EVF: depending on the scene, if it is a context or overview shot, OHVF works, however, I found the EVF preferable for precise positioning of the af point since there is no time to reframe/refocus. Develop a solid grip on your camera, experiment, strap around the neck or wrist strap. Learn to change +- dial with out looking at your camera, the same goes for shutter speed, keep your eyes on the street.

Use your x100s a lot, that’s it!

Fuji X Custom Settings

Today arrived the new firmware for most of the Fuji X series cameras.  When you update all the custom settings are wiped out as well as cache memory and frame numberHere are more or less my latest  custom settings.

Name ISO Dynamic Range Film Simulation White Balance Colour Sharpness Highlight  Shadow  Noise 
Standard AUTO DR100 Provia (standard) Auto 0 0 0 0 0
Landscape Normal 200 DR100 Astia (soft) Auto -1 +1 -1 -2 0
Landscape  High Contrast 400 DR200 Astia (soft) Auto -1 +1 -1 -2 0
Portrait Neutral 200 DR100 Pro-Neg Standard Auto 0 0 0 0 0
Portrait Neutral Higher Contrast 400 DR200 Pro-Neg High Auto 0 +1 -1 -2 0
B&W Landscape 800 DR100 Mono+Red Auto 0 +1 0 0 0
B&W Portrait 800 DR100 Mono+Green Auto 0 +1 -1 -1 0


I have set them according to the subjects I tend to shot so I can change a whole group of settings with a push of the "Q" menu button and a quick turn of the dial.   Finer tweaks to color and highlight/shadow tone were done from experience of using the camera and the above are what I  eventually arrived at after some months of use.

I tend to play quite a bit with Highlight Tome, Sharpness and Shadow Tone so I change them often. For the ISO thee are times when I like to have in AUTO with Standard 200, Max 3200 and min shutter speed at Focal length I am using x1.8

While I like the more saturated colors and higher contrast in Astia (soft) for landscape generally, I found it tended to clip into the shadows too easily so I somewhat reduced the contrast there by making a -2 adjustment.

For portraits the Provia (standard) or Pro-Neg film simulations work well as they are rather neutral and subdued in colour, so render skin tones well.  The Pro-Neg Hi gives the same colours but more contrast.  I reduced the contrast at the shadow end as I found it was clipping to black too readily.

The dynamic range settings work really well and allow the camera to record more detail in highlights and shadows than in a normal exposure.  For the higher DR setting (DR200 is all I have needed) the camera needs to be set to ISO 400 but the sensor/processor is so effective that there is no discernible noise penalty.  It isn't an HDR feature....my understanding is that it works like many other similar features and the camera basically underexposes the image then processes in an exposure and tone curve that avoids clipping at each end.

The Jpeg output is so good on this camera that I shoot Jpeg almost all the time, whereas I only shoot RAW on my Nikon DSLRs.  Images from the X-E1 print superbly and have amazing pixel level sharpness.  The camera seems to resolve beyond what its 16MP sensor should, probably due to the absence of the anti aliasing filter.  Strangely, when 100% images are viewed on a computer monitor, detail can look somewhat mushy due to the unusual colour filter layout of the X-Trans sensor, but images view nicely at normal sizes and print in a very natural way, giving what I would describe as an organic look to textures that look real enough to touch and bitingly sharp.


Weston Master III Lightmeter

Over many years, professional photographers the world over have user Weston exposure meters. Why? Because they fulfill the professional's needs. Extremely accurate in all lighting situations, rugged, generally no reliance on batteries. IMG_1650

The epitome of the selenium cell meter is the Weston Master, which has a long and complicated history, not least because there were both US-built and UK-built versions: the UK company started as a subsidiary of the US-based company (which was founded by an Englishman) and became 51% UK owned (as Sangamo Weston) in 1936.

The Weston Master Universal was introduced in 1939 and remained in production in the UK until about 1950, though the Weston Master II was introduced in the United States in 1945/6. The Weston Master III appeared in 1956; the Weston Master IV in 1965; the Weston Master V in 1967; and the Euro-Master in 1970. Even after Weston lost interest, the Euro-Master was manufactured by Kilbride Instruments in Scotland from 1980 to 84 and then as the Euro-Master II by Megatron in London from 1984 to 2010.

It works as follows: moving the small tab that sticks out from the silver dial adjusts the film speed setting which can be read though the small opening in the red dial. Then take a reading by aiming the meter cell on the bottom of the meter at the subject. If the light levels are high, leave the perforated cover over the selenium cell in place; if the the light is dim, then open the perforated cover. The meter needle will point to a number on the meter scale. The range of numbers for bright light is 25 to 1600 and for low light it goes from .2 to 50. Use the turned up tabs on the black wheel to aim the large silver arrow at the corresonding number on the outermost part of the dial. You can then read all the correct exposure combinations off the silver (shutter speeds) and black (f stops) dials. In other words, a shutter speed that lines up with an adjacent f stop should provide the right exposure.

Manual is here

Portrait Photography with Fuji XE-2

little fuji This is my standard portrait set up and I use aperture priority in conjunction with auto ISO.

Here are my settings:

ISO set to 200 Auto on ~ max 3200 with a minimum shutter speed set for each lens as follows: 14mm ~ 1/40th second, 23mm ~ 1/100th second, 35mm ~ 1/160th second Shutter speed dial set to A Aperture dial set to f/1.4 – f/4 as required Jpeg Fine + Raw Auto WB Ns film simulation, occasionally Astia Soft

AF set to S Activated on a half press of the shutter. I then move the focus zone around the frame as needed. I set the focus zone as the smallest square available as any background detail within the square during focusing might cause the lens to back focus.

With these settings dialed in I just pick up the camera, switch it on and start shooting. I adjust the shooting the exposure compensation as required via the very convenient dial, I change the focus zone to the best position for each shot and I reset the minimum shutter speed for Auto ISO in the ISO menu (Fn button) if I change my lens.

With the AF set to activate on a half shutter press I have to focus before every exposure. I rarely shoot multiple frames the same so I really don’t mind doing this.

I set the aperture and let the camera adjust the ISO from 200 to 3200 to suit the light level. When it runs out of ISO range it alters the shutter speed. I came to the values of minimum shutter speed using my simple formula* (See the section on shutter speed below). Occasionally I’ll dial in a higher shutter speed, especially when using the 14mm lens if the subject movement demands it. I just set the shutter speed dial to the value I want and the auto ISO continues to perform just as before.

Fujifilm X100S settings for Black & White

With the X100S I shoot with ISO set to Auto, with a base ISO of 200 and a maximum of 3200. Digital noise really isn’t an issue even this high. Trust me. And the shutter speed limit is mostly set to 1/125 of a second, unless I shoot to get some deliberate motion blur, then I find 1/30 sec is perfect. That gives me some motion and energy that can lift a picture to even greater heights. Well enough about that. I promised you my settings, and these are the settings I have come to love by simply shooting, testing, looking, evaluating and readjusting, over and over again for a couple of months. These settings give me pictures with good contrasts and some punch. And I love punchy b&w!
DSCF9507 copy
So the settings for my custom setting C2 for capturing in both RAW and black & white JPGs are as follows:
Image size: L 3:2
Image quality: F+RAW
Dynamic range: DR100
Film simulation: BR (monochrome + R filter)
Sharpness: +1
Highlight tone: +2
Shadow tone: +2
Noise reduction: 0