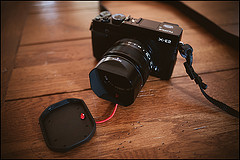
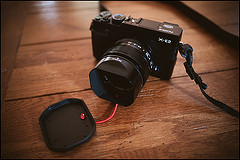
Why I Prefer My Sony A7R III and 24mm f/2.8 G Over the Leica Q2

As a professional photographer, gear choice can significantly impact your work's quality and flexibility. Having worked with various camera systems, I often get asked why I favour my Sony A7R III with a 24mm f/2.8 G lens over the Leica Q2. While both are stellar pieces of equipment, there are several key reasons why the Sony setup suits my style and needs better.

Versatility and Flexibility

The Sony A7R III is a full-frame mirrorless camera that offers a level of versatility that the Leica Q2 simply can't match. The Leica Q2 is a fixed-lens camera, which means you're limited to the 28mm f/1.7 lens. While this lens is excellent for many scenarios, it lacks the flexibility that interchangeable lenses provide.

With the Sony A7R III, I can switch between a vast array of lenses depending on the shoot's requirements. Whether it's the 24mm f/2.8 G for wide-angle shots or another lens for portraits, macros, or telephoto work, the ability to change lenses on the fly is invaluable. This flexibility ensures that I can always have the right tool for the job, no matter the shooting conditions.

Image Quality and Performance

Both the Sony A7R III and the Leica Q2 boast impressive image quality, but there are subtle differences that make the Sony a better fit for my workflow. The A7R III features a 42.4-megapixel sensor, delivering outstanding detail and resolution. The Leica Q2, while also impressive with a 47.3-megapixel sensor, doesn't quite match the dynamic range and low-light performance of the Sony.

The A7R III's back-illuminated sensor and superior noise control at high ISOs give it an edge in challenging lighting conditions. This is particularly important for me when shooting in low light or high-contrast scenes where retaining detail in both shadows and highlights is crucial.

Autofocus and Speed

When it comes to autofocus performance, the Sony A7R III outshines the Leica Q2. The Sony's advanced autofocus system, featuring 399 phase-detection points and 425 contrast-detection points, ensures quick and accurate focusing even in difficult situations. This is particularly beneficial for capturing fast-moving subjects or when working in environments with varying lighting conditions.

The Leica Q2's autofocus, while competent, doesn't quite match the speed and reliability of the Sony system. For professional work where every shot counts, having a camera that can lock focus quickly and accurately is a significant advantage.

Ergonomics and Usability

The ergonomics and usability of a camera can greatly influence the shooting experience. The Sony A7R III's design includes a comfortable grip and intuitive button layout, making it easier to handle during long shoots. Customizable buttons and a high-resolution electronic viewfinder further enhance the user experience.

While the Leica Q2 is known for its sleek and minimalist design, it lacks some of the ergonomic features that make the Sony A7R III so user-friendly. The Q2's minimalist approach might appeal to some, but for extensive professional use, the Sony's more comprehensive control system proves to be more practical.

Battery Life and Storage

Battery life is another area where the Sony A7R III has an advantage. Its larger battery allows for longer shooting sessions without needing frequent recharges, a crucial factor during all-day events or location shoots. Additionally, the dual SD card slots in the A7R III provide more storage options and the ability to back up files in real-time, offering peace of mind during critical shoots.

Conclusion

While the Leica Q2 is undoubtedly a remarkable camera with its own set of strengths, the Sony A7R III paired with the 24mm f/2.8 G lens offers a combination of versatility, performance, and usability that better suits my professional needs. The ability to switch lenses, superior autofocus, excellent image quality, and ergonomic design make the Sony setup a more powerful and flexible tool for a wide range of photographic applications.

Choosing the right gear is a personal decision that depends on your specific requirements and shooting style. For me, the Sony A7R III and 24mm f/2.8 G lens provide the perfect balance of features and performance, making them my preferred choice over the Leica Q2.

Venice Through Different Lenses: A Photographic Equipment Guide

Introduction: Welcome to Venice, a city that floats on the dreams of artists and the aspirations of photographers. Here, history lingers in the air, romance dances along the canals, and every view is a potential masterpiece waiting to be captured.

From the grandeur of landmarks like St. Mark's Basilica, Rialto Bridge, and the Accademia, to the less trodden but equally captivating areas like the historical Arsenale, the artsy Dorsoduro, the serene Cannaregio, or the majestic Madonna dell'Orto, Venice presents a kaleidoscope of photographic opportunities.

Imagine capturing the reflection of ancient buildings in the quiet waters of a secluded canal, the vibrant life of Venice in its bustling streets, or the serene elegance of boats gliding along the Grand Canal at sunset. Each area of Venice, whether bathed in the golden glow of sunrise or the subtle hues of twilight, offers unique scenes. Whether it's street photography capturing the essence of Venetian life, architectural shots that speak of centuries of history, or serene landscapes that merge water, light, and colour, Venice is an open canvas for your camera.


1. Choosing Your Camera: The Heart of Your Gear

  • DSLR vs Mirrorless: While DSLRs offer robustness and a vast range of lenses, mirrorless cameras are lighter and more compact, a big plus when navigating Venice's busy streets and canals.

  • Recommended Models: For DSLRs, consider the Canon EOS 5D Mark IV or Nikon D850. The Sony A7R IV or Fujifilm, despite not a huge fan of XT4 and XT5, are excellent choices for a mirrorless setup.

2. Lenses: Your Window to Venice

  • Venice is, in my humble view, mostly a one-lens location. The camera on a sling strap with the attached lens is all you need. :-) but if you are looking for something more……

  • Wide-Angle Lens: Essential for capturing the grandeur of Piazza San Marco or the expanse of the Grand Canal. A lens like the 16-35mm f/2.8 will do wonders.

  • Telephoto Lens: Perfect for zooming in on distant details of Venetian architecture or candid shots of locals and tourists. A 70-200mm f/2.8 is a versatile choice.

  • Prime Lens: A fast prime lens (like a 35mm f/1.4) is excellent for street photography and low light conditions, capturing the everyday life of Venice with clarity and depth.

3. Tripods: For Stability and Long Exposures

  • A lightweight, compact tripod is ideal for long exposure shots, especially at night or during the early morning. The Manfrotto Befree Advanced is an excellent option for its balance of portability and stability.

4. Filters: Enhancing the Mood

  • Polarizing Filter: To reduce glare from the water and enhance the blue of the sky.

  • Neutral Density Filter: For those dreamy, long exposure shots of gondolas gliding on the canals.

5. Camera Bag: Protecting Your Gear

  • A water-resistant and comfortable-to-carry bag is a must in Venice. Consider bags with customizable compartments for different equipment, like the Lowepro ProTactic series.

6. Additional Accessories:

  • Extra Batteries and Memory Cards: A must-have, as you'll be shooting a lot.

  • Lens Cleaning Kit: To keep your lenses spotless amidst the water and humidity.

7. Timing Your Shots: Capturing Venice's Best Light

  • The Magic of Early Mornings: There's something uniquely serene about Venice in the early morning. The soft, diffused light at this time beautifully highlights the intricate details of Venetian architecture and creates a peaceful atmosphere that's perfect for capturing the city's true essence. This time, before the bustle of the day begins, allows for uninterrupted shots of the canals and streets. As a photographer who cherishes the quietude and gentle light of not-quite-sunrise, I find this period particularly rewarding for photography.

  • The Charm of Late Afternoons: As the day progresses towards late afternoon, especially around 5 PM during the summer months, Venice transforms under the golden light. This time is ideal for capturing the warm hues and long shadows that add depth and drama to photographs. The light at this hour accentuates textures and colours, making it perfect for landscape and portrait photography. It's also a great time to capture the vibrancy of Venetian life as the city starts to wind down from the day's activities.

In both these periods, the interplay of light and shadow, the calmness or the subtle energy of the city, provides a multitude of opportunities for photographers. Whether it's the deserted bridges and alleyways in the early morning or the lively scenes of local life in the late afternoon, these are the moments when Venice truly reveals its multifaceted character.

8. Prime Locations for Stunning Shots

  • San Giorgio Maggiore for San Marco Views: For a unique perspective of San Marco, head to San Giorgio Maggiore. The view from this island offers a breathtaking panorama of the city, especially enchanting during sunrise or sunset, when the sky and water seem to merge in a dance of colors.

  • Lido for Spectacular Sunsets: The Lido, with its beautiful beaches, provides an ideal backdrop for sunset photography. The play of light on the water and the distant view of Venice create a perfect setting for both romantic and dramatic sunset shots.

  • The Jetty at Hotel San Moise: A somewhat hidden gem, this spot is fantastic for capturing the essence of Venice's waterways and the unique interaction between the city and its canals.

9. The Advantage of Hiring a Local Photographer

  • While these locations are accessible and offer wonderful photographic opportunities, the real secret to capturing Venice's magic lies in knowing the right time and angle to shoot from. This is where hiring a local photographer can make a significant difference. A local expert can guide you to the best spots at the optimal times, often unknown to the general public or overlooked by guidebooks. They can help you navigate the city efficiently, saving you time and allowing you to focus on capturing the best shots. With a local's insight, you can discover hidden gems and get unique perspectives that truly capture the spirit of Venice.


    10. My personal set-up

    I usually shoot with Leica M10 using a 28mm f1.8n or 35mm f 1.4 prime lenses or Leica Q2 . Some time with a Sony 7 rIII with a 24mm f2.8. Most of the time is one camera and one lens. Very small bag and no tripod, unless I do night or twilight shooting. I walk a lot and try to follow the right “light”

In conclusion, Venice is not just a city but a living canvas that changes with light and time. Armed with the right equipment at the right time and with local guidance, you can capture images that depict Venice's beauty and tell its timeless stories.


The Prime Choices: Exploring 28mm, 35mm, and 50mm Lenses

As many of you know, I've had a long-standing affair with prime lenses, particularly the 28mm, 35mm, and 50mm varieties. Each of these lenses has its unique charm and set of capabilities, making them go-to choices for photographers around the globe.

1. The Wide-Angle Wonder: 28mm Lens

Currently, the 28mm lens is my favorite, but it wasn't always this way. This wide-angle lens is a marvel for capturing expansive landscapes, intricate architectural details, and dynamic street scenes. Its wider field of view offers a sense of immersion, bringing viewers right into the scene.

Pros:

  • Excellent for capturing vast scenes without much distortion.

  • Great for storytelling, as it allows for more elements in the frame.

  • Ideal for street and travel photography.

Cons:

  • Can cause subjects to appear distant, which may not be ideal for portraits.

  • Requires getting close to the subject, which might not always be feasible.

2. The Street Photography Sweetheart: 35mm Lens

The 35mm lens, often regarded as the 'classic' street photography lens, strikes a balance between the wide-angle 28mm and the more standard 50mm. It's versatile enough to capture a variety of scenes without distorting the perspective too much.

Pros:

  • Perfect for capturing environmental portraits and street scenes.

  • Versatile for both landscapes and more intimate shots.

  • It offers a field of view that closely resembles human vision.

Cons:

  • It might not be wide enough for expansive landscapes.

  • It's not ideal for tight indoor spaces.

3. The Nifty Fifty: 50mm Lens

Ah, the 50mm lens - the first love for many photographers, including myself at one point. This lens is known for its versatility and the 'natural' perspective it offers, closely mirroring the human eye's field of view.

Pros:

  • Excellent for portraits with a natural look.

  • Great low-light performance due to wider apertures.

  • Produces beautiful background blur (bokeh), enhancing subject focus.

Cons:

  • Less suitable for capturing wide scenes.

  • Can feel too 'tight' in confined spaces.

Personal Journey and Conclusion

While my current favourite is the 28mm lens for its immersive wide-angle view, my preferences have shifted over time. Each lens has its place and purpose, and as photographers, we often find ourselves moving between these prime choices depending on the project at hand. Whether it's the expansive 28mm, versatile 35mm, or the classic 50mm, each lens offers a unique way to capture the world around us.

I'd love to hear about your experiences and preferences. Which of these prime lenses resonates most with your style? Please share your thoughts, and let's discuss the endless possibilities these lenses offer!

Stay creative!

Check my photography workshops here


35mm equivalence of native Fujifilm X lenses


I am often asked about the correspondence focal length for the Fujifilm X lenses

This table will help you find the true 35mm equivalence of native Fujifilm X lenses.


Native Fujifilm X lenses

Name Focal Length (35mm) f-stop (35mm) Aperture Size

XF14mmF2.8 R 21mm ƒ/4.2 5mm

XF16mmF1.4 R WR 24mm ƒ/2.1 11mm

XF16mmF2.8 R WR 24mm ƒ/4.2 5.7mm

XF18mmF2 R 27mm ƒ/3 9mm

XF23mmF2 R WR 35mm ƒ/3 12mm

XF23mmF1.4 R 35mm ƒ/2.1 16mm

XF27mmF2.8 41mm ƒ/4.2 9.6mm

XF33mmF1 50mm ƒ/1.5 33mm

XF35mmF1.4 R 53mm ƒ/2.1 25mm

XF35mmF2 R WR 53mm ƒ/3 18mm

XF50mmF2 R WR 75mm ƒ/3 25mm

XF56mmF1.2 R 84mm ƒ/1.8 47mm

XF56mmF1.2 R APD 84mm ƒ/1.8 47mm

XF60mmF2.4 R Macro 90mm ƒ/3.6 25mm

XF80mmF2.8 R LM OIS WR Macro 120mm ƒ/4.2 29mm

XF90mmF2 R LM WR 140mm ƒ/3 45mm

XF200mmF2 R LM OIS WR 300mm ƒ/3 100mm

XF8-16mmF2.8 R LM WR 12-24mm ƒ/4.2 2.9-5.7mm

XF10-24mmF4 R OIS 15-36mm ƒ/6 2.5-6mm

XF16-55mmF2.8 R LM WR 24-83mm ƒ/4.2 5.7-20mm

XF16-80mmF4 R OIS WR 24-120mm ƒ/6 4-20mm

XF18-135mmF3.5-5.6 R LM OIS WR 27-200mm ƒ/5.3-8.4 5.1-24mm

XF18-55mmF2.8-4 R LM OIS 27-83mm ƒ/4.2-6 6.4-14mm

XF50-140mmF2.8 R LM OIS WR 75-210mm ƒ/4.2 18-50mm

XF55-200mmF3.5-4.8 R LM OIS 83-300mm ƒ/5.3-7.2 16-42mm

XF100-400mmF4.5-5.6 R LM OIS WR 150-600mm ƒ/6.8-8.4 22-71mm

Touit 2.8/12 18mm ƒ/4.2 4.3mm

Touit 1.8/32 48mm ƒ/4.2 11mm

Touit 2.8/50M 75mm ƒ/4.2 18mm

My Fav Settings for Fujifilm XT2

I love my Fujifilm XT2 and these are the settings I tend to use most

I Shoot RAW + Fine JPG - set to M (12Mp) size so I get a full 24Mp RAW plus a super clean super sharp 12Mp JPG which is good enough a lot of the time for event work

To avoid Haloing in the JPGs I have sharpness to Minus 2 .... Noise reduction to Minus 3 seems to be a good balance between detail and leathery low NR artifacts - using the 12Mp size on these settings is superb and reminds me of the old Bayer 12Mp X100 and its almost Perfect ultrasharp JPG engine , if I need to crop or more rez, I`ve got the RAW..

I set boost to ON

Smallest single AF point with the full number of points available set in the menus

Choose Film sim depending on shoot / subject ..

For portraits I love the look of Astia with DR200 and +1EV.  It brings up the mid tones and preserves the highlights.

This is some text! Hi everyone, and welcome to this blog post on the camera settings I use with the Fuji X System. This is a question I have received several times and it often comes up during workshops where I see so many folks struggling with their cameras and settings. Now, while the focus of this post is centered around my Fuji cameras, I will say that the best set-up is the one that works for you and makes you feel confident as you operate your camera. And in order to do that you need to learn the operations of your camera system forwards and backwards, develop an understanding of how you want to approach your photography, and then practice until it becomes automatic. The last thing you need to be doing during the moment of capture is to fumble with your camera or the settings. I set up my X-T2 and my X-Pro 2 in exactly the same way. The reason for this is simple; no matter which camera I grab out of the bag, I know what the settings are and that the two camera bodies will function in the same way. With only some subtle variations, I use the same settings and set up for all of my various photographic endeavors - landscape, street, architecture, and portraits. It is all about simplicity my friends. I can take any of my camera bodies out of the bag, and with confidence, know that I can be shooting within seconds of turning the camera on. Fuji X cameras have a lot of technology under the hood but once you have settings established you rarely have to go back to the menus for anything. The three main things you really need - aperture, ISO, and shutter speed - are right on top of the camera. So let's take a look at the settings I use. Basic Settings, Set-up, and Functions File Type: For landscape work I shoot in RAW Mode only. All files will be processed from RAW using Lightroom, ACR, or Iridient Developer, and then finished in Photoshop. RAW Recording is set to Uncompressed. For street work, or people, I will use RAW + JPEG Fine and I will employ the Fuji Film Emulations. White Balance: Auto. I hardly ever vary this as it can be manipulated in post processing. Noise Reduction: I have this set to 0 as my default. Long Exposure Noise Reduction: Off. I never have this on unless I am shooting a very long exposure such as a star trail. Dynamic Range: I leave this set to DR100 as my default. Brackets: I will occasionally shoot a defined bracket set of images. More often than not I don't do this as I am always making my brackets while looking at the histogram. But if I need a quick bracket set I can switch to this in the Drive Mode. I have my Exposure Brackets set to 1-Stop apart. So this will be one shot at my defined exposure, then at shot 1-Stop Under, and a shot that is 1-Stop over. I do wish Fuji would change the Firmware to allow 5 to 7 stop differences. Brackets in the X-T2 can be set in the Shooting Menu > Drive Setting > Bracket Setting. Brackets in the X-Pro 2 can be set through the Drive Button on the top D-Pad of the camera. Color Space: Adobe RGB Card Slots: Both my X-T2 and the X-Pro 2 have dual card slots, one of the endearing features I love about these cameras. My Card slots are set to Sequential, which means, that when one card fills up, the camera switches to the other card. You can set it to BackUp and RAW/JPEG as well but I never use these. On occasion I used the BackUp Mode but I usually do not sweat card failure. Image Size: I typically leave this at the default range of L3:2. Any relevant cropping I will perform in post-processing Film Emulations: I love the Fuji Film Emulations and use them often when shooting in the RAW + JPEG Mode. But I use them even in shooting RAW as a Live View Screen setting to get a sense of what a final image might look like. The Velvia and Astia Emulations give the LV Screen image a color boost and the ACROS Emulation lets me view the potential of a B+W image. Function Buttons: The Function Buttons are a way for you to customize the settings you want close at hand. For my camera's I have made sure that the button assignments I use are the same on each camera body. There is a slight difference in what you can assign on the X-Pro 2 versus the X-T2, relative to the Front FN Button and the top of the D-Pad. But the other buttons set up the same for each camera. You can assign the various FN Buttons by going to the Set Up Menu > Button/Dial Setting > FN/AE-L/AF-L Button Setting, and work through the diagrams. The following list is how I assign my buttons: Front FN Button On my X-T2 it is set for Face and Eye Detection. On the X-Pro 2 it is set for Bright Frame Simulator and indicates image framing when using the OVF; FN Button > Wireless Communication; Left D-Pad > Film Emulation Mode; Right D-Pad > Timer Setting; Having this handy is very useful when I am shooting a longer exposure without or without my electronic shutter release. Bottom D-Pad > AF Mode; This is Single Point, Zone, or Wide Tracking Top of the D-Pad > AF Custom Settings on X-T2, (This is similar to the Drive Mode on the X-Pro 2). The Drive Mode on the X-T2 is just under the ISO Dial. AE-L Button: This is set to AE-L Only AF-L Button: This is set to AF-L Only Having these set in a similar fashion for both cameras just keeps the mental gyrations while shooting to a minimum. I think setting Function Buttons comes down to your personal way of shooting and camera operations you want at your fingertips. Focusing: I switch between S, C, and Manual focus depending largely on what I am shooting. In operation the S Focus Mode puts the focus at a single point or zone. The C Focus Mode continually seeks focus and is good for moving objects. For my landscape work I shoot in entirely in Manual Mode - manual focus and manual settings - and at the native camera ISO of 200. (more on some of this below). For street work I typically use AF and utilize the Joystick to move the focus point. I will often switch to C Focus Mode and select Continuous Low CL, or Continuous High CH Modes which fires the shutter in high speed bursts when shooting sporting events. CL will shoot from 3 to 5 burst frames and CH will fire from 8 to 14 burst frames. In addition you can couple this with one of the five Custom AF Settings in the X-T2. I am not afraid to work the ISO when shooting on the street and invariably go over 800 to 1000. For Manual Focus I use Focus Peaking. This coupled with the Focus Distance Scale is a great way to dial in your focus and know you have the shot. To set Focus Peaking go to AM/FM Setting > MF Assist > Focus Peak Highlight > Then select your Peaking Option. I use the Red (High). The portrait/street images below were all captured using the concepts I am discussing in this post. All were shot in either AF, S Mode, or Manual Mode using Back Button Focusing, and I used the Joystick to place the Focus Point exactly where I wanted it to be. I love having this kind of control that allows me to craft the image I want. You will notice that I have pushed the ISO around quite a bit and especially so in the lead image of the Lincoln Memorial. While I could set the camera to Auto ISO and set ISO parameters, I tend not to do this and simply select the ISO I feel is right for the scene I am photographing, or to react to my sense of the light, and perhaps what shutter speed I might need for a clean and sharp capture. Jason Masi • Breaux Vineyards, West Virginia. Fuji X-Pro 2 and a Fujinon XF34mm f1.4 R. Image exposed at ISO 200 at f 3.5 for 1/800 of a second. Karolin • Bradenton, Florida. Fuji X-T1 and a Fujinon 55-200mm f2.5 at 120mm. Image exposed at ISO 200 at f4.5 for 1/500 of a second. Nathan • Downtown St. Louis, Missouri. Fuji X-Pro 2 and a Fujinon XF16mm f1.4 R. Image exposed at Iso 400 at f4 for 1/250 of a second. Skyline • Downtown St. Louis, Missouri. Fuji X-Pro 2 and a Fujinon XF16-55mm f2.8 R at 16mm. Image exposed at ISO 200 at f11 for 1/250 of a second. Abby and Maise • Montgomery County, Maryland. Fuji X-Pro 2 and a Fujinon XF16-55mm f2.8 R WR at 23mm. Image exposed at ISO 200 at f4 for 1/500 of a second. Free to Move About the City • Downtown St. Louis, Missouri. Fuji X-Pro 2 and a Fujinon XF16-55mm f2.8 at 23mm. Image exposed at ISO 200 at F5.6 for 1/500 of a second. Kevin • Denver, Colorado. Fuji X-Pro 2 and a Fujinon XF23mm f1.4 R. Image exposed at ISO 800 at f2.8 for 1/100 of a second. The Power of "T", Back Button Focus, and the Distance Focus Scale Now, let's take a look at some other incredible components built into the Fuji X cameras. But, before we go there, I want to talk about the Screen and Viewfinder set-up. The screen set-up is entirely customizable on the Fuji's and can be accessed in the Toolbox Menu. Aside from the usual things you might want such as AF Mode, Film Emulation, and File Type, the four items that are set on each of my cameras, both in the Viewfinder and on the Live View Screen, is the Electronic Level; the Exposure Compensation, set to Scale; the Histogram; and the Manual Focus Scale, set to Feet. Everything else notwithstanding these four singular settings are the most important to my shooting. I almost always shoot in Manual Mode, and to be clear I set the Aperture, the ISO, and the Shutter Speed. I work quicker this way and it is the way that my mind thinks while in the process of making an image. My Exposure Mode is set to Evaluative Metering and I take my light readings using the Exposure Compensation Scale and the Histogram, and more so than not I base my exposure judgements on the Histogram. For street work I will periodically check the meter readings using the Exposure Compensation Scale and set it to 0. This usually gets me to within a stop or so of the right reading when I take a shot. Despite what camera you shoot with I believe having the Histogram viewable while you are making exposure adjustments is a must. With aperture and ISO set then it is a simple matter of just turning the Shutter Speed Dial to manipulate the exposure while looking at the effect in real time using the Histogram. After choosing a shutter speed you can use the front Command Dial to adjust the exposure, up 1-stop and down 1-stop, in 1/3-stop increments. This is quite handy for micro manipulation of the Histogram. But, here is where the Power of the "T" can simplify this even more. The "T" is located on the Shutter Speed Dial, and when set it allows you to use the Front Command Dial (or rear if you set it that way), to manipulate the shutter speed ranging from 30 seconds all the way to 32,000. So, with my aperture and ISO set, and the Shutter Dial set to "T", (see the image to the left), the only thing I have to manipulate is the Command Dial. It could not be more simple and I can quickly change aperture to suit conditions, and manipulate the exposure quickly while using the Histogram. Because the Command Dial moves in 1/3-stop increments as well, I can make micro adjustments to the exposure too. I have both of my cameras set this way and with the turn of the on-button, and a quick read of the light, I am shooting instantaneously. I think at the heart of this set-up is simplification - to simplify the mechanical process and make it automatic - so that I can concentrate on making images. Back Button Focus Now a small word about Back Button Focusing. If you are in Manual Focus Mode and you have the AF-L Button set to AF-L Lock you can use the Button to Back Button Focus. This is a great help for street photography or even for shooting portraits. When in Manual Mode you can use the Joystick to move your focus point, and once you have it where you want it, hit the AF-L Button. The camera will lock focus at that point and you can then press the shutter button as many times as you wish without the camera changing focus. Additionally, if you go to the Set-Up Menu > Button/Dial Setting > AE/AF Lock Mode, and set it to AE&AF On/Off Switch, this will decouple the buttons and allow you to lock focus and exposure when the camera is set to C or S, AF Mode, and you are in Aperture or Shutter Priority. So, much like the Back Button Method, once you have achieved focus, you can select the AF-L Button and it will lock focus until you press the button again. This is the same for the AE-L Button. You will know you are locked in when you see the AF-L and the AE-L indicator in the lower left corner. In the image below I had already locked focus in the zone around the grill using the Back Button Focus, and when Chef Chris hit his Usain Bolt pose, which caught me completely by surprise, I was ready to make a capture without worrying about the autofocus kicking in and perhaps missing the moment. Striking the Pose • Shepherdstown, West Virginia. Fuji X-T2 and a Fujinon XF35mm f2 R WR. Image exposed at ISO 200 at f4 for 1/400 of a second. Fuji's Distance Scale is nothing short of brilliant. Shown below on my Live View Screen, it is the linear graph at the bottom of the screen, just above the shooting data. The White Tick Mark on the graph is the point where I have focused the lens, in this example at 2 feet. The blue line indicates the hyper focus zone of the lens, in this case from just inside of a foot to 5 feet. Since Fujinon lenses are all chipped this information is conveyed to the camera for each focal length. I use this information in concert with Focus Peaking for all of my landscape work and it is extremely accurate. Much like the other settings described in this post this is another technical innovation from Fuji that allows me to focus on image making and not wondering if I am in focus or actually where my hyperfocus zone is located. The Depth of Field Scale has two options - Pixel Basis, and Film Format Basis. Pixel Basis is for images that will be viewed on screens and Film Basis is for images that will be printed. For my work I use the Film Format Basis. To set this go to the AF/MF Setting Menu > Depth of Field Scale > Film Format Basis. The Distance Scale can be set in feet or meters based on your preference, and to set this go to the Set Up Menu > Screen Set Up > Focus Scale Units > Feet. The image below illustrates the base set-up for my Live View Screen which is also mirrored in my Viewfinder. To the left is the Exposure Compensation Scale; to the lower right, the Histogram; and the Focus Distance Scale along the bottom. The Green Line is my Horizon Level Line. Additionally I have the Composition Grid set in thirds. To set up your screen go to the Set Up Menu > Screen Set Up > Disp. Custom Settings and place a check in the box for the items you wish to display. The landscape images below were all shot using the various tools and settings I have outlined. The only real difference comes from my all-manual process when shooting landscapes. This is largely centered around crafting an image with good foreground to back ground sharpness. Utilizing the information in the Focus Distance Scale and Focus Peaking you can achieve some amazing depth of field images, such as the Datura and Cabin image below. I think the creation of the image, and in fact the best images, come when you are free to experience and react to the situation. This can only happen when you are engaged with the scene before you and not buried deep in your menus. In photographic terms, almost nothing is worse than missing the key moment because you were not able to respond to the changing conditions or were buried within the camera settings. In my honest opinion, and largely one of the reasons I made the switch to Fuji, the beauty of the X System is that they have engineered cameras for photographers, that once set-up properly, magically get out of the way of making images. Hopefully the information contained in this post will give you some insights in to how I set up my cameras and help you see the possibilities for customization. The best camera is the one you have in your hands but it is even better when it gets out of the way of making images. It can be a painful process to go through your camera manual, and honestly, I would rather do anything else but wade through them. But if you tackle it in chunks it is not too bad and it will help you gain control over your camera. And when you have control of the camera , it does not have control over you. If you have any questions please drop me a comment. As always thanks for stopping by and I appreciate your support.

Fujifilm X-E3 my review

Fujifilm designed the new X-E3 to be an ultra compact rangefinder-style mirrorless camera you can slip in a pocket and get professional-quality results with. The idea seems to have been to craft a super-portable point-and-shoot that even casual users can carry anywhere, without sacrificing the image quality X-series users are accustomed to. If that was the intent, then Fujifilm has hung the moon.

P_20171126_104340-01.jpg


Fujifilm X-E3: Specifications

  • 24.3MP X-Trans CMOS III sensor
  • X-Processor Pro engine
  • Fujifilm X mount
  • ISO 200-12,800 (ISO 100-51,200 extended)
  • 4K UHD video recording, 30/25/24p
  • 325 AF points, upgraded tracking capabilities
  • 0.39in OLED viewfinder, 2,360,000 dots
  • 3in fixed touchscreen, 1,040,000 dots
  • Focus lever
  • Film Simulation modes
  • Wi-Fi and Bluetooth Low Energy
  • SDHC/SDXC card slot (inc. UHS-I)
  • 350-frame battery life
  • 121.3x73.9×42.7mm
  • Approx. 337g (without lens, inc. battery and card)

Look and Feel

As a physical object, the Fujifilm X-E3 is a thing of beauty. Measuring just 4.8 x 2.9 x 1.7 inches, it's significantly cut down in size from the other X-E series cameras, and running your hand over it gives you nothing but flat planes and smooth curves. There's almost nothing on the surface of this camera to snag on your pocket if you're grabbing it in a hurry, and at just a whisper less than 12 ounces, it's clear Fujifilm was thinking more about pockets than gear bags when they designed it.

User Interface

One of the ways Fujifilm got this economy of size was by getting rid of the pop-up flash and eliminating the bulky EVR hump over the sensor aperture. The design team also made the radical (for Fujifilm) decision to eliminate the D-pad control switch in favor of a surprisingly intuitive touchscreen swipe control with all the same functions. This works surprisingly well, and after a little practice thumb-swiping while peering through the viewfinder it feels as natural as the D-pad ever did.

Ease of Use

The X-E3 is almost embarrassingly easy to use. Basically, this camera has two modes: automatic and manual. All the custom settings a professional photographer could want are there in manual operation, which lets you control every detail of the shutter speed, depth of field, and other factors that affect an image. Or, you can switch it over to automatic and the X-E3 will handle all of that for you, remembering to restore your settings when you switch back out of automatic mode.

Accessories

The Fujifilm X-E3 retains the X-mount front of the other models in its line, so it works seamlessly with around two-dozen official Fuji lenses that are already on the market. If you happen to have a lens already, you can order the X-E3 as-is, without the two available kit lenses. Lacking a built-in flash, your only option for lighting up a scene is to mount the included EF-X8 flash on the X-E3's flat top, though its hot shoe works just fine with whatever aftermarket lighting rig you feel like putting up there.

Image Quality

Image quality doesn't seem to suffer at all with the X-E3. It uses the same sensor as the other X-E-series Fujifilm cameras, and nothing has changed about its broad dynamic range and super-sharp resolution. Colors are vibrant and rich straight out of the camera, whether you're working with jpegs or RAW files, and relatively little touch-up is needed, even for professional-quality images.

Walking the dog...early morning...in Venice (Fujifilm XE3)

Walking the dog...early morning...in Venice (Fujifilm XE3)

Fujifilm clearly intended the X-E3 to be a lightweight, versatile lifestyle and travel camera that anybody could use to get great results, even if they know next to nothing about digital photography when they pick it up. By cutting away most of the distractions from the already-slim X-line of cameras, and by combining a sleek, intuitive user interface with an automatic mode that does the much of the thinking for you, they have made something close to the ideal casual carry camera for professional and amateur photographers alike.

Fujifilm XE3 final verdict

The Fujifilm XE3 is a very satisfying mid-range mirrorless camera it will suit anyone entering the World of interchangeable lens photography. For the seripus amater or professional I would suggest to stick to the XT-2. For sure the XE3  feels responsive, handles well, and delivers great-looking 24 Megapixel photos and 4k video with minimal effort. It features a built-in viewfinder, touchscreen with clever gesture controls, an AF joystick for those who prefer a more conventional touch, and Bluetooth to aid with Wifi connections to your phone. 
 

Black Friday at Peak Design

Black Friday Sale

Thursday Nov. 23rd through Monday Nov. 27th

  • 25% off all Everyday Messengers
  • 15% off all Clips, Straps, Pouches, Accessories
  • 10% off other Everyday Bags

Not to be missed. Click here

Screen Shot 2017-11-23 at 10.37.38.jpg

Leica M10 - My impressions

I have owned and used a Leica M10 for about 2 months and these are my impressions

Leica has listened to their users and addressed many of their concerns. The highly anticipated Leica M10 is slimmer which makes it easier to handle and more comfortable to hold. A slew of other features that were upgraded with this camera include:

Screen Shot 2017-11-18 at 15.51.46.jpg
  • Thinner and lighter body
  • Bigger and brighter rangefinder
  • Configurable Favorites menu replaces the Set menu
  • Higher resolution rear LCD with a changed aspect ratio
  • Simplified button layout
  • Redesigned and dedicated ISO dial
  • Improved weather sealing
  • Faster buffering, processing and writing to disk
  • Continuous shooting is lightning fast
  • Superior high ISO capability
  • Shoot wide aperture in good light with ease with the 100 ISO base
  • Equipped with the Visoflex EVF for higher resolution and bright and clear images
  • Less shutter lag and blackout with the live view feature
  • Ability to move the exposure and zoom focus point while in live view

You get all these great features that the other cameras do not have and the only sacrifices you'll have to make are reduced battery life and no video.

This great little camera is about 50 grams lighter than the previous camera with dimensions being identical to the M6ttl and the M7. The thumb grip is a little deeper for a better grip and adds to the comfort level.

The redesigned rangefinder is about 30 percent larger and has a magnification of .72 versus the .68 found on previous cameras. This subtle improvement means you can see the 28 mm frame lines more easily and focusing is much easier with the high magnification.

Weather sealing makes shooting in bad weather easier. You still have to protect the camera when shooting in the rain because the M10 cannot be entirely weatherproof. But, the camera will be fine even in the rain if handled with care.

When you press the Menu button, it brings up the Favorites menu which replaces the Set menu in previous cameras. The Favorites menu is a handy option since you can add any options you choose to this menu. Even better, you can configure a Favorites menu for each of your User Pre-Sets.

The ISO dial has a nice look and feel. And, with all three principle variables for exposure - shutter speed, aperture and ISO - intelligently made visible on the outside of the camera, using the camera has never been more convenient. The dial has options for 100, 200, 400, 800, 1600, 3200 and 6400 ISO. The auto option is marked by a red A while an M marks the option for Menu. The figures on the dial always override what is set in the Menu.
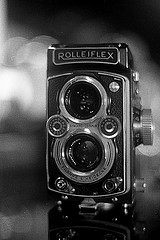
Although battery life is shorter than in previous cameras, Leica has improved battery life reporting. You start getting warnings from about 5 percent that you are low on battery life. The battery life remaining reduces evenly and the camera works until the battery dies. The INFO screen shows the battery life remaining as a long bar and as a percentage. The bar will be coloured green at 100 percent and will gradually go through yellow to red once you reach 5 percent.

One thing I must say puzzels me

Leica Partnered up with Huawei Android phone. For the M10 there is an iPhone app not compatible with Android. Selling in same-store Android phones AND a camera that cannot use the android app!  This questions logic big time!  And will there be one? In order at least  to restore logic? My Fuji has no problem in connecting with Andorids or IOS ;-)

I have sold my trusted M240 that I will occasionally miss, sold my Leica Q (I never liked, preferred one of my Fujifilm) and kept my Monochrom!

If you're looking for a great camera that has made some drastic improvements, then the Leica M10 is for you. It is designed for easy handling and the upgrades ensure you'll get the best shots.

Luminar 2018 by Macphurn

Editing a photo can be as easy as applying a one-tap filter in Instagram or as complex as creating a multilayered piece of artwork in Adobe Photoshop. Macphun Luminar 2018 is the in-between, covering the gamut from easy to advanced

Luminar 2018 Mac_3.png


Luminar 2018 offers everything a modern photographer needs for photo editing, including new filters powered by artificial intelligence, major speed improvements, a dedicated RAW develop module and a forthcoming in 2018; digital asset management platform.

Users will also benefit from the new intelligent Sun Rays filterLUT support, and real-time noise removal. With workspaces that match different styles of editing, Luminar adapts to deliver a complete experience that avoids clutter and complexity.

Luminar 2018 has been re-built from the ground up for dramatic performance boosts. Existing filters deliver richer colors and depth in less time. A brand new streamlined user interface speeds up working with presets, filters, and masks. With full support of pro options like layers, masks, and blending modes, complex repairs and photo composites can be easily accomplished.

Offer Availability:

You can buy Luminar 2018 here

The Luminar 2018 Black Friday offer will be available from November 21-29 click here

Pricing:

  • Current users of Luminar may upgrade at a Black Friday price of $49 ($39 with your coupon code)
  • New users can purchase Luminar 2018 for $69 ($59 with your coupon code)
  • A collection of bonuses will also be included with every purchase.

Bonuses:

  • A Pack of Urban presets from Contrastly
  • Creative Look LUTs Collection for use in Luminar 2018
  • The Ultra-Wide Landscape Ebook by Ian Plant
  • Lights&Shadows Photo Training Video by Matt Granger

Luminar is a sort of mix between Lightroom and Photoshop. Sure, the image management feature isn’t here yet, and it’s not the graphic design powerhouse that Photoshop is, but it mixes the broad strokes of RAW processor with the fine tuning abilities of a powerful image editor, including support for adjustment layers. For the unfamiliar, layers allow users to choose different blending modes — similar to Photoshop — as well as adjust the opacity. With layers, you also have options for masking and copying entire sets of adjustments. These layers can be removed, and you don’t “damage” the original image, and it’s why photo-editing experts rely on layers in their workflow.

Luminar 2018 adds a number of unique filters and adjustments. One favorite of ours is the sunrays filter, which lets you add artificial light rays and adjust the glow of the surrounding area. When done right, the effect looks realistic.

Presets_3.png

Ona Bag Prince Street

I believe you can never have an excess of camera bags  and I trust that everybody needs to have an OnaBags. The quality is unparalleled and the look is at the same time advanced and fantastic. While pricey, these sacks will endure forever. 

The trendy and cool outline of the new ONA Prince Street camera bag bounce out at you promptly. Upon closer examination you understand it is not just another pretty bag, it is as well an exceptionally tough, down to earth messenger bag for a reduced DSLR or full mirrorless camera pack. It comes in two styles - waxed canvas with full-grained cowhide trim, or full calfskin. In both styles the fine materials and workmanship of the bag is truly evident. 

The general configuration is genuinely essential with three dividers (more accessible as extras), two substantial extending front pockets and a back laptop or tablet space. Two front calfskin straps shroud the real metal catches that are effortlessly secured or un-affixed with one hand. The straps are movable to take into account extension. 


At $269 for the waxed-canvas model and $389  and in my view the the cost is completely justified by the workmanship and materials notwithstanding the in cool great looks that is going to improve as the bag age.

On the off chance that you are searching for a strong, fundamental travel bag with a great deal of style yet very few superfluous fancy odds and ends, the ONA Prince Street is something to consider for either a little DSLR unit or mirrorless camera framework. 

I use mine easily with the two leicas and 2 extra lenses and works great!


Weight: 2.6 pounds 

Outside measurements: 12.5"L X 10"H X 4.5"D 

Inside measurements: 12"L X 9"H X 4"D

What is in My Bag n1

The following is my typical full Leica Bag

Ona Bags The Prince Street in Smoke

Leica M 240

Leica M246 Monochrom

Voightlande 21 mm f1.8

Leica 35 mm Summilux f1.4

Leica 50 mm Summilux f1.4

Leica 90mm Summicrom  f2

Half Leather case Angelo Pelle

Straps by Peak Design

Think Tank memory cards wallet

Tile Tracking Device

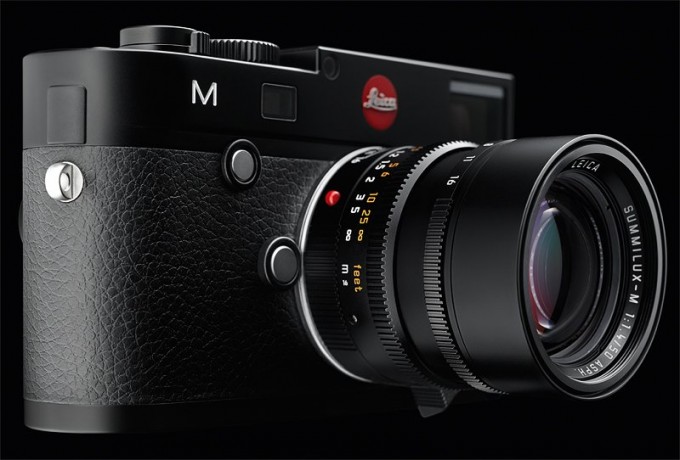
Leica M (Typ 240)

Leica-M-second-picture-680x460

My favorite camera is obviously the Leica, the latest addition to my collection is the M or 240 Type. I shoot most of my portraits, features and reportage using this camera with either the 35 1.4 Summilux or the 50mm 1.5

The Leica M 240 is a digital rangefinder camera with a full-format 24 x 36 mm sensor. As the world’s most compact full-format system camera, the Leica M 240 extends the legendary heritage of the Leica rangefinder M System and unites over 50 years of continuous technical improvements to the system with the best in cutting-edge digital technology.

The Leica M is a digital full-frame 35 mm rangefinder camera. It was introduced by Leica Camera AG in September 2012, and is the successor to the Leica M9 range of cameras. The M uses a 24-megapixel image sensor. The camera is the first M model to feature movie recording, and the first to have Live View—which allows the scene, as seen through the lens, to be composed.The M is compatible with almost all M mount lenses and most R mount lenses (via an adapter). All Leica M cameras are handmade in Portugal and Germany.

The M uses a CMOS 24-megapixel image sensor designed exclusively for Leica by the Belgian company CMOSIS. The sensor contains 6,000 by 4,000 pixels on a 6 x 6 µm² grid, and is made by STMicroelectronics in Grenoble.

The M supports most M-mount lenses, and with an optional R-Adapter, the camera can use almost all Leica R-mount lenses.Live View allows owners of R-lenses to use an optional electronic viewfinder.

The camera uses a MAESTRO image/video processor which is based on the Fujitsu Milbeaut. It has specifically-designed rubber seals (to protect against dust and water spray).

Peak Design System

I’d almost given up on finding a good camera strap solution for the way that I work but luckily I found Peak Designs .  The problem for me is that I often don’t want to have a strap on the camera at all, sometime I just like to use a cuff or a clutch and why notalight strap.   Most strap solutions gravitate towards using big bulky padding of some sort and that makes them both expensive and cumbersome to carry around for the small number of times I find myself looking for a new one. .  I’ve got several straps in my gear closet but all of them gather dust.  They are just too big and overly complex with these slider mechanisms that people seem so fixated with.  I guess if you walk around 12 hours a day with a camera on your shoulder then it might seem more useful but for the way I work it’s just not necessary.  Thing is though,  there’s always some point where I wish I had a shoulder strap with me.  Up until this point though I hadn’t seen a solution that gave me what I wanted.

The Micro Anchor system is the key to making the Leash easy to use and versatile.  Each Anchor is rated to hold 100lbs so you can easily carry your camera kit or even a supertelephoto lens.  The Leash and the Cuff both come with 4 Anchors.  Once you slide them into clip on the Leash and give it a tug you’ll hear it click into place.  To detach the Leash you have to push down on the Anchor and slide it back out of the clip.  It’s a secure system that I loved and trusted straight away.


There’s also an anchor point on the adjustment buckle for the Leash.  This means that you can create a loop for tethering your camera to either yourself or a static object like a railing if you are shooting from a building.  If you are carrying a backpack you could also tether the camera to your bag to save it if you ever dropped it.  Speaking as someone who has often found myself peering over the tops of buildings, lookouts, bridges and cliffs, this is an awesome little feature that I’ll be using a lot.

http://peakdesign.com

This post has received discount on Media samples. For more information, check out my full disclaimer policy.

Leica M3 and M2

My Leica M3 Camera

The Leica M3 is perhaps the one camera that does not actually require an introduction. Voted by STUFF Magazine and Ebay as the “Top Gadget of All Time”

The epitome of vintage style, the Leica M3?s modern incarnations are still held as pinnacles of camera design and lusted by photographer all over the world.

Just the fact that since the Leica M3?s introduction 1954, the basic design of Leica M cameras has not really changed is a testament to how well conceived the Leica M3 is. In fact, one could argue that Leica built such a great camera that they haven’t really done much else since.

The Leica MP, introduced in 2003, nearly 50 years after the Leica M3, is just an inferior, and far more expensive, modern copy.The Leica M3 is Leica’s greatest achievement and also a stark reminder of it’s glorious past.

The Leica M3 was in production for 13 years. Do you know how many M cameras Leica has released in the last 13 years? Eight! That’s roughly one camera every 18 months. You have the Leica M7, MP, M8, M8.2, M9, M9P, M-E and the Leica M Type 240. Leica have become just like every other camera manufacturer in the digital world, pumping out a new camera every 18 months to two years. That’s not even counting their partnership with Panasonic!

In 1954 the Leica M3 inaugurated a completely new era of 35mm cameras. Though SLRs had started to appear earlier (e.g. the Exakta system from the late 1940s), the multiple-frameline rangefinder by Leica offered

the smoothest, fastest, most robust shooting experience available, coupled with the then-already optically superior Leitz lenses.

These cameras were constructed to the absolute highest standards of quality and maintainability (everything was designed to be adjustable over a long, long lifespan). As such, as long as the rangefinder optics are clean (the balsam glue of the beam splitter have a tendency to fail after about 40 years on some examples of the M3, fading or completely disabling the rangefinder) this is a very 'safe' camera to buy on eBay.

My copy (a late-model, single-stroke) truly looks and functions like a new camera, despite it's age of 52 years. It's quickest, smoothest, quietest camera I own. Rangefinders are, of course,much more limited than their SLR counterparts, and this could not be considered a "general purpose" camera anymore, but for anybody still practicing the art of developing and printing their own photographs in an analogue manner, the Leica M3 offers arguably the best body to obtain the ultimate image quality possible from the 35mm format.

Being the first "M", the collectivity (value) of the M3 is sure to increase with time, and finally, as an object considered in its own right (not as a tool) the M3 has timeless beauty and pureness of design.

Regarding lenses, nothing fits a Leica M3 better than a Summicron 50mm f/2 - it's small, chromed, and likely the highest-performance M-mount lens yet made (according to several tests). With this lens, you can imagine the M3 being a fixed-lens camera, it's so compact and well-matched. If the light is good, shoot some Ilford Pan F, and be prepared for prints of unmatched quality from the 35mm format.

Mamiya RZ67 Pro II

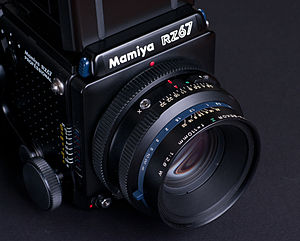
English: Mamiya RZ67 Professional camera, lens...

The Mamiya RZ67 is my medium format single-lens reflex system camera manufactured by Mamiya. There are three successive models: the RZ67 Professional (first model

released in 1982), RZ67 Professional II (released in 1995) and RZ67 Professional IID (released in 2004). RZ67 is a modular camera system, meaning lenses, viewfinders, ground glasses, film winders and film backs are all interchangeable. It is primarily designed for studio use, but can also be used in the field. The RZ67 Sekor lenses have built-in electronic leaf shutters which are cocked and triggered from the body. Focusing is performed with a bellows on the body instead of the lenses.

The camera accepts 6x7, 6x6 and 6x4.5, 120 and 220 film magazines and Polaroid as well as Quadra 72 4x5 sheet film backs. Mamiya RB67 backs are also supported via the G-Adapter. The film speed is set on each RZ back via a dial. There are two versions of the 6x7 and 6x4.5 backs, the model II versions have a second film counter to always show the film count on the top. The RZ67 operates on one 6V silver oxide 4SR44 battery, or 6V 4LR44 alkaline battery. It can be used in emergency mode fully mechanically with a fixed 1/400 sec shutter speed. Multiple exposures are possible in the M-mode. Mirror flip up is supported. The body has one standard flash hot shoe on its left side, one plug for a standard remote shutter cable release, and a socket for an electronic shutter trigger. The RZ67 measures 104 mm (W) x 133.5 mm (H) x 211.5 mm (L) with the 110mm f/2.8 lens, and weighs approximately 2.4 kg (5.29 lbs). The flange distance is 105 mm.

The RZ67 name is adopted from the model name of the Mamiya RB67 (where RB stands for Revolving Back), which was first introduced in 1970, thus the RZ67 also takes backs which can be rotated 90 degrees to provide a horizontal or vertical composition. The orientation is shown in the viewfinder with black guides. The viewfinder also hosts LEDs informing of the state of the camera (flash ready, low battery, dark slide not removed, shutter not cocked). In addition to manual operation (photographer chooses aperture and shutter speed), the RZ67 is able to operate in AEF mode with an AE viewfinder (AE being an abbreviation for automatic exposure), which transmits exposure information directly to the body. In RBL compatibility mode, the RZ67 is able to use RB67 lenses. The biggest difference between RB67 and RZ67 is, that RB67 is completely mechanical. The RZ67 has also mechanical couplings between the parts, but the shutter is electronic, and parts are able to transmit exposure information with electronic couplings. In addition, the RZ67 has plastic exterior body, which makes it somewhat lighter.

My Fuji X Series Cameras & Lenses

little fujiMy fav. at present is The Fujifilm XT1After starting at the top-end with its X-Pro1, Fujifilm has been steadily expanding its X-series mirrorless camera to appeal to a broader audience. With its X-T1, Fujifilm has moved back towards the high-end, offering a fully-loaded mirrorless camera in a weather-resistant, SLR-style body. There's plenty more where that came from - the X-T1 has one of the largest EVFs we've ever seen, numerous manual control dials and, for the first time on an X-series camera, an optional battery grip.

The 'guts' of the X-T1 are very much like those found on the recent X-E2. This includes the 16 megapixel X-Trans CMOS II sensor (with on-chip phase detection), EXR Processor II, built-in Wi-Fi, and full HD video recording. The main differences between the X-T1 and X-E2 are the LCD (tilting vs fixed) and EVF (in terms of magnification), the maximum burst rate (8 vs 7 fps, now with focus tracking at full speed), a flash sync port and, of course, the design.

The Fuji X series walk-around cameras that can be adapted for wedding work, editorial work heck, even commercial work.

With these cameras I feel unstoppable. Invincible. I no longer need to carry  heavy bulky DSLR around all day – with these cameras I am able to carry an entire kit in a shoulder bag and never tire. With these cameras I rarely miss a photo because I have always have a camera with me.

With these cameras I am stealthy, quick, unobtrusive, silent, a rocket for recording the extraordinary in the mundane of the everyday. My photography changed!

The Fujifilm X-Series range of digital cameras consists of the company Fujifilm's high-end digital cameras and is aimed professional and keen enthusiast photographers. It is part of the larger range of Fujifilm's digital cameras. X-Series itself is not unified by a common sensor size, technology or a lens format. Its main differentiating feature is the emphases on the controls needed by an advanced digital camera user.

I have owned or own at present the following Cameras

  • Fujifilm X100: prime lens digital camera that uses a custom APS-C sized CMOS sensor and Hybrid Viewfinder, and fixed 23mm F2.0 Fujinon lens. Announced at Photokina, September 20, 2010, the X100 launched globally in March 2011. Succeeded by Fujifilm X100S. SOLD
  • Fujifilm X10: advanced compact featuring a 2/3-inch 12-megapixel EXR-CMOS sensor and a high-definition F2.0 wide-angle and F2.8 telephoto Fujinon 4x manual zoom lens (28-112mm). Announced September 1, 2011. Succeeded by Fujifilm X20 SOLD
  • Fujifilm X-Pro1: Mirrorless interchangeable-lens camera that uses the "X-Trans CMOS" sensor and the Fujifilm XF-mount system of lenses. It was announced in January 10, 2012, and launched in March 2012. SOLD
  • Fujifilm X-E1: Mirrorless interchangeable-lens camera which is a slimmed-down version of X-Pro1. The modifications include removal of expensive hybrid finder replaced by an upgraded electronic viewfinder. New EVF uses a 2.36M dot OLED unit, out-speccing the X-Pro1's 1.44M dot LCD finder. It was announced on September 6, 2012. SOLD
  • Fujifilm X20: is an the replacement of X10 enthusiast compact camera featuring 2/3-inch X-Trans CMOS II sensor, EXR Processor II and a new advanced optical viewfinder. It was announced onn January 7, 2013.
  • Fujifilm X100S: a redesigned version of the X100 with new sensor-based phase detection, same sensor as Fujifilm X-E2. It was announced January 7, 2013. SOLD
  • Fujifilm X-E2: successor to the X-E1, featuring X-Trans CMOS II sensor, larger (3") screen with higher resolution (1.04 M), Digital Split Image technology, Wi-Fi. Announced on October 18, 2013.
  • 2 Fujifilm XT1 a new camera with a weather-sealed body featuring X-Trans CMOS II sensor and tilting LCD screen. It was announced on January 27, 2014. Also the first X-series camera with an optional battery grip, and the first camera from any manufacturer to fully support UHS-II SD cards.

I have the following Lenses

  • Fujinon XF18mm F2 R18mm focal length (27mm equivalent) F2.0-F16 aperture SOLD
  • Fujinon XF35mm F1.4 R35mm focal length (53mm equivalent) F1.4-F16 aperture
  • Fujinon XF60mm F2.4 R Macro 60mm focal length (91mm equivalent) F2.4-F22 aperture SOLD
  • Fujinon XF18-55mm F2.8-4 R LM OIS 18-55mm focal length (27-83mm equivalent) (F2.8-F4)-F22 aperture
  • Fujinon XF14mm F2.8 R14mm focal length (21mm equivalent) F2.8-F22 apertureSOLD
  • Fujinon XF55-200mm F3.5-4.8 R OIS55-200mm focal length (83-300mm equivalent)
  • Fujinon XF23mm F2.0 R 23mm focal length (35mm equivalent) F2.8-F22 aperture
  • Fujinon XF27mm F2.8 R 23mm focal length (41mm equivalent) F2.8-F22 aperture
  • Fujinon XF 50-140mm f/2.8 R LM OIS WR: A weather-resistant fast telephoto zoom with image stabilization, covering focal lengths equivalent to 75–210mm on full-frame. Officially announced on September 10, 2014.
  • Fujinon XF 18-135mm f/3.5–5.6 R LM OIS WR: A weather-resistant, image-stabilized superzoom, covering focal lengths equivalent to 27–202.5mm on full-frame. Officially announced on June 16, 2014.
  • Fujinon XF 16-55mm f/2.8 R LM WR: An enthusiast-level standard zoom, covering focal lengths equivalent to 24–82.5mm on full-frame, featuring weather-resistant construction. This lens was originally expected to be available in mid-2014, but has been delayed. Officially announced on January 6, 2015 during CES 2015.

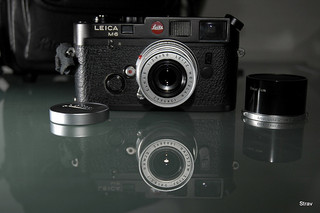
Leica M6

The Leica M6 is a rangefinder camera manufactured byLeica from 1984 to 1998.

Leica M6 Wetzlar, Elmar 50, ITOOY

The M6 combines the silhouette of the Leica M3 with a modern, off-the-shutter light meter with no moving parts and LED arrows in the viewfinder. Informally referred to as the M6 "Classic" to distinguish it from the "M6 TTL" models, and to indicate its "Classic" M3 dimensions. The top and bottom plates were made from lighter, cheaper magnesium alloy rather than the heavier machined brass of the M3. The M6 and M6 TTL are mechanical cameras; all functions save the light meter work without batteries, unlike the succeeding M7, which needs electrical power to operate properly.