Exploring Budapest Through the Lens: The Enriching Experience of a Photo Walk or Photography Workshop

With its rich history, stunning architecture, and vibrant street life, Budapest is a paradise for photographers. Whether you're an amateur with a keen eye or a seasoned pro, a photo walk or a photography workshop in this beautiful city is an opportunity to capture stunning images and an enriching experience that can transform your photographic skills and perspective. Here’s why a photography journey through Budapest is a must.

The Charm of Budapest

Budapest is often called the "Paris of the East," and it's easy to see why. The city boasts a blend of architectural styles, from Gothic and Baroque to Art Nouveau and modernist structures. The Danube River bisects the city, offering picturesque views of the iconic Chain Bridge, the grand Parliament Building, and the historic Buda Castle. The charm of Budapest lies in its contrasts: grand boulevards juxtaposed with narrow, winding streets; bustling markets next to serene thermal baths; and opulent palaces alongside remnants of its communist past.

Why a Photo Walk?

A photo walk is more than just a stroll with a camera. It’s an immersive experience that allows you to see a city from a different perspective. Here’s why a photo walk in Budapest is particularly special:

  1. Discover Hidden Gems: Budapest is full of hidden gems waiting to be discovered. From the quirky ruin bars in the Jewish Quarter to the vibrant street art that adorns the walls of the city, a photo walk can lead you to unexpected treasures that you might otherwise overlook.

  2. Engage with Locals: Engaging with locals can add a unique dimension to your photos. Whether it's capturing the lively atmosphere of the Great Market Hall or the serene moments in a local café, interactions with the people of Budapest can provide compelling subjects and stories for your photography.

  3. Improve Your Skills: Walking through Budapest with a camera in hand is a fantastic way to practice and improve your photography skills. The city's diverse scenes offer endless opportunities to experiment with different techniques, from street photography to architectural shots.

The Value of a Photography Workshop

While a photo walk can be a solo adventure, a photography workshop adds a layer of structured learning and professional guidance that can significantly enhance your experience. Here’s why participating in a photography workshop in Budapest is invaluable:

  1. Expert Guidance: Led by professional photographers who know the city intimately, workshops provide tailored advice and tips to help you capture the best shots. You’ll learn how to use light effectively, compose your images, and master your camera settings.

  2. Hands-On Learning: Workshops often combine theoretical lessons with hands-on practice. You’ll receive immediate feedback on your work, which can accelerate your learning process and help you overcome specific challenges.

  3. Networking Opportunities: Joining a workshop means meeting other photography enthusiasts. This can be a great opportunity to exchange ideas, share experiences, and build lasting connections.

  4. Unique Locations: Workshop leaders often have access to unique locations and insider knowledge that you wouldn’t find in guidebooks. Whether it’s a rooftop with a panoramic view of the city or a secluded spot along the Danube, these exclusive access points can lead to extraordinary photos.

Capturing the Spirit of Budapest

Budapest is a city that tells a story in every corner, and capturing its spirit through your lens can be incredibly rewarding. Whether it's the haunting beauty of the Shoes on the Danube Bank memorial, the grandeur of St. Stephen's Basilica, or the vibrant life in its many thermal baths, each photo you take will be a piece of Budapest’s soul.

Conclusion

Embarking on a photo walk or joining a photography workshop in Budapest is more than an opportunity to take beautiful pictures—it's an experience that enriches your understanding of the city and hones your photographic skills. The city’s blend of history, culture, and modern vibrancy provides a perfect canvas for creativity. So, grab your camera and immerse yourself in the visual feast that is Budapest. Whether you're capturing its timeless elegance or its everyday moments, Budapest promises a photographic journey like no other.

Check my Budapest Workshops here

Why I Decided to Part Ways with TripAdvisor

I am often asked why I decided to leave Tripadvisor where I had more than 500 only 5* reviews…..

In the early days, TripAdvisor felt like a revolution—a place where feedback was king, and the best experiences rose to the top purely through customer satisfaction and word of mouth. I was there from the beginning, embracing the platform as a valuable tool for sharing and discovering genuine travel experiences. However, as the years have passed, my relationship with TripAdvisor has changed, leading me to the difficult decision to part ways. Here's why.

From Feedback to Sales

Initially, TripAdvisor was purely a feedback website, a space where honest reviews could guide travelers to make informed decisions. Your ranking on the site was a direct reflection of the quality of your service as perceived by your clients. It was a system that felt fair and transparent, rewarding those who went the extra mile to ensure a memorable experience for their guests.

The Shift Towards Selling Experiences

The turning point came when TripAdvisor began selling experiences, transforming from a review platform into a marketplace. This shift marked a significant departure from its original ethos. The criteria for ranking started to blur, increasingly influenced by where the site could make more money, especially if you were selling your tour through Viator, their affiliated booking platform.

The Introduction of the Accelerate Plan

The introduction of the Accelerate plan further compounded my concerns. This scheme allows operators to decide what percentage of their earnings they want to pay to Viator, with the option to go as high as 51%. This means that regardless of the quality of your service or the number of positive reviews you have, your visibility on TripAdvisor is now heavily influenced by how much you're willing to pay. In essence, it has become a bidding war, where those with deeper pockets—or willingness to sacrifice their margins—can dominate visibility, overshadowing smaller, quality-focused operators.

A War Against Authenticity

This pay-to-play model feels like a war against the very authenticity and quality that platforms like TripAdvisor were supposed to champion. As an award-winning photographer and workshop leader, I base the prices of my tours on the value of my time, the depth of my expertise, and my commitment to transferring knowledge to my guests. This includes countless hours dedicated to improving my skills and expanding my knowledge to ensure the highest quality experience possible. My pricing strategy is not, and should not be, determined by the demands or commission structures of a third-party platform.

Moving Forward

The decision to leave TripAdvisor was not made lightly. It stems from a desire to stay true to the values that have always guided my work: authenticity, quality, and a deep respect for the experiences I share with my guests. In an era where the digital landscape is increasingly commercialized, I believe it's more important than ever to stand firm in our commitment to these principles.

For those who have followed and supported me through TripAdvisor in the past, I want to extend my heartfelt thanks. Your feedback and engagement have been invaluable. As I move forward, I remain committed to offering unique, high-quality photography workshops and masterclasses in Venice, Ljubljana, and Budapest. I invite you to join me directly on my journey, away from the noise and competition of platforms that no longer serve our best interests.

Together, we'll continue to explore the beauty of photography and the world around us, unencumbered by the constraints of algorithms and bidding wars.

Thank you for your continued support and understanding.

On the obsession of Dept of Field

English: DOF scale detail on a Nikon lens

I'm in a good mood generally, and not going to rant, but sometimes I get the impression that some photos have super shallow DOF because the photographer can get it, regardless of artistic value or purpose.That kinda reminds me of a friend of mine an excellent Scottish Musician that he told me  that an awful lot of (usually younger) players, seem to think that playing fast is an accomplishment worthy of wonder in itself.It just isn't music... as shallow DOF sometimes isn't photography.

Consider the irony here. For most its history, among the greatest technical challenges of photography was obtaining even adequate depth of field. From extreme lens movements to big lights, tiny apertures, long exposures, and multiple flash pops, photographers bent over backwards simply to get enough of their subject into focus.

As is often the case, people tend to follow trend so if shallow DOF is "in" then masses are going to follow until something else takes it's place. With more dof, one has to take more care "Arranging all those in-focus elements into coherent form".......definetly adds to the challenge of the shot and I suppose brings out the additional skills of the photographer.

How did we go on before "fast lenses"......we either accepted the BG or simply didn't take the shot!

These days, it's that for "professional looking" photographs they should buy fast lenses and then use them at their widest apertures. I've begun hearing them criticize slower lenses and smaller sensors for their lack of "depth of field control." That term once meant something more subtle  now it seems to have become merely shorthand for "Right, let's see how shallow this thing can focus." It's all about blur, baby, blur!

Really low DoF does get tired quickly but a lot of portraits wouldn't be the same without it. When looking through some sets of photos I can't help but think "Yeah, alright, you have bought a 1.4 lens, I get it"

The current photography hobbyist obsession seems to regard minimal depth of field as a hallmark of a memorable image, some of us relics from the film age might argue pretty much the opposite. The richest photos the ones we return to again and again, seeing more each time most often work in layers. They show more rather than less, taking in the full spatial depth of our world rather than just one razor-thin slice of it.

What is in My Bag n1

The following is my typical full Leica Bag

Ona Bags The Prince Street in Smoke

Leica M 240

Leica M246 Monochrom

Voightlande 21 mm f1.8

Leica 35 mm Summilux f1.4

Leica 50 mm Summilux f1.4

Leica 90mm Summicrom  f2

Half Leather case Angelo Pelle

Straps by Peak Design

Think Tank memory cards wallet

Tile Tracking Device

Peak Design System

I’d almost given up on finding a good camera strap solution for the way that I work but luckily I found Peak Designs .  The problem for me is that I often don’t want to have a strap on the camera at all, sometime I just like to use a cuff or a clutch and why notalight strap.   Most strap solutions gravitate towards using big bulky padding of some sort and that makes them both expensive and cumbersome to carry around for the small number of times I find myself looking for a new one. .  I’ve got several straps in my gear closet but all of them gather dust.  They are just too big and overly complex with these slider mechanisms that people seem so fixated with.  I guess if you walk around 12 hours a day with a camera on your shoulder then it might seem more useful but for the way I work it’s just not necessary.  Thing is though,  there’s always some point where I wish I had a shoulder strap with me.  Up until this point though I hadn’t seen a solution that gave me what I wanted.

The Micro Anchor system is the key to making the Leash easy to use and versatile.  Each Anchor is rated to hold 100lbs so you can easily carry your camera kit or even a supertelephoto lens.  The Leash and the Cuff both come with 4 Anchors.  Once you slide them into clip on the Leash and give it a tug you’ll hear it click into place.  To detach the Leash you have to push down on the Anchor and slide it back out of the clip.  It’s a secure system that I loved and trusted straight away.


There’s also an anchor point on the adjustment buckle for the Leash.  This means that you can create a loop for tethering your camera to either yourself or a static object like a railing if you are shooting from a building.  If you are carrying a backpack you could also tether the camera to your bag to save it if you ever dropped it.  Speaking as someone who has often found myself peering over the tops of buildings, lookouts, bridges and cliffs, this is an awesome little feature that I’ll be using a lot.

http://peakdesign.com

This post has received discount on Media samples. For more information, check out my full disclaimer policy.

15 things +1 (I try) to avoid in Street Photography

 ..I have specified I TRY  to avoid .... ....

  1. Using more than one lens per day for street photography.  I prefer a 35mm or occasionally a 50mm
  2. Checking the LCD screen after taking photos on the streets (Chimping)
  3. Letting criticism affect me negatively. Rather, I try to use it to empower me to find weaknesses in my work.
  4. Leaving the house without a camera
  5. Spending a lot of time looking at photos online ; rather I spend more time shooting
  6. Forgetting how lucky I am to be able to go out and take photos everyday
  7. Mixing my digital and film photos in a project
  8. Letting the number “likes” dictate whether a photo is good or not
  9. Taking a photo of someone on the streets without saying “thank you” or smiling at them
  10. Hesitating before taking a street photograph
  11. Shooting to please my critics
  12. Recommending lenses longer than 50mm for street photography
  13. Making excuses when a photo doesn’t work. It is shit end of the story
  14. Taking photos without emotion and without your heart
  15. Uploading photos online until letting it “marinate” for few weeks

+1.  Comparing myself to other photographers

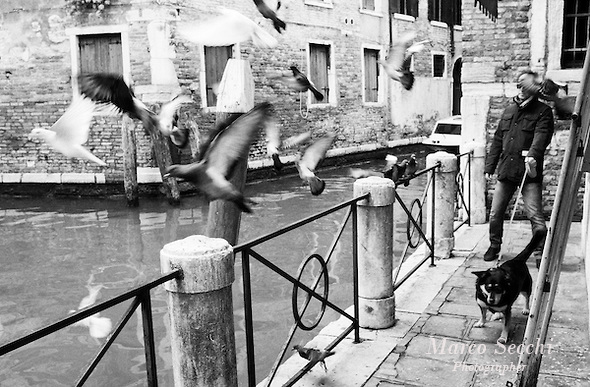
Ponte degli Scalzi - Fismonger - Leica M2 35mm HP5+ 400 Asa

How to Rescue a Wet Camera

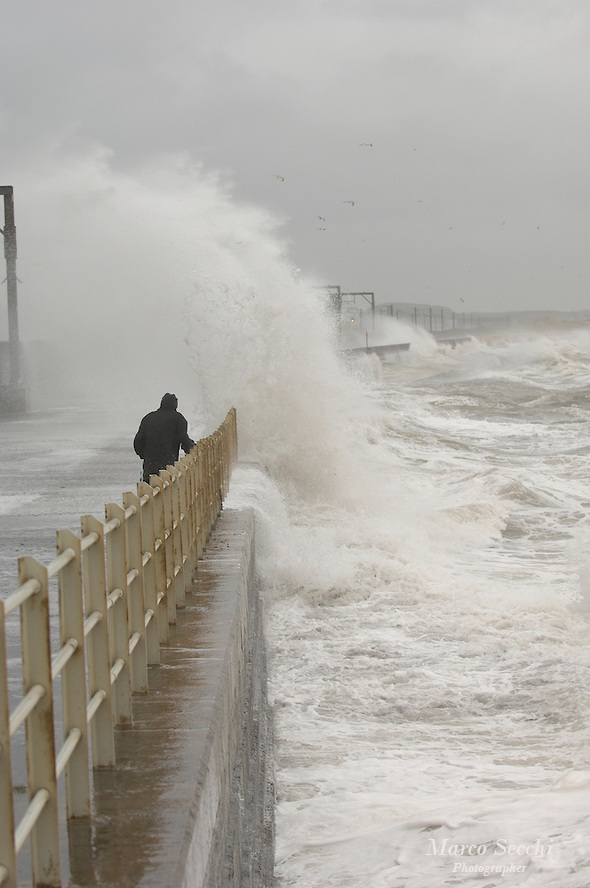
Scotland, Saltcoats 23rd November 2006 Extreme weather condition with strong gales and rain are battering the West Coast of Scotland NUJ recommended terms & conditions apply. Moral rights asserted under Copyright Designs & Patents Act 19

It has happened to me a couple of times covering bad weather in Scotland, to friends and colleagues, even a couple of days ago to one of my Venetian colleague.

Your precious camera meets the water...either in the form of a big splash or heavy torrential rain.

I have managed to recovered my cameras at least 2 times and I have strictly used the following method

  • As soon as it happen switch off the camera, remove the battery, remove memory card, I would say this is the most important action.
  • Do NOT turn the camera on  ever....you may risk to short circuit important parts
  • As soon as you can, make sure there are no traces of moisture visible on the camera.
  • Find a container big enough to hold the camera and a couple of bags or more of rice (Yes RICE)
  • can be a Tupperware container, half fill it with  rice  and then place the dead camera body on top of the rice with the mirror facing down.
  • pour more rice on top of the camera until it is completely covered with about 1 inch of rice above the top of the camera body
  • placed a tightly fitted lid on the container and place it a dry cupboard for at least  one week.

After about a week of drying out in the hermetically sealed rice box you should be able to switch on the camera and scroll through all the menus..,.. if this is the case I would place the camera again in the rice for 4 or 5 days  or leave it near but not too close to a radiator.

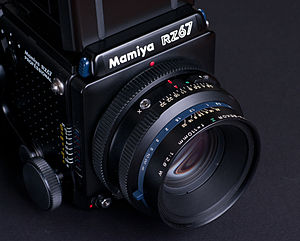
Mamiya RZ67 Pro II

English: Mamiya RZ67 Professional camera, lens...

The Mamiya RZ67 is my medium format single-lens reflex system camera manufactured by Mamiya. There are three successive models: the RZ67 Professional (first model

released in 1982), RZ67 Professional II (released in 1995) and RZ67 Professional IID (released in 2004). RZ67 is a modular camera system, meaning lenses, viewfinders, ground glasses, film winders and film backs are all interchangeable. It is primarily designed for studio use, but can also be used in the field. The RZ67 Sekor lenses have built-in electronic leaf shutters which are cocked and triggered from the body. Focusing is performed with a bellows on the body instead of the lenses.

The camera accepts 6x7, 6x6 and 6x4.5, 120 and 220 film magazines and Polaroid as well as Quadra 72 4x5 sheet film backs. Mamiya RB67 backs are also supported via the G-Adapter. The film speed is set on each RZ back via a dial. There are two versions of the 6x7 and 6x4.5 backs, the model II versions have a second film counter to always show the film count on the top. The RZ67 operates on one 6V silver oxide 4SR44 battery, or 6V 4LR44 alkaline battery. It can be used in emergency mode fully mechanically with a fixed 1/400 sec shutter speed. Multiple exposures are possible in the M-mode. Mirror flip up is supported. The body has one standard flash hot shoe on its left side, one plug for a standard remote shutter cable release, and a socket for an electronic shutter trigger. The RZ67 measures 104 mm (W) x 133.5 mm (H) x 211.5 mm (L) with the 110mm f/2.8 lens, and weighs approximately 2.4 kg (5.29 lbs). The flange distance is 105 mm.

The RZ67 name is adopted from the model name of the Mamiya RB67 (where RB stands for Revolving Back), which was first introduced in 1970, thus the RZ67 also takes backs which can be rotated 90 degrees to provide a horizontal or vertical composition. The orientation is shown in the viewfinder with black guides. The viewfinder also hosts LEDs informing of the state of the camera (flash ready, low battery, dark slide not removed, shutter not cocked). In addition to manual operation (photographer chooses aperture and shutter speed), the RZ67 is able to operate in AEF mode with an AE viewfinder (AE being an abbreviation for automatic exposure), which transmits exposure information directly to the body. In RBL compatibility mode, the RZ67 is able to use RB67 lenses. The biggest difference between RB67 and RZ67 is, that RB67 is completely mechanical. The RZ67 has also mechanical couplings between the parts, but the shutter is electronic, and parts are able to transmit exposure information with electronic couplings. In addition, the RZ67 has plastic exterior body, which makes it somewhat lighter.

Fuji X Custom Settings

Today arrived the new firmware for most of the Fuji X series cameras.  When you update all the custom settings are wiped out as well as cache memory and frame numberHere are more or less my latest  custom settings.

Name ISO Dynamic Range Film Simulation White Balance Colour Sharpness Highlight  Shadow  Noise 
Standard AUTO DR100 Provia (standard) Auto 0 0 0 0 0
Landscape Normal 200 DR100 Astia (soft) Auto -1 +1 -1 -2 0
Landscape  High Contrast 400 DR200 Astia (soft) Auto -1 +1 -1 -2 0
Portrait Neutral 200 DR100 Pro-Neg Standard Auto 0 0 0 0 0
Portrait Neutral Higher Contrast 400 DR200 Pro-Neg High Auto 0 +1 -1 -2 0
B&W Landscape 800 DR100 Mono+Red Auto 0 +1 0 0 0
B&W Portrait 800 DR100 Mono+Green Auto 0 +1 -1 -1 0


I have set them according to the subjects I tend to shot so I can change a whole group of settings with a push of the "Q" menu button and a quick turn of the dial.   Finer tweaks to color and highlight/shadow tone were done from experience of using the camera and the above are what I  eventually arrived at after some months of use.

I tend to play quite a bit with Highlight Tome, Sharpness and Shadow Tone so I change them often. For the ISO thee are times when I like to have in AUTO with Standard 200, Max 3200 and min shutter speed at Focal length I am using x1.8

While I like the more saturated colors and higher contrast in Astia (soft) for landscape generally, I found it tended to clip into the shadows too easily so I somewhat reduced the contrast there by making a -2 adjustment.

For portraits the Provia (standard) or Pro-Neg film simulations work well as they are rather neutral and subdued in colour, so render skin tones well.  The Pro-Neg Hi gives the same colours but more contrast.  I reduced the contrast at the shadow end as I found it was clipping to black too readily.

The dynamic range settings work really well and allow the camera to record more detail in highlights and shadows than in a normal exposure.  For the higher DR setting (DR200 is all I have needed) the camera needs to be set to ISO 400 but the sensor/processor is so effective that there is no discernible noise penalty.  It isn't an HDR feature....my understanding is that it works like many other similar features and the camera basically underexposes the image then processes in an exposure and tone curve that avoids clipping at each end.

The Jpeg output is so good on this camera that I shoot Jpeg almost all the time, whereas I only shoot RAW on my Nikon DSLRs.  Images from the X-E1 print superbly and have amazing pixel level sharpness.  The camera seems to resolve beyond what its 16MP sensor should, probably due to the absence of the anti aliasing filter.  Strangely, when 100% images are viewed on a computer monitor, detail can look somewhat mushy due to the unusual colour filter layout of the X-Trans sensor, but images view nicely at normal sizes and print in a very natural way, giving what I would describe as an organic look to textures that look real enough to touch and bitingly sharp.


Fuji X100s for street photography

I am often asked what settings I use for street photography. First, let’s make sure you have everything you will need, extra batteries and extra memory cards. A fast memory card is essential when shooting raw. ...do not forget your camera! (Marco Secchi)

Here are my settings for street shooting: Auto ISO: 200-3200 Min. Shutter speed limit: 1/125 Focus AF-C mode Drive Mode S or C: most of the time I am in s mode, c-mode if the situation really calls for it. While in AF-C mode , always awake/never sleep doesn’t work, keep half pressing the shutter from time to time, especially when you spot a potential shot, make sure the camera is not asleep Shutter priority at 1/250 or higher in regular light Optical Hybrid finder vs EVF: depending on the scene, if it is a context or overview shot, OHVF works, however, I found the EVF preferable for precise positioning of the af point since there is no time to reframe/refocus. Develop a solid grip on your camera, experiment, strap around the neck or wrist strap. Learn to change +- dial with out looking at your camera, the same goes for shutter speed, keep your eyes on the street.

Use your x100s a lot, that’s it!

Fuji X Custom Settings

Today arrived the new firmware for most of the Fuji X series cameras.  When you update all the custom settings are wiped out as well as cache memory and frame numberHere are more or less my latest  custom settings.

Name ISO Dynamic Range Film Simulation White Balance Colour Sharpness Highlight  Shadow  Noise 
Standard AUTO DR100 Provia (standard) Auto 0 0 0 0 0
Landscape Normal 200 DR100 Astia (soft) Auto -1 +1 -1 -2 0
Landscape  High Contrast 400 DR200 Astia (soft) Auto -1 +1 -1 -2 0
Portrait Neutral 200 DR100 Pro-Neg Standard Auto 0 0 0 0 0
Portrait Neutral Higher Contrast 400 DR200 Pro-Neg High Auto 0 +1 -1 -2 0
B&W Landscape 800 DR100 Mono+Red Auto 0 +1 0 0 0
B&W Portrait 800 DR100 Mono+Green Auto 0 +1 -1 -1 0


I have set them according to the subjects I tend to shot so I can change a whole group of settings with a push of the "Q" menu button and a quick turn of the dial.   Finer tweaks to color and highlight/shadow tone were done from experience of using the camera and the above are what I  eventually arrived at after some months of use.

I tend to play quite a bit with Highlight Tome, Sharpness and Shadow Tone so I change them often. For the ISO thee are times when I like to have in AUTO with Standard 200, Max 3200 and min shutter speed at Focal length I am using x1.8

While I like the more saturated colors and higher contrast in Astia (soft) for landscape generally, I found it tended to clip into the shadows too easily so I somewhat reduced the contrast there by making a -2 adjustment.

For portraits the Provia (standard) or Pro-Neg film simulations work well as they are rather neutral and subdued in colour, so render skin tones well.  The Pro-Neg Hi gives the same colours but more contrast.  I reduced the contrast at the shadow end as I found it was clipping to black too readily.

The dynamic range settings work really well and allow the camera to record more detail in highlights and shadows than in a normal exposure.  For the higher DR setting (DR200 is all I have needed) the camera needs to be set to ISO 400 but the sensor/processor is so effective that there is no discernible noise penalty.  It isn't an HDR feature....my understanding is that it works like many other similar features and the camera basically underexposes the image then processes in an exposure and tone curve that avoids clipping at each end.

The Jpeg output is so good on this camera that I shoot Jpeg almost all the time, whereas I only shoot RAW on my Nikon DSLRs.  Images from the X-E1 print superbly and have amazing pixel level sharpness.  The camera seems to resolve beyond what its 16MP sensor should, probably due to the absence of the anti aliasing filter.  Strangely, when 100% images are viewed on a computer monitor, detail can look somewhat mushy due to the unusual colour filter layout of the X-Trans sensor, but images view nicely at normal sizes and print in a very natural way, giving what I would describe as an organic look to textures that look real enough to touch and bitingly sharp.


My Fuji Travel Kit

Over the last few weeks I have received a number of emails asking which camera bag I use with the Fujifilm X-Pro1 and also what equipment I include in my travel photography kit bag. I thought I would create a simple list of what I include in my travel photography kit regardless of the size of the trip. (Marco Secchi)


Cameras

Obviously I travel with the Fujifilm X-Pro1 camera and I carry with me the Fujinon 35mm and Fujinon 18mm lenses. In addition I also bring along the trusty Fujifilm X100. Occasionally I have the X10 in my pockets as well

The X100 is slightly smaller so tends to be carried around literally everywhere and it is perfect for those times when you are not photography focused but want quality photos if the opportunity arises.

I use one of my own brand  strap and Italian leather half case on the X-Pro1 to protect my camera

On the X100 I use again one of my own straps. They can be on the right or left side of the camera depending on your preference. A  leather ring  reduce the strap opening. The strap comes with a 1/2? split ring to attach to the camera.

Camera Bag

I use either the Think Tank Retrospective 5 Pinestone Shoulder Bag  or one of my own leather bags. Both bags come  with 3 divided sections ideal for the X-Pro1, X100 and a 2nd lens.

There are a number of additional pockets for ipad, documents memory cards etc

Tripod

For traveling light I always take my brilliant little GorillaPod

Accessories

I do not carry many carry accessories with me. Just a  lens cleaning cloth  a Hamma cable release for long exposures over 30 seconds, couple of spare batteries, connections to my ipad, iphone

I also pack a couple of soft release buttons, many argue these are vanity decoration but I do think they make the button easier to use. I use mine either in glass or  wood

I carry most of the time  the Fuji flash EF x20.


Nikon F3

 Nikon F3 – Still a Viable Shooter?Launched in 1980, the Nikon F3 replaced the F2 as their top of the line professional camera body, and went from being the most controversial to one of the best selling film cameras in the history of the company.

Nikon F3

Prior to the introduction of the F3, the Nikon pro bodies had always been fully mechanical, with no reliance on batteries except to power the meter (if you had one of

the metering heads). The F3, however, used a brand new electronically controlled horizontal-traveling titanium shutter which, in contrast to previous models, required battery power to operate.

This initially caused great consternation in the pro community, and the reluctance of many to switch to the new F3 was a real problem for Nikon. Many press photographers were unwilling to give up the reliability of their mechanical F2s for this new, untested electronic camera.

There are plenty of excellent websites that document the various features of the F3 so I won’t duplicate any of that here. What we’re interested in is basically this: is the Nikon F3 still a viable shooter today? The answer is an unreserved ‘Yes!’. A good clean body will set you back around the $200 mark, which is an amazing bargain for a camera this good, and you can use almost the entire range of Nikon manual focus lenses which can be picked up for equally good prices if you shop around a little.

The metering is very accurate, and for most situations I just leave the camera in auto mode and it very rarely gives me a bad exposure, even when shooting transparency film. The viewfinder is fantastic, one of the best I’ve used in a 35mm film camera, offering a full 100% view of the image area. If you are used to the cramped, squinty viewfinders of some consumer or ‘prosumer’ DSLRs, the F3s finder will be a revelation!

While we are on the subject, my 1986 F3 is the ‘HP’ variant, which means it has the high eye-point finder (DE3), with greater eye relief and a little less magnification. This finder is physically a little taller than the original (DE2) prism, but allows you to see the entire viewfinder image with your eye a little further from the eyepiece, which is particularly useful if you wear glasses. Even if you don’t, it’s still an excellent all-round finder and, although some users prefer the original, the F3HP variant would still be my recommendation.

A quick word about the motor drive for the F3. Known as the MD4, it’s capable of a blistering six frames per second, has power rewind and also powers the camera body when attached. What’s more, the camera and motor drive combo handles beautifully; for me it handles better than just the body alone. These can be had a very little money  and make using the F3 a total blast! Oh yeah, they sound cool too!

Go get you one, and shoot some film!


Nikon F2

Launched in 1983, the successor of the FE had a relatively short sales career, but a long legacy.BluePyjamaSyndrome’s Nikon F2

It can be argued that the Nikon FM3a, sold from 2001 to 2006, is much more a descendant of the FE2 than of the FM2.

In 1977, a few years after Olympus initiated the compact SLR revolution, Nikon presented the FM. Like the Olympus OM-1, the FM was a compact semi automatic camera with a mechanical shutter, which could be equipped with a motor drive. But contrarily to the OM-1, which still relied on a CdS light metering system and on mercury batteries, the FM used modern gallium photo diodes and silver oxyde batteries.

It also benefited from a vertical blade metallic shutter, and the exposure metering was relying on 3 LEDs instead of the more conventional match needle arrangement of the OM-1. Solidly built and reliable, the FM was very successful commercially, and the ancestor of a large family of models whose production only stopped in 2006.

The FE from 1978 is the automatic exposure version of the FM. It looks very similar to the FM, but instead of LEDs, it uses two needles to show the shutter speed selected by the photographer (semi-auto mode) and by the automatic exposure system (aperture priority auto mode). In 1982, the FM became the FM2, receiving a new mechanic shutter with titanium blades, which could reach 1/4000 sec and had a flash synchro speed of 1/200 sec.

One year later, the FE2 was launched. Its titanium shutter is an improved and electronic version of the FM2?s, with a X synchro speed now reaching to 1/250 sec. The FE2 also benefits from a modern on the film (OTF) flash metering system (that the FM2 never got). The FM/FE range of products was extended the following year with the presentation of the Nikon FA, which added matrix metering (a world premiere), a programmed exposure mode and trade the brass prism cover of the FM/FE models for a polycarbonate one. Both FE2 and FA were discontinued in 1988. The FM2 lived longer, and was ultimately replaced by the FM3a, which merged the mechanical shutter of the FM2 with the electronics of the FE2.

Using the FE2 as an every day camera

Reasonably light and compact, the Nikon FE2 is very solidly built, and very nicely finished. Compared to a previous generation model like the FM, the FE2 has smoother commands. The viewfinder is typical from a pre-high eye point construction – the enlargement factor is high (0.86) for a good focusing precision, but the frame coverage is limited (93%), and the eye point is very short (14mm), which could be an issue for photographers wearing glasses. Even with thin glasses, it’s impossible to see 100% of the image projected on the focusing screen without having to move one’s eye ball right to left and left to right: you only perceive 90% of the focusing screen when you look straight into the viewfinder, which compounded with the rather limited frame coverage, ensures that you’ll have a wide safety margin on both sides of your prints.  The titanium blade shutter was the most advanced at the time of the camera's launch, with a top speed of 1/4000 sec and a flash sync speed of 1/250 sec.


The determination of the exposure is very conventional for a camera of its generation, with a center weighted measurement provided by two silicon photodiodes. In automatic mode, a needle indicates the speed selected by the exposure system of the camera on a large scale at the left of the viewfinder. The photographer has multiple ways to override the automatism: he can memorize the exposure (pushing the self timer lever towards the lens), apply a correction factor on the film speed selector (from -2 up to +2EV), or switch to semi-auto mode. In this case, a second needle – larger and transparent – appears in the viewfinder, showing the shutter speed selected by the photographer. In a very simple matching needle arrangement, the photographer just has to align the meter needle with shutter speed needle. The shutter speed knob is much smoother than on the FM (in the FE2 the shutter is controlled electronically), and surprisingly the camera is more pleasant to use in semi-auto mode than the FM. No wonder that Nikon derived the exposure control system of the FM3a from the FE2?s and not from FM’s.

Powered by two easy to find LR44 silver oxide batteries, the camera also operates without battery at a speed of 1/250sec. Compatible with any AI, AIs and AF lenses, it’s still perfectly usable today.Less rugged than its FM and FM2 cousins (it has an electronic shutter and a potentially more fragile match needle metering system), it is more pleasant to use and can respond efficiently to a larger variety of photography opportunities. Like the FA and the FM3a, but unlike the FM2, the FE2 benefits from a modern through the lens (on the film or OTF) flash metering system, compatible with the flash units currently sold by Nikon.

Its automatic exposure system is very easy to override, and does not get in the way. The matching needle system in the viewfinder is very informative, easier to read in the sun light than the LEDs of the FG, and than the small LCD display of the FA. With the F3, the FE2 is probably the most usable Nikon camera of the early eighties.

How much for a Nikon FE2? The Nikon FE2 is a very good automatic exposure film camera, and its reputation has obviously an impact on its price. Specialized retailers  sell it between $130 (Bargain) and $270 (Top Condition). As usual, prices are a bit lower on eBay, but the FE2 does not seem to sell for less than $100, with peaks up to $180 for very nice items.I