Portrait Photography with Fuji XE-2

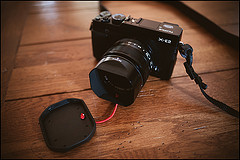
little fuji This is my standard portrait set up and I use aperture priority in conjunction with auto ISO.

Here are my settings:

ISO set to 200 Auto on ~ max 3200 with a minimum shutter speed set for each lens as follows: 14mm ~ 1/40th second, 23mm ~ 1/100th second, 35mm ~ 1/160th second Shutter speed dial set to A Aperture dial set to f/1.4 – f/4 as required Jpeg Fine + Raw Auto WB Ns film simulation, occasionally Astia Soft

AF set to S Activated on a half press of the shutter. I then move the focus zone around the frame as needed. I set the focus zone as the smallest square available as any background detail within the square during focusing might cause the lens to back focus.

With these settings dialed in I just pick up the camera, switch it on and start shooting. I adjust the shooting the exposure compensation as required via the very convenient dial, I change the focus zone to the best position for each shot and I reset the minimum shutter speed for Auto ISO in the ISO menu (Fn button) if I change my lens.

With the AF set to activate on a half shutter press I have to focus before every exposure. I rarely shoot multiple frames the same so I really don’t mind doing this.

I set the aperture and let the camera adjust the ISO from 200 to 3200 to suit the light level. When it runs out of ISO range it alters the shutter speed. I came to the values of minimum shutter speed using my simple formula* (See the section on shutter speed below). Occasionally I’ll dial in a higher shutter speed, especially when using the 14mm lens if the subject movement demands it. I just set the shutter speed dial to the value I want and the auto ISO continues to perform just as before.

My Recommended Menu Settings Fuji X pro 1

My Recommended Menu Settings

These are the camera settings I changed to made the Fuji X-Pro1 most suitable for my shooting needs. Your mileage may vary, but I found these tweaks to make the camera all the more usable than the stock camera settings:

Shooting Menu 1: Image Quality (RAW+FINE) – Always shoot in RAW. With RAW + FINE, you get the flexibility of RAW with the instant use of the X-Pro1?s excellent JPGs. Also a smart move until Adobe fixes issues with their demosaicing algorithm for the X-Pro1.

Shooting Menu 3: Fn Button (ISO) – Quick access to change the ISO from the Fn button. With this access, which I find faster than the Q button for dedicated ISO adjustment, you have all exposure settings at your fingertips.

Shooting Menu 4: AE/AF-Lock Mode (Switch) – Ability to switch AE-AF-Lock on by pressing button once instead of having to press and hold – a useful tweak if you focus and recompose often instead of changing the AF point.

Shooting Menu 4: AE/AF-Lock Button (AE+AF) – Locks both AE and AF.

Setup 1: Silent Mode (ON) – No AF confirmation noise or beeps from menu selections for quieter operation.

Setup 2: Quick Start Mode (ON) – Doesn’t completely power off camera to increase responsiveness.

Setup 2: Image Display (OFF) – Turns off default 1.5 second image review in EVF for smoother shooting experience. 

Setup 3: Color Space (sRGB) – My preferred color space.

“AF-ON” Button

With my DSLRs, I often have my cameras set up so that the shutter release only fires the shutter, while AF is controlled by the AF-ON button only. This way it’s so much faster shoot for my style of photography, and many other shooters prefer this set up as well.

While the Fuji X-Pro1 doesn’t really have a dedicated AF-ON button like most DSLRs, there is a work-around that you can use to achieve the exact same set up.

The small trick is to shoot in manual focus mode. The camera now defaults to allow the AE-L/AF-L button to activate focus as a kind of “AF override.” Now, the shutter release is entirely de-coupled from AF, but you can still activate AF through the AE-L/AF-L button, so in effect you’ve got your AF-ON button back.

AF Trick: Focus & Fire In One Action

One trick that many users seem to be finding out is to press the shutter release down fully to achieve focus and release the shutter in a single act. Most DSLR users are used to acquiring focus with a half-press and then firing the shutter after focus is locked. With the Fuji X-Pro1, the focusing lag experienced is partially due to the separation of these steps.

Many users are finding that by fully pressing the shutter release in one motion, the delay involving the contrast detection AF and shutter release seems to be lessened.

This trick is basically the opposite of the preceding trick to completely separate focus and shutter release, but if you’re a DSLR user who has been frustrated by the focus speed, it’s worth breaking your habits to see if this works for you. While this trick doesn’t work for all types of shooting, try it – you might just like it.

Never Shoot in 6FPS Bust Mode. Ever.

6FPS sounds great, until you realize that shooting in bursts will lock up your camera for what feels like 10x the time it took you to shoot your sequence. Just stick to single shot mode, your patience will thank you for it.