Poveglia: home of an abandoned 17th-century asylum, like you’ve never seen it before!

Discover the mesmerizing beauty of Poveglia, an island steeped in history and brimming with photographic opportunities. Join our exclusive photography workshop and embark on a journey that combines the art of capturing stunning images with the allure of this unique location.

Why Choose Our Poveglia Photography Workshop?

Our workshop stands out as a remarkable experience, offering you the chance to enhance your photography skills while immersing yourself in the captivating ambiance of Poveglia. Here's what sets us apart:

Expert Guidance: Benefit from the expertise of our professional photographers who will provide you with valuable insights, personalized instruction, and guidance throughout the workshop.

Unparalleled Island Location: Poveglia's rich history and picturesque landscapes provide an idyllic backdrop for your photographic exploration. From its crumbling ruins to its lush flora, every corner of this island offers a story waiting to be captured.

Hands-On Practice: Engage in hands-on photography sessions, allowing you to apply newly acquired techniques and experiment with different styles under the guidance of our instructors.

Unique Shooting Opportunities: Access exclusive shooting locations on Poveglia, including hidden spots rarely seen by visitors. Capture breathtaking images of the island's haunting beauty and preserve its essence through your lens

This small island located in the Venetian Lagoon, located between Venice and Lido is known for the dilapidated 17th-century asylum for the mentally ill. Tales of hauntings, ghostly moans, screams and spectres make this place known as one of the most haunted locations in the world. 

Poveglia  001.jpg

Complete with a plague burial ground, this site is deserted and off-limits, making images reasonably rare. 

Stranger yet is the local’s reaction to being asked questions about this foreboding place; very few Venetians talk about the island or answer questions. Many pretend the island doesn’t even exist, which only adds to the mystery, intrigue, and ultimate sadness of the location. 

Poveglia  022.jpg

I regularly organize photography workshops, especially the 10h Black and White that include a visit to Poveglia. Check with me about availability.

My photo zine of Poveglia is here https://www.amazon.com/gp/product/B08WJY7WNB Do check for your local Amazon Marketplace for free handling and shipping!

This black and white zine will bring the sense of dread of the island into your living room and pique your curiosity about all the secrets buried on Poveglia.


Showcase and Sell your Images with NFTs

Starting from today I will start minting my very first Non-Fungible Token. This is a token saved on the Ethereum blockchain, which is unique and can prove the ownership of a good or service. In this case, a photograph I took.

DSCF5035 copy.jpg

NFT (non-fungible token) technology empowers content creators such as photographers to control, manage, and distribute their content, and in addition, is a great platform to showcase, promote, and sell their images.

The introduction of NFT technology has begun to benefit the photography world. With regard to my point of view, photographers should be making use of cryptography and blockchain technology features that ensure their work cannot be replicated, and thus proof of authenticity is backed by math and code.

Photographers can mint ethereums (about 50 cents) on a blockchain that is interoperable with Ethereum. It is cheaper to make more coins at once.

SmartNFTs enables photographers to create one final NFT with multiple layers of NFTs, while also implementing various functions, such as lifetime royalties. Any future sales of the NFT, from one owner to another, would incur a royalty to the digital artist.


Screenshot 2021-02-28 at 20.32.35.png

NFT is getting more and more popular, and this time the Ethereum network, which has been upgraded since 2017, is better equipped to deal with the constant activity. NonFungible.com, a company that publishes market insights on NFTs, says that in 2020, the value of NFT trading was approximately $250 million, an increase of 300% from the previous year. People are paying high prices in both cryptocurrency and legal tender to purchase tokens that represent ownership of digital objects, which are then resold at a higher price.


NFTS the Basics

Fifteen Tips For Better Photography

Would you like to improve your photographic skills just that little bit more? Tired of shooting the same old photos from the same angle and the same subject every time? Here are fifteen cherished tips you can use to improve your photography.


Keep an eye on the weather

Weather conditions can play a big part in setting the mood of your shot. Rather than waiting for the bright light of the midday sun, a misty morning in a forest can be the perfect time of day for that mood-shot.

Take your time to choose the subject

Take your time to choose the subject, then spend time walking around the subject looking for the best angle and lighting.

Take your time to set up the shot

Don't be afraid to take your time to set up your shot. Although it can get a bit frustrating if you have your loved ones tagging along and they're sitting and waiting impatiently for 20 minutes for you to take a single shot of a piece of driftwood on the beach!

Don't always choose brightly-coloured subjects

Subjects with muted colours can sometimes produce excellent results. A field of wheat of similar yellow-brown colour can produce striking results when accompanied by a low-sun and long shadows.

Movement diffusion

If you have a camera that allows you to shoot with a manual shutter speed - try slowing the speed and increasing the F-stop. Then move your camera when taking the shot. Some very effective arty-type images can be produced with blur effects.

Overexpose your subject

Not too good to do all the time, but experiment with results by over-exposing the subject.

Try macro photography

Grab a magnifying glass and see if you can focus your camera through the glass onto a small subject. It just may work! And may open up a whole new range of subjects for you!

Shoot through wet glass

Try spraying water onto a window, then take a shot through the window to a subject outside. (wet the outside of the window - not the inside of your home!)

Colour balance

Try balancing colour by having the subject and the surrounding detail in similar colours.

Silhouettes

Silhouettes usually have a small range of colours, but can produce some of the most beautiful images. Shooting a silhouette involves having the background brighter then the subject in the foreground.

Experiment with patterns

We've all seen those amazing images of the red and orange leaves of maple trees in the fall/autumn. Thousands of leaves - all of a similar shape and colour - but very awe-inspiring and beautiful.

Compliment colours

Two strikingly-different colours can be beautiful too. Picture an image of your girlfriend or wife in a red dress sitting on a field of green grass. Or your boyfriend or husband in a red shirt walking through a field of waist-high wheat stalks. Complimentary colours that will bring more attention to the subject.

Use a colour filter

If your camera can be fitted with coloured filters - try your hand. Although this effect can be made quite easily these days with a photo and image-editing software.

Sunrise is better than sunset

Wake up before sunrise one day and go on a photography expedition. If you've not done it before you'll be pleasantly surprised by the contrasting light and shadows. But remember you'll only have a very short window of time in which to shoot (usually less than an hour) before the sun rises too high and you lose the light.

Use a flash in daylight

Use your flash during the daytime to fill a close subject with light. This will produce better results where the background is brighter than your subject, and the automatic shutter speed on your camera shoots too fast to show the detail of your subject effectively.

For more detailed instructions “Learn Digital Photography: The Ultimate Guide for Beginners” check here

Black and White Digital Photography. First Steps

There are several ways to achieve black and white digital photography. With black and white digital photography, you are bringing the end-user back into a period of time when life seemed a lot simpler. Many digital cameras come equipped with a function to take these types of photos. If your digital camera does not support this function, you can still change your photographs into black and white with software programs.

As we all know, there are times in our lives when the priority is to shoot black and white images. That happens to me a lot. I want to get rid of colour to accentuate shapes or just because it is aesthetically pleasing. Black and White photography is not necessarily simpler than colour photography, but it offers a whole different set of challenges and possibilities.

DSCF8846 copy.jpg

There are several ways to achieve black and white digital photography. With black and white digital photography, you are bringing the end-user back into a period of time when life seemed a lot simpler. Many digital cameras come equipped with a function to take these types of photos. If your digital camera does not support this function, you can still change your photographs into black and white with software programs. Some camera shot only in Black and White!

You will want your black and white digital photography to look its best when you are finished. A technique that can help you get the best image out of your digital photograph is through image manipulation. You may find it better to convert your eight-bit colour images (which are usually jpegs) into 16-bit colours first. This is important because an 8-bit RGB can be the same as a 10-bit grayscale.

You can find information all over the Internet to help you with your black and white digital photography. These resources can be found in everything from websites to magazines. Coloured pictures can look truly beautiful as a black and white display. You will usually have to convert your graphics because although there are options with digital cameras, there are no true black and white digital cameras.

My favourite app/program is Silver Efex Pro, that creates extraordinary photos using unique black & white algorithms and adjustments inspired by darkroom techniques. Change luminosity and contrast, brighten whites, apply colour filters, and even adjust density and grain!


DSCF1066 copy.jpg

TIP!!! Correct the Colorcasts

An important part of black and white digital photography is correcting the colorcasts. These are caused by bad lighting, but you can use software such as PhotoShop Elements to make the relevant changes by using their editing applications. The Imaging Factory is also software that can help you to easily convert and fix lighting areas in your graphics to get the best look with your black and white digital photography. If you want to turn your graphics into black and white digital photography, you can step into a completely new dimension in photography. You can do an endless array of projects right from your own computer.

5 Beginner Tips For Shooting Winter Landscapes

Winter brings out the toughest elements in our climate, with many people putting away their camera bags ëtill early spring. But, if you do put away your camera you are missing out on the raw beauty that this magical season brings.

Here are a few tips to make the trip more enjoyable.

1. Wear the right clothes: Itís very important to wrap up warm when out and shooting winter images. The winter season brings the toughest elements, so if you are planning to spend a few days out and about always be well prepared.

2. Watch the weather: Itís very important to know what the weather is going to be like. You donít want to travel for a couple of hours and then hear a weather report that tells you that: the weather is wet for the next few days. During the winter months the weather can dramatically change in a matter of hours.

It ís always advisable to let someone know where you are going and which route youíre planning to take. If you do get injured or ever caught in a storm someone may be able to help.

Snow.jpg


3. Carry only what you need: Carry only the essentials. You donít need to upload your camera bag with every piece of equipment you own. If you are going to be out taking pictures all day you are much better off going as light as possible. Carrying a light load will also help preserve energy. You could be climbing icy rocks or crossing snow filled hills; a warm flask would serve you a lot better than a third camera.

4. Look for detail: Snow, ice and frost bring out texture and atmosphere in most subjects. The early frosty morning is an ideal time for close-up photography. The frosty morning also brings out patterns in our landscapes.

Take care where you place your camera: if you are taking pictures early in the morning try placing it at oblique angles to the sun - this will give your images strong shadows. This will also add mood to your landscape images. Once you have found the perfect spot pay extra attention to foreground interest as this will add depth to your image.

Snow in Venice14.jpg


5. Expose carefully: Snow and ice are extremely difficult to expose properly. Snow usually confuses your cameras metering system or your hand held light meter. When you take a light reading from snow you will automatically get an underexposed image. The meter will record the snow as grey.

Now is the time to start bracketing your shots. If you bracket your shots add 1 - 2 stops of light to compensate for your light meter reading. Using an 18% grey card, which I described in a previous article, should also give you a perfect light reading.

Snow in Venice04.jpg

Tiramisu: Real Italian Recipe

Here's Tiramisu authentic Italian recipe. This is the most famous Italian dessert in the world and it's from Treviso (a lovely town near Venice). It's delicious, easy to make, and I'm sure that you'll love it!

the origin of tiramisu date its invention to the 1960s in the region of Veneto, Italy, at the restaurant "Le Beccherie" in Treviso. Specifically, the dish is claimed to have first been created by a confectioner named Roberto Linguanotto, owner of "Le Beccherie".

The original shape of the cake is round, although the shape of the biscuits also allows the use of a rectangular or square pan. However, it is often assembled in round glasses, which show the various layers, or pyramid.

Numerous variations of Tiramisu exist. Some cooks use other cakes or sweet, yeasted bread, such as panettone, in place of ladyfingers (savoiardi). Bakers living in different Italian regions often debate the use and structural qualities of utilising other types of cookies, such as pavesini for instance, in the recipe. Other cheese mixtures are used as well, some containing raw eggs, and others containing no eggs at all.

A slice of Tiramisu at the   “Beccherie” Restaurant in Treviso

A slice of Tiramisu at the “Beccherie” Restaurant in Treviso

Ingredients

SAVOIARDI LADYFINGERS ( I like Balocco)

500 g (1,1 lb) of mascarpone cheese cream

4 medium eggs

100 g (3,5 oz) of sugar

300 ml of coffee (better if proper espresso)

Cocoa powder

OPTIONAL 2 tablespoons MARSALA can be replaced by Rum, Sherry etc

Preparation

Using an electric mixer in a medium bowl, whip together egg yolks and 1/4 cup/50 grams sugar until very pale yellow and about tripled in volume. A slight ribbon should fall from the beaters (or whisk attachment) when lifted from the bowl. Transfer mixture to a large bowl, wiping out the medium bowl used to whip the yolks and set aside.

In the medium bowl, whip cream and remaining 1/4 cup/50 grams sugar until it creates soft-medium peaks. Add mascarpone and continue to whip until it creates a soft, spreadable mixture with medium peaks. Gently fold the mascarpone mixture into the sweetened egg yolks until combined.

Combine espresso in a shallow bowl and set aside.

Using a sifter, dust the bottom of a 2-quart baking dish (an 8x8-inch dish or a 9-inch round cake pan would also work here) with 1 tablespoon cocoa powder.

Working one at a time, quickly dip each ladyfinger into the espresso mixture -- they are quite porous and will fall apart if left in the liquid too long -- and place them rounded side up at the bottom of the baking dish. Repeat, using half the ladyfingers, until you’ve got an even layer, breaking the ladyfingers in half as needed to fill in any obvious gaps (a little space in between is O.K.). Spread half the mascarpone mixture onto the ladyfingers in one even layer. Repeat with remaining espresso-dipped ladyfingers and mascarpone mixture.

Dust top layer with remaining tablespoon of cocoa powder. Top with shaved or finely grated chocolate, if desired.

Cover with plastic wrap and let chill in the refrigerator for at least 4 hours (if you can wait 24 hours, all the better) before slicing or scooping to serve.

tiramisu-treviso.jpg

Business Tips for Photographers in 2021 1/3

I am fortunate enough that, despite the Covid crisis, my income has not changed and has actually increased in this crazy climate of 2020/21.

At the beginning of the crisis exactly 12 months ago, I thought I had to modify strategies and leave aside my extremely successful workshops/photo walks business  and commercial clients heavily linked to tourism and travel. They accounted for more than 200,000 Euro. So I sat down and decided to explore other areas and find different incomes

In 12 months I started three business ideas each of them became very profitable in less than 90 days

From creating a side-hustle to finding new clients I would like to share some business tips for photographers, emerging artists and creatives that find themselves in difficulties due to the financial stress.

The first thing you must understand is that you're a business, not just an artist. Realize that getting clients is just part of the game.

Monetize on your talents and experience and be active and get some exposure for the post-lockdown season.

Diversify Your Income

Especially in these difficult times with lockdowns and scarcity of paid work you may have come to the conclusion that you have been relying fully on commercial clients, or agencies or something else and then realize how important it was to have other money streams. Focus more on stock photography, as you can always photograph your own family, yourself, landscapes, and still lifes.

If you’re not sure where to start, spend some time brainstorming potential side-hustles, here are just some ideas

Start your very own photography YouTube channel as a long-term project. Join affiliate programs related to photography. Start a blog, and set up an online shop where I’ll sell photography resources, courses, eBooks, zines, prints.

Become a Specialist

There are many talented photographers out there but they are generalists, but in my experience what consumers want is experts, photographers with a particular insight and mastery of their skills. This year, if you have more free time, use it to build, learn and develop. Pick a niche and get extremely good at it to the point where you can offer the best service.

Build a micro-site dedicated to a niche of the photography world. For example, you could build a site for pet photographers, based on 3 - 5 blogs that you can share on social media.

Network, Network and more Network

It is still possible, without leaving a house, to reach out and network! It helps in to provide a possible customer communication outreach spreadsheet where everything from the name of the person, company name, contact details, outreach date, and any notes can be written down. If you don't hear back, make sure to follow up as it is not uncommon for it to take a few tries before hearing back from a potential customer.

Invite people to join a "Fan Page" and receive a login. In this way, they build their own personal profile page. The Fan Page can be displayed in the back of a session room or studio, where it can be viewed along with the other images that have been uploaded.

Use a referral program. This is an effective tool for indexing a viral spread, as users can share a link via email with friends and family, expanding upon the initial user. However, to make this strategy work you need to offer some incentive for users to refer the link.

Have continuous interaction with your network by starting conversations you care about. In the blog post How I Grew My Wedding Photography Business to $195,000 a Year Using Facebook, Pro Photographer Randy Joyner describes how he did just that.

Use Social Media, from Facebook to Instagram from Linkedin to Twitter!

Full House For Breakfast

Improve your Long Exposures Photography

Long exposure photography is a technique where you allow your camera’s sensor to gather light for a longer period of time. One major goal of this is revealing more detail in the darker areas of the scene. For more creative purposes, you may want to use a long exposure to create a sense of motion in your images.

Venice with Long Exposure

Venice with Long Exposure

Filters

When you want to use a long exposure to produce a creative effect such as blurry water but there is too much light to allow a slow shutter speed, it’s possible to increase the exposure time by using filters. Neutral density filters are solid “grey” looking filters of uniform density that have no effect on how colours are recorded but are used to reduce the amount of light entering the camera. They can be either circular screw-on type or square

Create a visual Composition and Calculate your exposure

Depending on the tones in your scene, many cameras can calculate a good long exposure up to 30 seconds. But if you’re doing an exposure that’s longer than 30 seconds, or you’re adding any ND filters, you must calculate the settings for your exposure.

Cable Release

The shutter button on your camera releases the mechanical shutter inside of the camera. Using a shutter release button allows you to capture images without touching the camera at all. A shutter is a curtain that lets light into the camera sensor for a period of time; using a wired or wireless shutter release, you can initiate the opening and closing of this curtain without touching your camera.

Tripod

Although it’s one of the most important elements of any photo set up, it’s also one of the most undervalued, ignored, and overlooked. A good tripod will cost you money, while a cheap one may not even do its job. However, the downside is that some people won’t buy a new tripod because they think that they don’t need a sturdy one yet.

My favourite brand is Manfrotto I have been using then for so long I cannot even remember, One of the latest ones I have been using is the Manfrotto BrFree 3-Way Live Advanced. I will review on another post in the next few days. You can find it here

Manfrotto Befree Tripod

Manfrotto Befree Tripod


Set your camera on manual or bulb mode

Many DSLRs have multiple pre-programmed modes that can set your shutter speed and aperture for you. But these modes will also be automatically metering for you, which is unlikely to get you the results you’re looking for. So instead opt for Manual mode, or Bulb mode if you will be doing an exposure of over 30 seconds. When using Bulb mode the shutter will stay open from when you press the shutter release button, to when you let go.

Shoot at the lowest ISO possible

Although newer cameras can shoot with relatively little noise at higher ISOs, long exposures can create noise. So shoot with the lowest ISO possible on your camera. Most cameras come with long exposure noise reduction features, but at higher ISOs using this feature can make the noise worse.

Cover your viewfinder to prevent light leaks

Although light leaks rarely occur with regular exposures, with longer exposures the images are subject to light leaks through the viewfinder. Even a small leak can create big issues like hazes on an image with a long exposure. Don’t cover the viewfinder with your thumb, as this can create camera movement. Instead, try covering it with gaffers’ tape or a custom viewfinder cap and compose your image in your camera’s live view.

Shoot in RAW

Shooting long exposures can be tough, especially the first few times. Shooting in RAW will give you more latitude to recover a slightly overexposed image and will give you greater control in your post-production.

Foggy Day in Venice - Long Exposure

Foggy Day in Venice - Long Exposure


The Gondolier's Hat

The “Gondolier's Hat” is a mixed B&W - Colour image of mine.

Shot in Venice a few years back on a very calm and small canal in the Fenice area. This is the summer hat (The winter one is in wool and black) traditionally it is made of woven straw with coloured bands on both the crown and brim.

gondolier-hat.jpg


You can buy a print photographic, framed, acrylic or canvas here

If you are in the United States you can buy my prints from Fine Art America

Death and the Dervish

For sure one of my favourite books.

This is the most famous Bosnia novel by Author Selimovic written in 1966. Although this book describes the Ottoman Bosnia, it's ultimately about a human soul and all the negative and positive aspect of one.

It is first-person narrative based around 1700s Sarajevo Islamic tekke (monastery)

The basic story is the narrator Sheikh Nuruddin, an ex-soldier of about 40 years old, is a leading member of a religious order (a Dervish) on the outskirts of the town (kasba). He lives alongside Mustafa, deaf and married with kids; Mullah Yusaf, a 25-year-old ill pale individual; and finally Hufiz-Mohammed, a knowledgeable youth and initial friend of Hassan. We learn that the local kadi (town leader) has had Nuruddin’s brother (a simple clerk, 15 years his junior) arrested. He’s invited to Hassan’s father’s house where the sister tries to persuade him to get Hassan to deny his inheritance (for dishonouring behaviour Constantinople). Nuruddin sees the potential to gain influence and get his brother released. Hassan grows to be Nuruddin’s close friend whilst horse-trading and womanising (possibly Catholics).

Nuruddin is existential, over-thinker. He plans, schemes and visits important people to affect his goals which start with freeing his brother but about halfway turn to revenge on the town’s people and leaders. We certainly get inside his head; and for all his religion, his God plays surprising little on his mind – he still seems very much wedded to this earth in his views, personal and selfish behaviour. Nuruddin is ultimately a complex and unforgiving character and we have 450 pages of detailed, hard going, narrative-based in a multicultural historic setting. Ultimately, I think, the tale is about betrayal on many levels social, religious, family and friends.

You can buy the Paperback here and the Kindle here

Christmas in Venice

Obviously due to Covid this year is very particular but these are ideas and tips for a future Christmas in Venice

A wonderful way to spend Christmas Eve is to attend midnight mass at St. Mark's Basilica. But remember, midnight mass starts at 10:30 p.m. and you should get there early to get a seat (no tickets are needed). Try to enter through the north entrance and not the west entrance often used by tourists.

Even though December 26th is a national holiday (St. Stephen's Day), most of Venice's museums and sites will be open.

Several Venice restaurants are closed on Christmas Eve and Christmas Day and even on the 23rd and 26th. Most hotel restaurants and Harry's Bar are open. Be sure to do your homework and make reservations ahead of time for Christmas meals. We hear Caffe Quadri and the restaurant - Piazza San Marco's famous cafe - is open on Christmas Day. Good place for Christmas breakfast and coffee!


211214_3758 copy.jpg

Remember that the vaparetto schedule changes on major holidays. Check the signs posted on the platforms for schedule information.

Each year on December 26, the Frari Church in San Polo (in the Campo dei Frari) offers a free concert at 4:00 p.m. The church is filled with magnificent art, including Titian's Assumption of the Virgin, Canova's Tomb and a carved monk's chair from 1468.

For an incredible seafood dinner and a warm celebration at midnight, go to Trattoria Antiche Carampane on New Year's Eve. (San Polo 1911; (39) 041 524-0165) The price for dinner runs about £70 per person. No matter where you go that night, you must make reservations.

Another restaurant recommendation: Antica Trattoria Poste Vecie (Rialto Pescheria Venezia; (39-041-721-1822) is open on Christmas Day and New Year's Day. This restaurant also has excellent fish and a larger menu as well. The soups and Venetian-style calf's liver are terrific. Fireplaces keep the restaurant warm on cold nights.

DSC_3152 copy.jpg


If you're in Venice on January 6, don't miss the Befana races. Men clad in long skirts, wigs and babushkas climb into boats for races on the Grand Canal. The best views are from the Rialto Bridge.

Venezia in Bianco e Nero (Venice in Black and White)

During the last week, I published a new Photo Zine:

Venezia in Bianco e Nero (Venice in Black and White)

I believe or at least I think to remember that the first time I ever saw as a kid San Marco was when it was completely empty and to me, it was in Black and White. It was simply magical.Because Venice in Black and White just feels right!

ASIN : B08QR4YYH8

  • Publisher : Independently published (December 13, 2020)

  • Language: : English

  • Paperback : 52 pages

  • ISBN-13 : 979-8573953397

  • Item Weight : 4.2 ounces

  • Dimensions : 5.5 x 0.13 x 8.5 inches

It is now available on all Amazon Marketplaces to maintain a free or very low shipping costs


You can easily find it on

  • Amazon.com here,

  • Amazon.co.uk here

  • Amazon.de here

    Or search for your local Amazon Marketplace to save on shipping!

If you prefer to order a high-quality print directly from me you will get a

  • Silk Paper

  • 170gr

  • Real Black

Can be ordered at Euro 15 here


8 + 1 Spaghetti Recipes

Being Italian and having lived most of our life abroad means we are often asked about Italian recipes but at the same time can be a challenge to follow original recipes and to source some of the products.

My amazing doctor here in Hungary asked me recently some Italian recipes so I decided to regularly write on my blog some of the one we prepare. Obviously due to our background a “pure” Italian may find them a bit “fusion” in fact at home we tend to eat a mix of Italian, French, Russian, Hungarian, Slovenian, English, Scottish, Indian, Middle Eastern, Pakistani …to name a few!!

These spaghetti pasta recipes are simple Italian classics you'll find in trattorias all across Italy. “Pantry” meals that take less than 15 minutes to make, each makes enough for 4 people so half if it is just for 2.

For all recipes, follow the Base Steps then move onto the recipe specific steps.

Key step (especially for simple pasta like these) - tossing the sauce with the cooked pasta and a splash of pasta cooking water. The fat in the sauce reacts with the starch in the cooking water, thickening the sauce and making it stick to the pasta strands. This is the proper way to make pasta - no self respecting Italian or restaurant would ever skip this step!

Ingredients for four people

330 g dried spaghetti (or other long pasta we prefer Linguine)


PASTA AGLIO E OLIO (WITH OLIVE OIL & GARLIC):

  • 2 or 3 spoons of extra virgin olive oil

  • 3 garlic cloves, sliced

  • 1/2 tbsp red chilli flakes

  • some chopped parsley

Heat oil over medium high heat. Add garlic and cook until golden - be careful not to burn it.

Toss with pasta and cooking water per Base Directions. Toss through parsley and chilli flakes, serve with parmesan.


PASTA ARRABIATA

  • 1 tbsp extra virgin olive oil

  • 1 garlic cloves , crushed

  • 400g crushed tinned tomatoes

  • 1 tbsp chilli flakes

  • some cup chopped parsley

Heat oil over medium high heat. Add garlic, stir until fragrant, then add the tinned tomatoes and chilli flakes, simmer on medium for 5 minutes.

Toss with pasta and cooking water per Base Directions. Toss through parsley and serve with parmesan.


SPAGHETTI CON LE ACCIUGHE (PASTA WITH ANCHOVIES)

  • 1 or 2 tbsp extra virgin olive oil

  • 1 garlic cloves, crushed

  • 1-2 tbsp anchovies, finely chopped

  • 1/2 tbsp red chilli flakes

  • some chopped parsley

Heat oil over medium high heat. Add garlic and anchovies, stir until the garlic is fragrant and the anchovies have melted.

Toss with pasta and cooking water per Base Directions. Toss through parsley and chilli flakes, and serve with parmesan.


SPAGHETTI ALL’AMATRICIANA:

  • 1 - 2 tbsp extra virgin olive oil

  • 1 garlic cloves, crushed

  • 1/2 brown onion, diced

  • 250g crushed tinned tomatoes

  • 1/2 tsp red chilli flakes

  • 120g thinly sliced guanciale, or diced pancetta or bacon

Heat oil over medium high heat. Add the garlic, onion and guanciale (or pancetta or bacon) and cook until the onion has softened and the guanciale is golden.

Add the tinned tomatoes and chilli flakes and bring to rapid simmer. Toss with pasta and cooking water per Base Directions. Serve with parmesan.


PASTA POMAROLA (FRESH TOMATO & BASIL SAUCE ):

  • 1 - 2 tbsp extra virgin olive oil

  • 1 - 2 garlic cloves , crushed

  • 500g fresh cherry tomatoes, halved. We tend to use 400-500g crushed tinned tomatoes

  • fresh basil , lightly packed

Heat oil over medium high heat. Add garlic and cook until fragrant, add tomato and cook briefly, just to warm through.

Toss with pasta and cooking water per Base Directions. Toss through basil, serve with parmesan.


SPAGHETTI NAPOLITANA:

  • 1 - 2 tbsp olive oil

  • 2 garlic cloves , crushed

  • 1//2 brown onion , diced

  • 500g crushed tinned tomatoes

  • fresh basil , lightly packed

Heat oil over medium high heat. Add garlic and cook until fragrant, then add the onion and cook until softened. Then add tinned tomatoes and 1/2 cup water, simmer 5 minutes.

Toss with pasta and cooking water per Base Directions. Toss through basil and serve with parmesan.


SPAGHETTI ALLA PUTTANESCA (SPAGHETTI WITH OLIVES AND CAPERS ):

  • 1 -2 tbs extra virgin olive oil

  • 1 - 2 garlic cloves , crushed

  • 250g crushed tinned tomatoes

  • 0.33 tbsp red chilli flakes

  • 70g black sliced olives

  • 1.33 tbsp capers

  • some chopped parsley

Heat oil over medium high heat. Add garlic and cook until fragrant, then add tinned tomatoes, chilli flakes, olives, capers and 1/2 cup water. Simmer 3 minutes.

Toss with pasta and cooking water per Base Directions. Toss through parsley and serve with parmesan.


SPAGHETTI AL TONNO:

1 tbsp extra virgin olive oil

1 garlic cloves , crushed

1/2 brown onion , diced

250g crushed tinned tomatoes

100g tinned tuna

some chopped parsley

Heat oil over medium high heat. Add garlic and cook until fragrant. Add the onion and cook until softened, then add the tinned tomatoes and 1/2 cup water. Simmer 3 minutes, then add the tuna.

Toss with pasta and cooking water per Base Directions. Toss through parsley. Seafood pasta typically not served with parmesan but you can if you want!

+1 Extra Recipe

SPAGHETTI ALLA BOLOGNESE:

2 tbsp extra virgin olive oil

1 knob of butter

1 onion, sliced

1 carrot

1 celery

300g minced beef

100ml white wine (or red)

100 g pancetta (bacon)

1 glass of whole milk

400 g of tomato “passata” (We use Mutti Tomato Puree/Passata)

2 tablespoons of tomato paste

Start the preparation of the sauce by chopping the celery, onion and carrot together in a blender and frying the bacon and vegetables in a pan with 2 tablespoons of oil

Then add the minced meat, the wine and let it evaporate, then add the milk, continuing to mix add the sauce, broth, a pinch of salt and pepper and cook for 2 hours, stirring occasionally!

Put the spaghetti back in the same pot where they cooked, add half of the sauce and stir the pasta, then serve it immediately on the table, seasoning it with the rest of the sauce.

Instructions

BASE DIRECTIONS (FOR ALL):

Cook spaghetti (or any other long dried pasta) in a large pot of salted boiling water per packet. Check 1 minute before suggested time to see if is ready for you, do not over cook

Meanwhile, prepare one of the sauces.

When pasta is ready, scoop out 1 cup of pasta cooking water, and drain pasta.

Add pasta into chosen sauce with 3/4 cup pasta cooking water. Toss pasta until sauce thickens and sticks to pasta (called "emulsifying" the sauce), 1 - 2 minutes. Use more pasta water if needed to loosen the sauce.

Season with salt and pepper to taste. Finish pasta per chosen recipe.

Notes and Tips

Pasta We prefer Linguine vs Spaghetti . If we use Spaghetti will be n5

Brands Depending of where we live abroad we tend to buy Barilla that is widely found, DeCecco, Lidl own brand (Italiamo) and Penny own brand (San Fabio) are also very good in our opinion!

Virgin Oil it must be a really good Virgin Oil!!!

Canned tomatoes - not all canned tomatoes are created equal. Good quality ones are naturally sweet with better tomato flavour, poor quality ones are sour and often unripe tomatoes. If needed, add sugar to sweeten tomatoes.

Salted boiling water - use a big pot of water and 1 - 1 1/2 tbsp salt. Stir pasta once or twice while cooking.

Time the pasta so it finishes cooking when the sauce is ready. If you leave cooked pasta sitting in a colander, it sticks together and goes hard as it cools. Ideal is to use tongs to transfer it straight out of the boiling water into the sauce - no colander needed!

Pasta sticks together - If your pasta DOES start to stick together and go hard, loosen it up with a splash of the reserved pasta cooking water (don't rinse it with tap water, this washes away the starch which stops the sauce from clinging to the pasta). Alternative is to use a drizzle of oil - drizzle and toss while hot.


Improve Your Mobile Photography with 20 Tips!

Do you want to take excellent photos with your mobile phone?

Mobile photography may seem daunting. But with a few simple tricks, you'll be able to shoot better photos with a WoW factor


1. Clean Your Lens to Get Sharp Images

The first and most important thing every mobile photographer should do is clean their phone lens.

Make sure you wipe the lens before taking the shot to get crisp, clean images.

We carry phones in our pockets and bags, which are havens for dirt. Always make sure you give your lens a quick wipe before you take any photos.

Specks of dust on the lens can ruin the perfect shot; it can make an image fuzzy or cause potential light distortion.

Your camera lens needs to be clean to capture clear and crisp images like this.


2. Explore Your Camera Settings

The best phone photography happens once you have familiarised yourself with your mobile’s camera settings and features.

Check your manual, phone settings and native camera app to see what your mobile has to offer.

The number of options available will vary depending upon your phone’s make and model. Learn how to access these features quickly and confidently, so you always get the best possible shot.

Familiarise yourself with your mobile camera settings so you can access them quickly.


3. Set your Image Quality to High

Make sure you have the image quality set to the highest possible level in your settings. This ensures you are using the camera to its maximum capabilities.

Set the image quality to the highest possible level to capture beautiful details, such as these dandelion clocks, taken with an iPhone.


4. Get Beautiful Bokeh Effect in Your Photos by Using Portrait Mode

A fairly recent addition to some smartphones has been the portrait mode in the camera app.

iPhones and Google Pixel phones have this handy mode, which blurs the background on portrait shots. It adds depth of field to images by mimicking a professional camera lens.

Use portrait mode to blur the background.


5. Sweep Your Phone Sideways to Create Panoramas

Turn on the panorama mode in your camera app to capture beautiful sweeping landscapes.

Vistas like this won’t last long. Use the panorama setting on your phone to capture the whole scene.

Pan your phone to the left or right to take the photo. Your phone takes a series of shots which it then automatically stitches together to create one long panoramic image.


6. Capture Great Action Shots with Burst Mode

The burst mode in your camera app allows you to take multiple shots in quick succession. This is great for capturing action shots of people or pets. You can scroll through the shots to pick the best one.

Capture actions shots using the burst mode on your mobile.


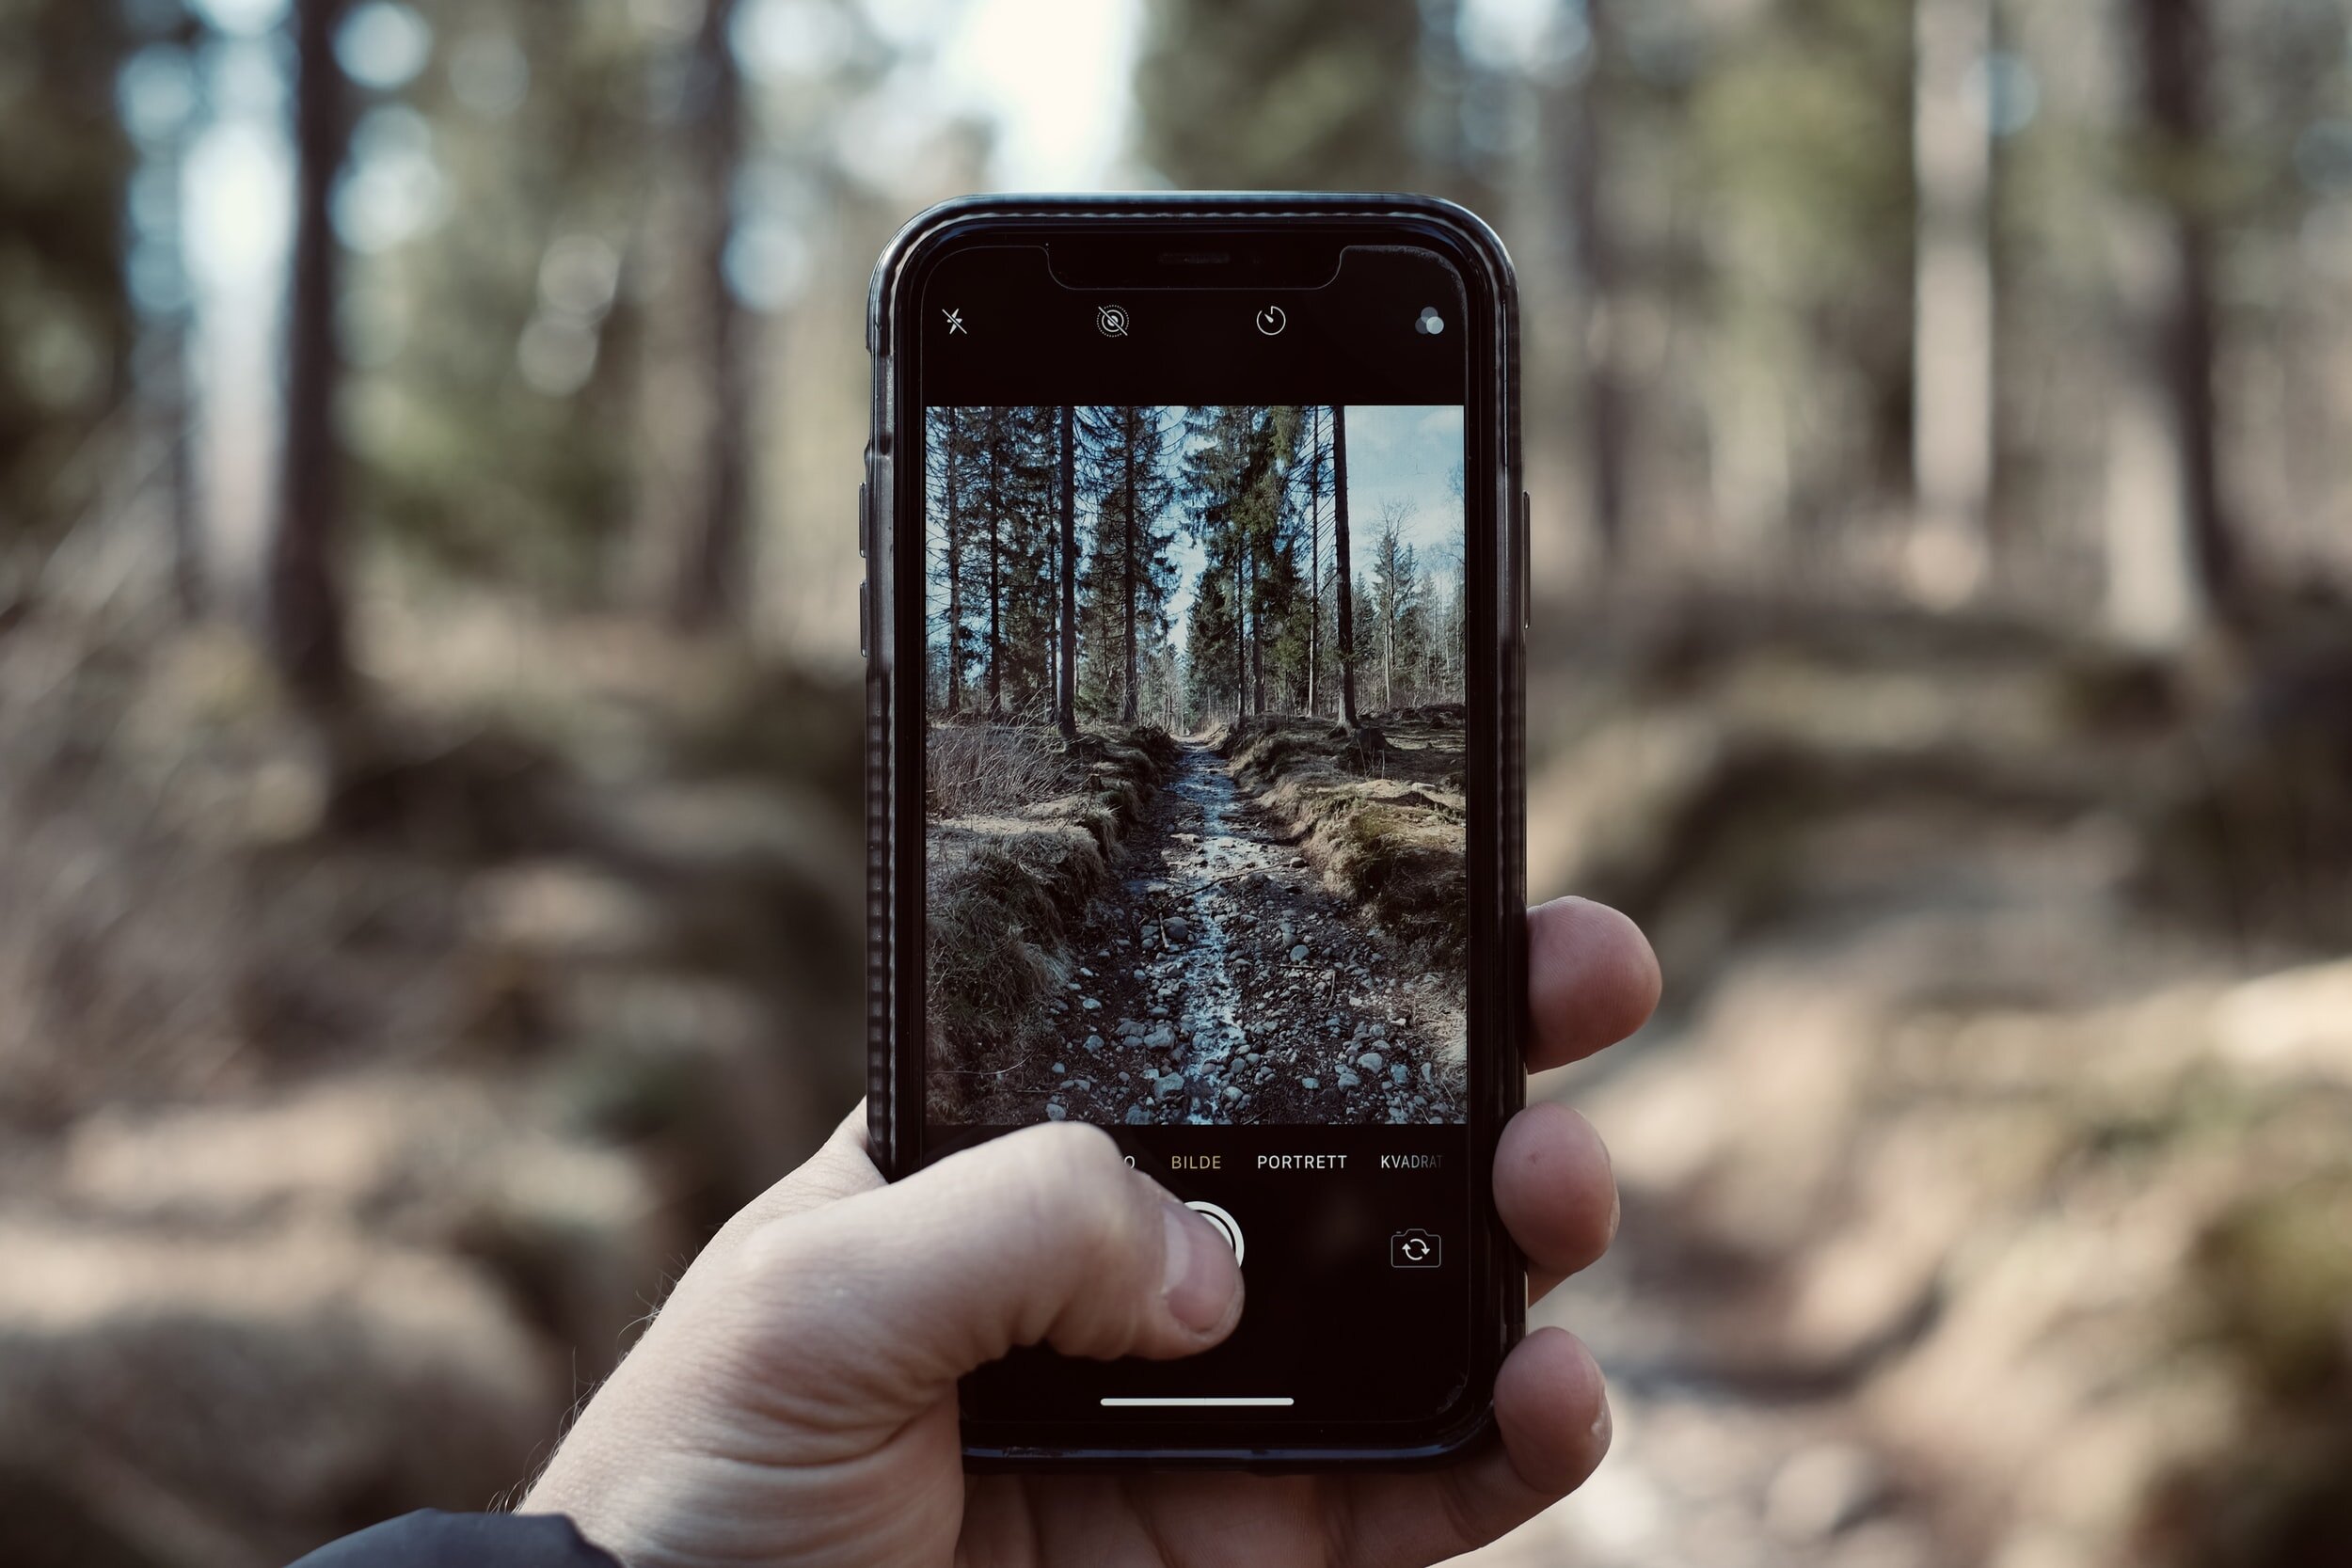
7. Use the Self Timer to Ensure Sharp Images

Use the camera’s self-timer when light levels are low or you need to steady the phone. Find a tripod or prop your phone on something and set the self-timer running–it usually runs at intervals of 3 or 10 seconds. The use of this will minimize the risk of camera shake and you’ll end up with a sharper image.

Use your phone’s self-timer for sharper images in low light conditions.


8. Don’t Compromise on Quality – Forget the Front Lens

There’s one phone function you’ll be tempted to use but should avoid: the front camera lens.

The image quality is generally much lower than your phone’s rear camera, which could result in noise on your image, especially in low light situations. So, avoid the temptation, even if composition with the rear lens is a bit trickier!

Avoid the temptation to use the front-facing camera lens: the image quality will be poor.


9. Uncover Camera Shortcuts to Quickly Access Features

Time is of the essence with photography to ensure you don’t miss the moment. Good knowledge of how to access your phone camera quickly is vital. There’s usually a shortcut that will let you bypass the phone’s lock screen.

In the iPhone, swipe left to access the camera directly from the lock screen.

Did you also know that on an iPhone you can use the volume buttons as shutter buttons? This offers a discrete option that is perfect for capturing candid moments.

Use the volume button as a shutter button to capture candid moments.

It’s also much easier to use the volume buttons as the shutter if you only have one hand free: perfect if you need to hold your subject in position with your other hand.

Take the time to discover the shortcuts specific to your phone model to improve your mobile photography.

Quick access to your camera app means you won’t miss moments like these.


10. Hold your Mobile Steady to Stop Camera Shake

It’s extremely important to hold your phone still when taking a shot. This will ensure the final image is sharp.

You could use a tripod to achieve this: there are plenty available to fit mobile phones. However, one of the advantages of mobile photography is you don’t have to carry extra equipment.

You can rest your body on the ground to keep your phone still to get shots like this.

A simple tip to steady your phone is to rest it against any kind of fixed surface when you press the shutter. A table could work if you are indoors, or alternatively, a rock or a tree stump if you are outdoors.

, or alternatively, a rock or a tree stump if you are outdoors.

You can also steady yourself. Try leaning your body or arm against a fixed surface to stop your phone moving when you take the shot.

Steady your arm and phone against objects such as trees, for shots taken in low light conditions.

It is especially important in low light conditions to keep your phone steady. Holding your phone close to your body can also help reduce camera shake.

It’s important to keep your phone steady when taking shots in low light conditions.


11. Take Control Of Focus to get Tack Sharp Images

Most mobile phone photos tend to have a wide depth of field, which means a sharp focus throughout the scene.

Controlling the focus plays a big part in being creative. Get your camera lens up close to a subject in the foreground to create a narrower depth of field; the background will then drop out of focus.

Focus on the foreground to narrow the depth of field.

Pro Tip: Remember to tap the screen at the point where you want the focus to be sharpest.

If you struggle with that or don’t have portrait mode on your mobile, you can blur parts of an image in post-processing. Make use of photo editing apps and software to achieve this.

Create a shallow depth of field by focussing on a subject in the foreground.


12. Turn On The Gridlines to Perfect Your Composition

The composition is key to a good photo, whether that is taken on a traditional camera or your smartphone.

Nothing screams amateur photographer more than an uneven horizon.

But this is easily avoided with one simple trick: turn the gridlines on in your settings.

Use your on-screen gridlines to make sure subjects, like this bridge, are straight in your shots.

This will overlay two horizontal and two vertical lines on your screen. Line these up with elements of the scene to make sure everything is straight.

Use the grid lines to line up elements of your scene, to ensure everything is straight.


13. Adjust The Exposure for Beautifully Lit Images

Phone photography is not just about pointing and shooting. You must adjust the exposure to get a good shot.

Exposure is the amount of light that reaches your camera sensor. This is crucial in determining how light or dark your final image will be.

You may need to adjust the exposure on some shots to lighten the foreground.

In traditional photography, the amount of light reaching the camera sensor is adjusted by changing the aperture size.

In phone photography, we can’t do that. One method is to tap to set the focus in a particular part of the scene. If you tap and focus on a light area–such as the sky–the camera will adjust the exposure to try to match darker parts of the scene. This will give you a darker image.

Tap your screen to focus on the sky, which will darken the foreground and give an intentionally moody feel to your shot.

Alternatively, focus on a dark area–such as the foreground–for the camera to try to match the lighter areas of the scene. This time you’ll end up with a lighter image.

Try focussing on different parts of the screen to get the overall image brightness just right.

Some models of mobile phones have manual exposure control (exposure compensation), which appears when you tap and focus on the screen.

Click on your screen to activate the focus. Then look for an exposure slider that can be adjusted to correct your exposure.

In the iPhone, you’ll see a sun icon appear next to a vertical line. Drag your finger upwards across the screen to increase exposure, or downwards to decrease exposure.

Tap on different areas of your smartphone screen to get the right level of brightness/exposure.


14. Turn HDR Mode On to Help Exposure

Have you ever wondered what the HDR mode does on your phone? You’re not alone. Many people overlook this setting, but this can help with exposure.

HDR stands for High Dynamic Range. It’s especially important to turn HDR on to make sure your photos are perfectly exposed.

This iPhone shot with HDR mode on captures all the detail in the both the dark and light areas of the scene.

Landscape photography shots that are taken on a mobile camera often suffer from an overexposed sky and dark foreground. The HDR setting should help fix that issue.

HDR enables your camera to take several photos in quick succession; some are lighter and some are darker. Your phone then combines these to give one better-exposed image.

However, don’t use this setting if your subject is moving, as you’ll get end up with a blurred image.

Most phones will give you the option to keep both the normal and HDR version of a shot.


15. Always Look for the Best Lighting for your Shot

Mobile phone cameras generally don’t perform well in low light conditions. You’ll end up with grainy images and unwanted blur from camera shake.

Try to shoot in natural light wherever possible.

The golden hour before sunrise or after sunset, is a fantastic time to shoot. It gives more even exposure and a lovely warmth to shots.

Shoot during the golden hour to add a lovely warm glow in your images.

Try to avoid harsh sunlight in the middle of the day: this will cause unwanted shadows, light spots or glare on your image.

Overcast days and misty weather, on the other hand, even/soften the light and are a great time for mobile photography.

A misty early morning can produce beautiful soft light.

Avoid using your mobile’s built-in flash: it’s rarely flattering. Related Article: Ultimate Guide to Flash Photography


16. Move Closer to your Subject to Maintain Image Quality

Avoid the instinct to use your smartphone camera’s zoom function. It is a digital zoom, which reduces the quality of the final image. It is the editing equivalent of cropping an image.

If you want to capture more detail, simply move closer to your subject. You will retain far more pixels image and detail in the image than if you zoom in.

Move close to your subject, rather than zoom in, to ensure no loss of quality of the final image.

The only exception is if your mobile has an in-built optical zoom. This usually means you’ll have a second lens, as well as another fixed focal lens. One example of this is the telephoto lens on the iPhone XS.

Get in close to subjects to retain more detail.


17. Change Your Position for a New Perspective

A huge advantage of mobile photography is a small size and the lightweight of your camera. You’ll be able to manoeuvre yourself to take photos from angles you may not have ordinarily tried.

Try a different angle with your phone photography.

Turn an ordinary subject into something special by looking at it from a different perspective.

Get down low and shoot at ground level. You’ll be able to include foreground that helps set the scene for your image, which will add interest and draw the viewer in.

Crouching down low and including the foreground, adds depth to an image.

Shooting upwards is a great way to make your subject appear imposing and larger than life. Remember to move yourself as well as your mobile camera to find the best perspectives.

Shooting upwards adds a new perspective and can make your subject seem imposing.


18. Try Third Party Camera Apps for More Creativity

Are you craving more advanced control of your mobile camera?

The beauty of mobile phones is you don’t need to spend lots of money to enhance your photography kit. Simply find a third party app, which will give you new camera tools.

If you’re an experienced photographer there are apps available that will match the capabilities of your main camera.

Third party camera apps will give you more control in difficult lighting conditions.

You’ll find apps that offer a broad range of manual controls such as ISO, white balance and focus. While other apps are dedicated to a specific task, such as long exposure photography.

There are also plenty of fun effects apps too. These can do all kinds of things from adding fun stickers to your images to turning your shot into a cartoon.

Head to the Apple App Store or Google Play Store to browse the camera apps on offer.

Unlock more advanced manual controls for your phone camera with a third party camera app.


19. Use Phone Photo Editing Apps to Add Flair to your Photos

One of the best things about mobile phone photography is that your creativity can continue after you’ve taken the shot.

There are many editing apps available to help you add more flair to your images. Plus you can edit instantly on your phone, with no need to transfer shots to another device to edit.

The mood was enhanced on this image with the use of a phone photo editing app.

Start by cropping and straightening shots to refine your photos.

If you’re new to editing, try Snapseed. This app, available to iPhone and Android users, offers plenty of editing options including a blemish removal tool. It also features a great selection of overlays to add to shots, which change the look of your image.

Read Next: Best photo editing apps

If you want to turn your photo into a painterly masterpiece, Mextures (iPhone only) is a great introduction to layer-based editing.

An iPhone photo transformed into a painterly work of art using the Mextures app.

Or, turn your photos into a work of art with a single tap, with the Prisma app (iPhone and Android).

Some apps even magic away unwanted telephone lines, or light flare from the sun, with a single tap.

Have fun and get creative by adding mobile editing apps to your mobile photography.

A black and white filter was added to this iPhone shot for a simple edit.


20. Take Lots of Photos

Don’t let a lack of storage space on your phone prevent you from taking photos.

Take plenty of shots of the same scene from different perspectives.


The mystery of Scottish "witch" Maggie Wall

Just outside the village of Dunning in Perthshire, lies a monument. It’s a collection of stones about 20 feet high, topped with a cross and decorated with gifts left by visitors—pennies, feathers, shells, fluffy stuffed animals, and tiny tea candles. The stones bear the words in stark white lettering: “Maggie Wall burnt here 1657 as a witch.”

Maggie Wall1.jpg

Scotland was home to nearly 3,800 people accused of witchcraft between 1500s and 1700s, the vast majority of whom were women. In the end, about 1,500 were murdered as a result of witch hunt inquisitions. However, mysteriously, there is no record of a woman named Maggie Wall being tried as a witch. What’s more, there’s no record of the monument itself until 1866, though a forest surrounding the monument called Maggie Walls Wood was documented as of 1829.

There are several theories about who Maggie Wall was and why her monument exists. Some have suggested that Lord Andrew Rollo (the landowner of the area at the time) was having an affair with Maggie, and built the monument after she was executed out of guilt.

Others theorise that it was in fact Lady Rollo who erected the monument, feeling a sense of sympathy towards Maggie and women like her.

In 1663, six women from Dunning were accused of witchcraft (and three were executed), which is an alarmingly high number considering the village only had a couple of hundred residents.

The 1650s and 1660s were turbulent times in this Perthshire parish, with the witch trials coinciding with religious and political tensions.

The local minister, Revered George Muschet, was deemed unfit by church officials, but he was well liked within the village. When officials attempted to discipline the minister in 1652, they were attacked by an angry mob of local women who wanted to keep him in the church.

Some have suggested that Maggie Wall was part of this group, and that may be why she came under the wrath of the church and burned as a witch a few years later.

The accepted theory is that this monument stands as a testament to all the witches murdered in Scotland during the witch hunts as no other such monument exists. Perhaps the name was taken from the surrounding wood to represent the countless and forgotten women who were killed. Occasionally a wreath is laid at the foot of the monument, serving as a reminder of the injustices suffered by the mysterious symbolic witch, Maggie Wall.

Before You Go

This monument is located right outside of Dunning Scotland. Dunning is in Perth and Kinross. It is off of the road B8062 which you can access from the A9 highway.

Rural Life in Monochrome

Rural areas have a low population density and small settlements, also agricultural areas are commonly rural, as well as other types of areas such as forests.

Different countries have varying definitions of rural for statistical and administrative purposes……but no matter where the style of life is very similar

Rural living offers the opportunity to reconnect with nature. More trees and less traffic means cleaner air. Fields, forests, and streams make for great outdoor living and a healthier lifestyle

Advantages

  • More privacy. In the countryside there’s a good chance your nearest neighbour won’t be directly next door. You may not even be able to spot their home at all.

  • You can have a bigger garden. If you’ve always wanted to grow your own food or have more space for children or pets, this is a huge benefit.

  • You’ll be able to own pets you may have always wanted but couldn’t have owned in a city or town. Cows, llamas and horses are all examples of these. You could even keep hens and have your own free-range eggs.

  • You’ll be closer to the various wildlife of the area and to walks in areas of natural beauty.

  • City-dwellers usually suffer higher levels of stress than those who commute in for work or live and work in the country. There is a reason living and working in a city is called “the rat race”. By decreasing the number of people surrounding you, you could become more relaxed.

  • You can be fully, or semi self-sufficient. You could grow your own food. If you do decide to keep animals, you may also be able to sell produce from them (milk/eggs/honey) to create a small income.

Disadvantages

  • If you have children of school-age, they might be faced with a longer journey to school, whether they walk, take the bus or get a lift in.

  • Shopping can become an inconvenience. This may not seem all that important, but staples that are purchased a couple times a week, such as milk and bread, may be further than just a 2 minute trip down the road.

  • There may be limited job opportunities, unless you already have a job nearby or if you commute into a town or city.

  • Television and Internet connectivity could be weaker or patchy in more rural areas.

  • During the winter months, nearby roads might not be in the best shape or not be as well maintained as urban roads.

  • Trade services, such as a mechanic, are harder to find. In urban areas, if you have car trouble you can make do with a local taxi or bus until it’s fixed. Services like these are scarcer in the countryside, leaving you with limited options.

  • Entertainment and eateries may be further away, which involves more time, a higher expense and extra planning.

Sufi Galata Dervishes

The Mevlevis are also known as the "whirling dervishes" due to their famous practice of whirling as a form of dhikr (remembrance of God). Dervish is a common term for an initiate of the Sufi path; whirling is part of the formal sema ceremony and the participants are properly known as semazens.

The Galata tekke has a long and revered history, having been founded in 1491 by a Ottoman grandee from the palace of Sultan Beyazit II. The tekke’s first şeyh(sheikh, leader) was Muhammed Semaî Sultan Divanî, a descendant of Mevlâna Jelaleddin Rumî himself.

The building you see is not the original, which burned in 1765, but its replacement, which dates from 1796 and was extensively restored during the 19th century, also between 1967 and 1972, and again in 2008.

The Galata Mevlevihanesi Müzesi is open daily except Monday from 09:00am to 16:30 (4:30pm), with last entry at 16:00 (4pm). There is a small admission fee.

Galip Dede, a renowned 17th-century sheikh of this tekke, is buried in an ornate tomb to the left as you enter from the street.

Kumbaracıbaşı Ahmet Paşa, better known in the west as Claude Alexandre, Comte de Bonneval (1675-1747), a French nobleman who converted to Islam and entered the sultan’s service as a bombardier general, is also buried on the tekke’s grounds.

Nearby is the tomb of İbrahim Müteferrika (1674-1745), an ethnic Hungarian Unitarian from Transylvania who converted to Islam and established the first Arabic/Ottoman moveable-type printing press in the Ottoman Empire in the 1720s.

Holy Trinity Church in Velemer frescos by Janos Aquila, Orseg, Hungary

The Holy Trinity church was erected in the 13th century in Velemer, County Vas Hungary .

DJI_0268 copy-1563219778804.jpg


The rectangular aisleless church, to which a tower is attached on the north facade, is aligned east to west, as typical of medieval times. While carrying elements of Romanesque style it also has some Gothic elements . The walls of the church are built of both brick and stone. It is adorned by an arched cornice, with corbels carved with human faces, representing the various sins, supporting the roof.

The frescoes in the church were painted by János Aquila of Radkesburg from 1377 to 1378.


The church was used by the Calvinist church from the mid-17th century, and was re-Catholicised in 1733. It was abandoned in 1808.
.

DJI_0266 copy-1563219777261.jpg

The frescos have worn over the centuries, but among the surviving fragments of the sanctuary the symbols of the four gospels are easily found - the lion representing Mark, the eagle John, the angel Matthew, and the oxen Luke. On the sanctuary's north wall, a self-portrait of Aquila himself can even be made out. The window recess of the sanctuary is decorated with floral and herbal motifs.

Above is a depiction of the Veil of Veronica with the likeness of Christ. The threefold circle in the pinnacle of the sanctuary side of the triumphal arch symbolises the Holy Trinity. The image of Christ the Judge is outside the central piece, while the images to the right and left symbolise good and evil deeds. Below and to one side, a cavalry scene can be made out, and St Anne with Mary and the child Jesus can be seen on the opposite side.

The church dedicated to the Holy Trinity (Szentháromság) and to King St Stephen (Szent István király) is located towards the southeast edge of town, away from the main road.

A Soaring Symbol: The Eagle in Aquila's Frescoes

One cannot discuss Aquila's work without noting the compelling presence of the eagle. In many cultures and religious traditions, the eagle symbolises strength, renewal, and spiritual ascension. Its inclusion in Aquila's frescoes could serve multiple symbolic purposes:

  1. Divine Connection: The eagle, with its ability to soar towards the heavens, is often seen as a messenger or intermediary between the divine and the earthly realm. Its presence in the frescoes may signify the spiritual journey from the mortal world to the divine, echoing the Christian belief in resurrection and eternal life.

  2. Personal Emblem: Given that 'Aquila' translates to 'eagle' in Latin, the artist's use of this symbol could also be a personal signature, a way of marking his work with a visual emblem that is both deeply meaningful and reflective of his own name. This interplay between the artist's identity and the symbolic imagery enriches the narrative woven into the frescoes.

  3. Guardianship and Vigilance: In Christian iconography, the eagle is also associated with St. John the Evangelist, symbolizing clarity of vision and spiritual insight. Its inclusion might suggest a thematic focus on the Gospels' messages and a call to vigilance in faith.

Deciphering the Frescoes: Layers of Meaning

Like the eagle within the Velemer church, the frescoes invite viewers to explore layers of meaning woven together with theological themes and personal stories. These artworks are more than mere decorations; they are visual sermons, teaching and inspiring those who gaze upon them.

Janos Aquila's mastery lies in blending traditional Christian iconography with local cultural motifs, creating a tapestry that speaks universally and specifically to the community for whom it was made. The frescoes serve as a bridge, connecting the earthly to the divine, the individual to the community, and the past to the present.

Reflecting on the Past, Inspiring the Future

For photographers and art enthusiasts, the frescoes offer a unique study in the power of visual storytelling. Through his use of colour, composition, and symbolism, Aquila invites us into a reflective dialogue with our spiritual and artistic journeys.

Exploring the frescoes of the Velemer church is not just an academic exercise; it's a pilgrimage into the heart of human creativity and divine inspiration. Janos Aquila's work challenges us to look beyond the surface, to find meaning in the symbols that surround us, and to appreciate the profound connection between art, faith, and life.

My post about Martjanci church is here

#Ancient_monument #Hungary #műemlék #Temple #templom