Business Tips for Photographers in 2021 1/3

I am fortunate enough that, despite the Covid crisis, my income has not changed and has actually increased in this crazy climate of 2020/21.

At the beginning of the crisis exactly 12 months ago, I thought I had to modify strategies and leave aside my extremely successful workshops/photo walks business  and commercial clients heavily linked to tourism and travel. They accounted for more than 200,000 Euro. So I sat down and decided to explore other areas and find different incomes

In 12 months I started three business ideas each of them became very profitable in less than 90 days

From creating a side-hustle to finding new clients I would like to share some business tips for photographers, emerging artists and creatives that find themselves in difficulties due to the financial stress.

The first thing you must understand is that you're a business, not just an artist. Realize that getting clients is just part of the game.

Monetize on your talents and experience and be active and get some exposure for the post-lockdown season.

Diversify Your Income

Especially in these difficult times with lockdowns and scarcity of paid work you may have come to the conclusion that you have been relying fully on commercial clients, or agencies or something else and then realize how important it was to have other money streams. Focus more on stock photography, as you can always photograph your own family, yourself, landscapes, and still lifes.

If you’re not sure where to start, spend some time brainstorming potential side-hustles, here are just some ideas

Start your very own photography YouTube channel as a long-term project. Join affiliate programs related to photography. Start a blog, and set up an online shop where I’ll sell photography resources, courses, eBooks, zines, prints.

Become a Specialist

There are many talented photographers out there but they are generalists, but in my experience what consumers want is experts, photographers with a particular insight and mastery of their skills. This year, if you have more free time, use it to build, learn and develop. Pick a niche and get extremely good at it to the point where you can offer the best service.

Build a micro-site dedicated to a niche of the photography world. For example, you could build a site for pet photographers, based on 3 - 5 blogs that you can share on social media.

Network, Network and more Network

It is still possible, without leaving a house, to reach out and network! It helps in to provide a possible customer communication outreach spreadsheet where everything from the name of the person, company name, contact details, outreach date, and any notes can be written down. If you don't hear back, make sure to follow up as it is not uncommon for it to take a few tries before hearing back from a potential customer.

Invite people to join a "Fan Page" and receive a login. In this way, they build their own personal profile page. The Fan Page can be displayed in the back of a session room or studio, where it can be viewed along with the other images that have been uploaded.

Use a referral program. This is an effective tool for indexing a viral spread, as users can share a link via email with friends and family, expanding upon the initial user. However, to make this strategy work you need to offer some incentive for users to refer the link.

Have continuous interaction with your network by starting conversations you care about. In the blog post How I Grew My Wedding Photography Business to $195,000 a Year Using Facebook, Pro Photographer Randy Joyner describes how he did just that.

Use Social Media, from Facebook to Instagram from Linkedin to Twitter!

Full House For Breakfast

Improve your Long Exposures Photography

Long exposure photography is a technique where you allow your camera’s sensor to gather light for a longer period of time. One major goal of this is revealing more detail in the darker areas of the scene. For more creative purposes, you may want to use a long exposure to create a sense of motion in your images.

Venice with Long Exposure

Venice with Long Exposure

Filters

When you want to use a long exposure to produce a creative effect such as blurry water but there is too much light to allow a slow shutter speed, it’s possible to increase the exposure time by using filters. Neutral density filters are solid “grey” looking filters of uniform density that have no effect on how colours are recorded but are used to reduce the amount of light entering the camera. They can be either circular screw-on type or square

Create a visual Composition and Calculate your exposure

Depending on the tones in your scene, many cameras can calculate a good long exposure up to 30 seconds. But if you’re doing an exposure that’s longer than 30 seconds, or you’re adding any ND filters, you must calculate the settings for your exposure.

Cable Release

The shutter button on your camera releases the mechanical shutter inside of the camera. Using a shutter release button allows you to capture images without touching the camera at all. A shutter is a curtain that lets light into the camera sensor for a period of time; using a wired or wireless shutter release, you can initiate the opening and closing of this curtain without touching your camera.

Tripod

Although it’s one of the most important elements of any photo set up, it’s also one of the most undervalued, ignored, and overlooked. A good tripod will cost you money, while a cheap one may not even do its job. However, the downside is that some people won’t buy a new tripod because they think that they don’t need a sturdy one yet.

My favourite brand is Manfrotto I have been using then for so long I cannot even remember, One of the latest ones I have been using is the Manfrotto BrFree 3-Way Live Advanced. I will review on another post in the next few days. You can find it here

Manfrotto Befree Tripod

Manfrotto Befree Tripod


Set your camera on manual or bulb mode

Many DSLRs have multiple pre-programmed modes that can set your shutter speed and aperture for you. But these modes will also be automatically metering for you, which is unlikely to get you the results you’re looking for. So instead opt for Manual mode, or Bulb mode if you will be doing an exposure of over 30 seconds. When using Bulb mode the shutter will stay open from when you press the shutter release button, to when you let go.

Shoot at the lowest ISO possible

Although newer cameras can shoot with relatively little noise at higher ISOs, long exposures can create noise. So shoot with the lowest ISO possible on your camera. Most cameras come with long exposure noise reduction features, but at higher ISOs using this feature can make the noise worse.

Cover your viewfinder to prevent light leaks

Although light leaks rarely occur with regular exposures, with longer exposures the images are subject to light leaks through the viewfinder. Even a small leak can create big issues like hazes on an image with a long exposure. Don’t cover the viewfinder with your thumb, as this can create camera movement. Instead, try covering it with gaffers’ tape or a custom viewfinder cap and compose your image in your camera’s live view.

Shoot in RAW

Shooting long exposures can be tough, especially the first few times. Shooting in RAW will give you more latitude to recover a slightly overexposed image and will give you greater control in your post-production.

Foggy Day in Venice - Long Exposure

Foggy Day in Venice - Long Exposure


The Gondolier's Hat

The “Gondolier's Hat” is a mixed B&W - Colour image of mine.

Shot in Venice a few years back on a very calm and small canal in the Fenice area. This is the summer hat (The winter one is in wool and black) traditionally it is made of woven straw with coloured bands on both the crown and brim.

gondolier-hat.jpg


You can buy a print photographic, framed, acrylic or canvas here

If you are in the United States you can buy my prints from Fine Art America

Death and the Dervish

For sure one of my favourite books.

This is the most famous Bosnia novel by Author Selimovic written in 1966. Although this book describes the Ottoman Bosnia, it's ultimately about a human soul and all the negative and positive aspect of one.

It is first-person narrative based around 1700s Sarajevo Islamic tekke (monastery)

The basic story is the narrator Sheikh Nuruddin, an ex-soldier of about 40 years old, is a leading member of a religious order (a Dervish) on the outskirts of the town (kasba). He lives alongside Mustafa, deaf and married with kids; Mullah Yusaf, a 25-year-old ill pale individual; and finally Hufiz-Mohammed, a knowledgeable youth and initial friend of Hassan. We learn that the local kadi (town leader) has had Nuruddin’s brother (a simple clerk, 15 years his junior) arrested. He’s invited to Hassan’s father’s house where the sister tries to persuade him to get Hassan to deny his inheritance (for dishonouring behaviour Constantinople). Nuruddin sees the potential to gain influence and get his brother released. Hassan grows to be Nuruddin’s close friend whilst horse-trading and womanising (possibly Catholics).

Nuruddin is existential, over-thinker. He plans, schemes and visits important people to affect his goals which start with freeing his brother but about halfway turn to revenge on the town’s people and leaders. We certainly get inside his head; and for all his religion, his God plays surprising little on his mind – he still seems very much wedded to this earth in his views, personal and selfish behaviour. Nuruddin is ultimately a complex and unforgiving character and we have 450 pages of detailed, hard going, narrative-based in a multicultural historic setting. Ultimately, I think, the tale is about betrayal on many levels social, religious, family and friends.

You can buy the Paperback here and the Kindle here

Christmas in Venice

Obviously due to Covid this year is very particular but these are ideas and tips for a future Christmas in Venice

A wonderful way to spend Christmas Eve is to attend midnight mass at St. Mark's Basilica. But remember, midnight mass starts at 10:30 p.m. and you should get there early to get a seat (no tickets are needed). Try to enter through the north entrance and not the west entrance often used by tourists.

Even though December 26th is a national holiday (St. Stephen's Day), most of Venice's museums and sites will be open.

Several Venice restaurants are closed on Christmas Eve and Christmas Day and even on the 23rd and 26th. Most hotel restaurants and Harry's Bar are open. Be sure to do your homework and make reservations ahead of time for Christmas meals. We hear Caffe Quadri and the restaurant - Piazza San Marco's famous cafe - is open on Christmas Day. Good place for Christmas breakfast and coffee!


211214_3758 copy.jpg

Remember that the vaparetto schedule changes on major holidays. Check the signs posted on the platforms for schedule information.

Each year on December 26, the Frari Church in San Polo (in the Campo dei Frari) offers a free concert at 4:00 p.m. The church is filled with magnificent art, including Titian's Assumption of the Virgin, Canova's Tomb and a carved monk's chair from 1468.

For an incredible seafood dinner and a warm celebration at midnight, go to Trattoria Antiche Carampane on New Year's Eve. (San Polo 1911; (39) 041 524-0165) The price for dinner runs about £70 per person. No matter where you go that night, you must make reservations.

Another restaurant recommendation: Antica Trattoria Poste Vecie (Rialto Pescheria Venezia; (39-041-721-1822) is open on Christmas Day and New Year's Day. This restaurant also has excellent fish and a larger menu as well. The soups and Venetian-style calf's liver are terrific. Fireplaces keep the restaurant warm on cold nights.

DSC_3152 copy.jpg


If you're in Venice on January 6, don't miss the Befana races. Men clad in long skirts, wigs and babushkas climb into boats for races on the Grand Canal. The best views are from the Rialto Bridge.

Venezia in Bianco e Nero (Venice in Black and White)

During the last week, I published a new Photo Zine:

Venezia in Bianco e Nero (Venice in Black and White)

I believe or at least I think to remember that the first time I ever saw as a kid San Marco was when it was completely empty and to me, it was in Black and White. It was simply magical.Because Venice in Black and White just feels right!

ASIN : B08QR4YYH8

  • Publisher : Independently published (December 13, 2020)

  • Language: : English

  • Paperback : 52 pages

  • ISBN-13 : 979-8573953397

  • Item Weight : 4.2 ounces

  • Dimensions : 5.5 x 0.13 x 8.5 inches

It is now available on all Amazon Marketplaces to maintain a free or very low shipping costs


You can easily find it on

  • Amazon.com here,

  • Amazon.co.uk here

  • Amazon.de here

    Or search for your local Amazon Marketplace to save on shipping!

If you prefer to order a high-quality print directly from me you will get a

  • Silk Paper

  • 170gr

  • Real Black

Can be ordered at Euro 15 here


8 + 1 Spaghetti Recipes

Being Italian and having lived most of our life abroad means we are often asked about Italian recipes but at the same time can be a challenge to follow original recipes and to source some of the products.

My amazing doctor here in Hungary asked me recently some Italian recipes so I decided to regularly write on my blog some of the one we prepare. Obviously due to our background a “pure” Italian may find them a bit “fusion” in fact at home we tend to eat a mix of Italian, French, Russian, Hungarian, Slovenian, English, Scottish, Indian, Middle Eastern, Pakistani …to name a few!!

These spaghetti pasta recipes are simple Italian classics you'll find in trattorias all across Italy. “Pantry” meals that take less than 15 minutes to make, each makes enough for 4 people so half if it is just for 2.

For all recipes, follow the Base Steps then move onto the recipe specific steps.

Key step (especially for simple pasta like these) - tossing the sauce with the cooked pasta and a splash of pasta cooking water. The fat in the sauce reacts with the starch in the cooking water, thickening the sauce and making it stick to the pasta strands. This is the proper way to make pasta - no self respecting Italian or restaurant would ever skip this step!

Ingredients for four people

330 g dried spaghetti (or other long pasta we prefer Linguine)


PASTA AGLIO E OLIO (WITH OLIVE OIL & GARLIC):

  • 2 or 3 spoons of extra virgin olive oil

  • 3 garlic cloves, sliced

  • 1/2 tbsp red chilli flakes

  • some chopped parsley

Heat oil over medium high heat. Add garlic and cook until golden - be careful not to burn it.

Toss with pasta and cooking water per Base Directions. Toss through parsley and chilli flakes, serve with parmesan.


PASTA ARRABIATA

  • 1 tbsp extra virgin olive oil

  • 1 garlic cloves , crushed

  • 400g crushed tinned tomatoes

  • 1 tbsp chilli flakes

  • some cup chopped parsley

Heat oil over medium high heat. Add garlic, stir until fragrant, then add the tinned tomatoes and chilli flakes, simmer on medium for 5 minutes.

Toss with pasta and cooking water per Base Directions. Toss through parsley and serve with parmesan.


SPAGHETTI CON LE ACCIUGHE (PASTA WITH ANCHOVIES)

  • 1 or 2 tbsp extra virgin olive oil

  • 1 garlic cloves, crushed

  • 1-2 tbsp anchovies, finely chopped

  • 1/2 tbsp red chilli flakes

  • some chopped parsley

Heat oil over medium high heat. Add garlic and anchovies, stir until the garlic is fragrant and the anchovies have melted.

Toss with pasta and cooking water per Base Directions. Toss through parsley and chilli flakes, and serve with parmesan.


SPAGHETTI ALL’AMATRICIANA:

  • 1 - 2 tbsp extra virgin olive oil

  • 1 garlic cloves, crushed

  • 1/2 brown onion, diced

  • 250g crushed tinned tomatoes

  • 1/2 tsp red chilli flakes

  • 120g thinly sliced guanciale, or diced pancetta or bacon

Heat oil over medium high heat. Add the garlic, onion and guanciale (or pancetta or bacon) and cook until the onion has softened and the guanciale is golden.

Add the tinned tomatoes and chilli flakes and bring to rapid simmer. Toss with pasta and cooking water per Base Directions. Serve with parmesan.


PASTA POMAROLA (FRESH TOMATO & BASIL SAUCE ):

  • 1 - 2 tbsp extra virgin olive oil

  • 1 - 2 garlic cloves , crushed

  • 500g fresh cherry tomatoes, halved. We tend to use 400-500g crushed tinned tomatoes

  • fresh basil , lightly packed

Heat oil over medium high heat. Add garlic and cook until fragrant, add tomato and cook briefly, just to warm through.

Toss with pasta and cooking water per Base Directions. Toss through basil, serve with parmesan.


SPAGHETTI NAPOLITANA:

  • 1 - 2 tbsp olive oil

  • 2 garlic cloves , crushed

  • 1//2 brown onion , diced

  • 500g crushed tinned tomatoes

  • fresh basil , lightly packed

Heat oil over medium high heat. Add garlic and cook until fragrant, then add the onion and cook until softened. Then add tinned tomatoes and 1/2 cup water, simmer 5 minutes.

Toss with pasta and cooking water per Base Directions. Toss through basil and serve with parmesan.


SPAGHETTI ALLA PUTTANESCA (SPAGHETTI WITH OLIVES AND CAPERS ):

  • 1 -2 tbs extra virgin olive oil

  • 1 - 2 garlic cloves , crushed

  • 250g crushed tinned tomatoes

  • 0.33 tbsp red chilli flakes

  • 70g black sliced olives

  • 1.33 tbsp capers

  • some chopped parsley

Heat oil over medium high heat. Add garlic and cook until fragrant, then add tinned tomatoes, chilli flakes, olives, capers and 1/2 cup water. Simmer 3 minutes.

Toss with pasta and cooking water per Base Directions. Toss through parsley and serve with parmesan.


SPAGHETTI AL TONNO:

1 tbsp extra virgin olive oil

1 garlic cloves , crushed

1/2 brown onion , diced

250g crushed tinned tomatoes

100g tinned tuna

some chopped parsley

Heat oil over medium high heat. Add garlic and cook until fragrant. Add the onion and cook until softened, then add the tinned tomatoes and 1/2 cup water. Simmer 3 minutes, then add the tuna.

Toss with pasta and cooking water per Base Directions. Toss through parsley. Seafood pasta typically not served with parmesan but you can if you want!

+1 Extra Recipe

SPAGHETTI ALLA BOLOGNESE:

2 tbsp extra virgin olive oil

1 knob of butter

1 onion, sliced

1 carrot

1 celery

300g minced beef

100ml white wine (or red)

100 g pancetta (bacon)

1 glass of whole milk

400 g of tomato “passata” (We use Mutti Tomato Puree/Passata)

2 tablespoons of tomato paste

Start the preparation of the sauce by chopping the celery, onion and carrot together in a blender and frying the bacon and vegetables in a pan with 2 tablespoons of oil

Then add the minced meat, the wine and let it evaporate, then add the milk, continuing to mix add the sauce, broth, a pinch of salt and pepper and cook for 2 hours, stirring occasionally!

Put the spaghetti back in the same pot where they cooked, add half of the sauce and stir the pasta, then serve it immediately on the table, seasoning it with the rest of the sauce.

Instructions

BASE DIRECTIONS (FOR ALL):

Cook spaghetti (or any other long dried pasta) in a large pot of salted boiling water per packet. Check 1 minute before suggested time to see if is ready for you, do not over cook

Meanwhile, prepare one of the sauces.

When pasta is ready, scoop out 1 cup of pasta cooking water, and drain pasta.

Add pasta into chosen sauce with 3/4 cup pasta cooking water. Toss pasta until sauce thickens and sticks to pasta (called "emulsifying" the sauce), 1 - 2 minutes. Use more pasta water if needed to loosen the sauce.

Season with salt and pepper to taste. Finish pasta per chosen recipe.

Notes and Tips

Pasta We prefer Linguine vs Spaghetti . If we use Spaghetti will be n5

Brands Depending of where we live abroad we tend to buy Barilla that is widely found, DeCecco, Lidl own brand (Italiamo) and Penny own brand (San Fabio) are also very good in our opinion!

Virgin Oil it must be a really good Virgin Oil!!!

Canned tomatoes - not all canned tomatoes are created equal. Good quality ones are naturally sweet with better tomato flavour, poor quality ones are sour and often unripe tomatoes. If needed, add sugar to sweeten tomatoes.

Salted boiling water - use a big pot of water and 1 - 1 1/2 tbsp salt. Stir pasta once or twice while cooking.

Time the pasta so it finishes cooking when the sauce is ready. If you leave cooked pasta sitting in a colander, it sticks together and goes hard as it cools. Ideal is to use tongs to transfer it straight out of the boiling water into the sauce - no colander needed!

Pasta sticks together - If your pasta DOES start to stick together and go hard, loosen it up with a splash of the reserved pasta cooking water (don't rinse it with tap water, this washes away the starch which stops the sauce from clinging to the pasta). Alternative is to use a drizzle of oil - drizzle and toss while hot.


Improve Your Mobile Photography with 20 Tips!

Do you want to take excellent photos with your mobile phone?

Mobile photography may seem daunting. But with a few simple tricks, you'll be able to shoot better photos with a WoW factor


1. Clean Your Lens to Get Sharp Images

The first and most important thing every mobile photographer should do is clean their phone lens.

Make sure you wipe the lens before taking the shot to get crisp, clean images.

We carry phones in our pockets and bags, which are havens for dirt. Always make sure you give your lens a quick wipe before you take any photos.

Specks of dust on the lens can ruin the perfect shot; it can make an image fuzzy or cause potential light distortion.

Your camera lens needs to be clean to capture clear and crisp images like this.


2. Explore Your Camera Settings

The best phone photography happens once you have familiarised yourself with your mobile’s camera settings and features.

Check your manual, phone settings and native camera app to see what your mobile has to offer.

The number of options available will vary depending upon your phone’s make and model. Learn how to access these features quickly and confidently, so you always get the best possible shot.

Familiarise yourself with your mobile camera settings so you can access them quickly.


3. Set your Image Quality to High

Make sure you have the image quality set to the highest possible level in your settings. This ensures you are using the camera to its maximum capabilities.

Set the image quality to the highest possible level to capture beautiful details, such as these dandelion clocks, taken with an iPhone.


4. Get Beautiful Bokeh Effect in Your Photos by Using Portrait Mode

A fairly recent addition to some smartphones has been the portrait mode in the camera app.

iPhones and Google Pixel phones have this handy mode, which blurs the background on portrait shots. It adds depth of field to images by mimicking a professional camera lens.

Use portrait mode to blur the background.


5. Sweep Your Phone Sideways to Create Panoramas

Turn on the panorama mode in your camera app to capture beautiful sweeping landscapes.

Vistas like this won’t last long. Use the panorama setting on your phone to capture the whole scene.

Pan your phone to the left or right to take the photo. Your phone takes a series of shots which it then automatically stitches together to create one long panoramic image.


6. Capture Great Action Shots with Burst Mode

The burst mode in your camera app allows you to take multiple shots in quick succession. This is great for capturing action shots of people or pets. You can scroll through the shots to pick the best one.

Capture actions shots using the burst mode on your mobile.


7. Use the Self Timer to Ensure Sharp Images

Use the camera’s self-timer when light levels are low or you need to steady the phone. Find a tripod or prop your phone on something and set the self-timer running–it usually runs at intervals of 3 or 10 seconds. The use of this will minimize the risk of camera shake and you’ll end up with a sharper image.

Use your phone’s self-timer for sharper images in low light conditions.


8. Don’t Compromise on Quality – Forget the Front Lens

There’s one phone function you’ll be tempted to use but should avoid: the front camera lens.

The image quality is generally much lower than your phone’s rear camera, which could result in noise on your image, especially in low light situations. So, avoid the temptation, even if composition with the rear lens is a bit trickier!

Avoid the temptation to use the front-facing camera lens: the image quality will be poor.


9. Uncover Camera Shortcuts to Quickly Access Features

Time is of the essence with photography to ensure you don’t miss the moment. Good knowledge of how to access your phone camera quickly is vital. There’s usually a shortcut that will let you bypass the phone’s lock screen.

In the iPhone, swipe left to access the camera directly from the lock screen.

Did you also know that on an iPhone you can use the volume buttons as shutter buttons? This offers a discrete option that is perfect for capturing candid moments.

Use the volume button as a shutter button to capture candid moments.

It’s also much easier to use the volume buttons as the shutter if you only have one hand free: perfect if you need to hold your subject in position with your other hand.

Take the time to discover the shortcuts specific to your phone model to improve your mobile photography.

Quick access to your camera app means you won’t miss moments like these.


10. Hold your Mobile Steady to Stop Camera Shake

It’s extremely important to hold your phone still when taking a shot. This will ensure the final image is sharp.

You could use a tripod to achieve this: there are plenty available to fit mobile phones. However, one of the advantages of mobile photography is you don’t have to carry extra equipment.

You can rest your body on the ground to keep your phone still to get shots like this.

A simple tip to steady your phone is to rest it against any kind of fixed surface when you press the shutter. A table could work if you are indoors, or alternatively, a rock or a tree stump if you are outdoors.

, or alternatively, a rock or a tree stump if you are outdoors.

You can also steady yourself. Try leaning your body or arm against a fixed surface to stop your phone moving when you take the shot.

Steady your arm and phone against objects such as trees, for shots taken in low light conditions.

It is especially important in low light conditions to keep your phone steady. Holding your phone close to your body can also help reduce camera shake.

It’s important to keep your phone steady when taking shots in low light conditions.


11. Take Control Of Focus to get Tack Sharp Images

Most mobile phone photos tend to have a wide depth of field, which means a sharp focus throughout the scene.

Controlling the focus plays a big part in being creative. Get your camera lens up close to a subject in the foreground to create a narrower depth of field; the background will then drop out of focus.

Focus on the foreground to narrow the depth of field.

Pro Tip: Remember to tap the screen at the point where you want the focus to be sharpest.

If you struggle with that or don’t have portrait mode on your mobile, you can blur parts of an image in post-processing. Make use of photo editing apps and software to achieve this.

Create a shallow depth of field by focussing on a subject in the foreground.


12. Turn On The Gridlines to Perfect Your Composition

The composition is key to a good photo, whether that is taken on a traditional camera or your smartphone.

Nothing screams amateur photographer more than an uneven horizon.

But this is easily avoided with one simple trick: turn the gridlines on in your settings.

Use your on-screen gridlines to make sure subjects, like this bridge, are straight in your shots.

This will overlay two horizontal and two vertical lines on your screen. Line these up with elements of the scene to make sure everything is straight.

Use the grid lines to line up elements of your scene, to ensure everything is straight.


13. Adjust The Exposure for Beautifully Lit Images

Phone photography is not just about pointing and shooting. You must adjust the exposure to get a good shot.

Exposure is the amount of light that reaches your camera sensor. This is crucial in determining how light or dark your final image will be.

You may need to adjust the exposure on some shots to lighten the foreground.

In traditional photography, the amount of light reaching the camera sensor is adjusted by changing the aperture size.

In phone photography, we can’t do that. One method is to tap to set the focus in a particular part of the scene. If you tap and focus on a light area–such as the sky–the camera will adjust the exposure to try to match darker parts of the scene. This will give you a darker image.

Tap your screen to focus on the sky, which will darken the foreground and give an intentionally moody feel to your shot.

Alternatively, focus on a dark area–such as the foreground–for the camera to try to match the lighter areas of the scene. This time you’ll end up with a lighter image.

Try focussing on different parts of the screen to get the overall image brightness just right.

Some models of mobile phones have manual exposure control (exposure compensation), which appears when you tap and focus on the screen.

Click on your screen to activate the focus. Then look for an exposure slider that can be adjusted to correct your exposure.

In the iPhone, you’ll see a sun icon appear next to a vertical line. Drag your finger upwards across the screen to increase exposure, or downwards to decrease exposure.

Tap on different areas of your smartphone screen to get the right level of brightness/exposure.


14. Turn HDR Mode On to Help Exposure

Have you ever wondered what the HDR mode does on your phone? You’re not alone. Many people overlook this setting, but this can help with exposure.

HDR stands for High Dynamic Range. It’s especially important to turn HDR on to make sure your photos are perfectly exposed.

This iPhone shot with HDR mode on captures all the detail in the both the dark and light areas of the scene.

Landscape photography shots that are taken on a mobile camera often suffer from an overexposed sky and dark foreground. The HDR setting should help fix that issue.

HDR enables your camera to take several photos in quick succession; some are lighter and some are darker. Your phone then combines these to give one better-exposed image.

However, don’t use this setting if your subject is moving, as you’ll get end up with a blurred image.

Most phones will give you the option to keep both the normal and HDR version of a shot.


15. Always Look for the Best Lighting for your Shot

Mobile phone cameras generally don’t perform well in low light conditions. You’ll end up with grainy images and unwanted blur from camera shake.

Try to shoot in natural light wherever possible.

The golden hour before sunrise or after sunset, is a fantastic time to shoot. It gives more even exposure and a lovely warmth to shots.

Shoot during the golden hour to add a lovely warm glow in your images.

Try to avoid harsh sunlight in the middle of the day: this will cause unwanted shadows, light spots or glare on your image.

Overcast days and misty weather, on the other hand, even/soften the light and are a great time for mobile photography.

A misty early morning can produce beautiful soft light.

Avoid using your mobile’s built-in flash: it’s rarely flattering. Related Article: Ultimate Guide to Flash Photography


16. Move Closer to your Subject to Maintain Image Quality

Avoid the instinct to use your smartphone camera’s zoom function. It is a digital zoom, which reduces the quality of the final image. It is the editing equivalent of cropping an image.

If you want to capture more detail, simply move closer to your subject. You will retain far more pixels image and detail in the image than if you zoom in.

Move close to your subject, rather than zoom in, to ensure no loss of quality of the final image.

The only exception is if your mobile has an in-built optical zoom. This usually means you’ll have a second lens, as well as another fixed focal lens. One example of this is the telephoto lens on the iPhone XS.

Get in close to subjects to retain more detail.


17. Change Your Position for a New Perspective

A huge advantage of mobile photography is a small size and the lightweight of your camera. You’ll be able to manoeuvre yourself to take photos from angles you may not have ordinarily tried.

Try a different angle with your phone photography.

Turn an ordinary subject into something special by looking at it from a different perspective.

Get down low and shoot at ground level. You’ll be able to include foreground that helps set the scene for your image, which will add interest and draw the viewer in.

Crouching down low and including the foreground, adds depth to an image.

Shooting upwards is a great way to make your subject appear imposing and larger than life. Remember to move yourself as well as your mobile camera to find the best perspectives.

Shooting upwards adds a new perspective and can make your subject seem imposing.


18. Try Third Party Camera Apps for More Creativity

Are you craving more advanced control of your mobile camera?

The beauty of mobile phones is you don’t need to spend lots of money to enhance your photography kit. Simply find a third party app, which will give you new camera tools.

If you’re an experienced photographer there are apps available that will match the capabilities of your main camera.

Third party camera apps will give you more control in difficult lighting conditions.

You’ll find apps that offer a broad range of manual controls such as ISO, white balance and focus. While other apps are dedicated to a specific task, such as long exposure photography.

There are also plenty of fun effects apps too. These can do all kinds of things from adding fun stickers to your images to turning your shot into a cartoon.

Head to the Apple App Store or Google Play Store to browse the camera apps on offer.

Unlock more advanced manual controls for your phone camera with a third party camera app.


19. Use Phone Photo Editing Apps to Add Flair to your Photos

One of the best things about mobile phone photography is that your creativity can continue after you’ve taken the shot.
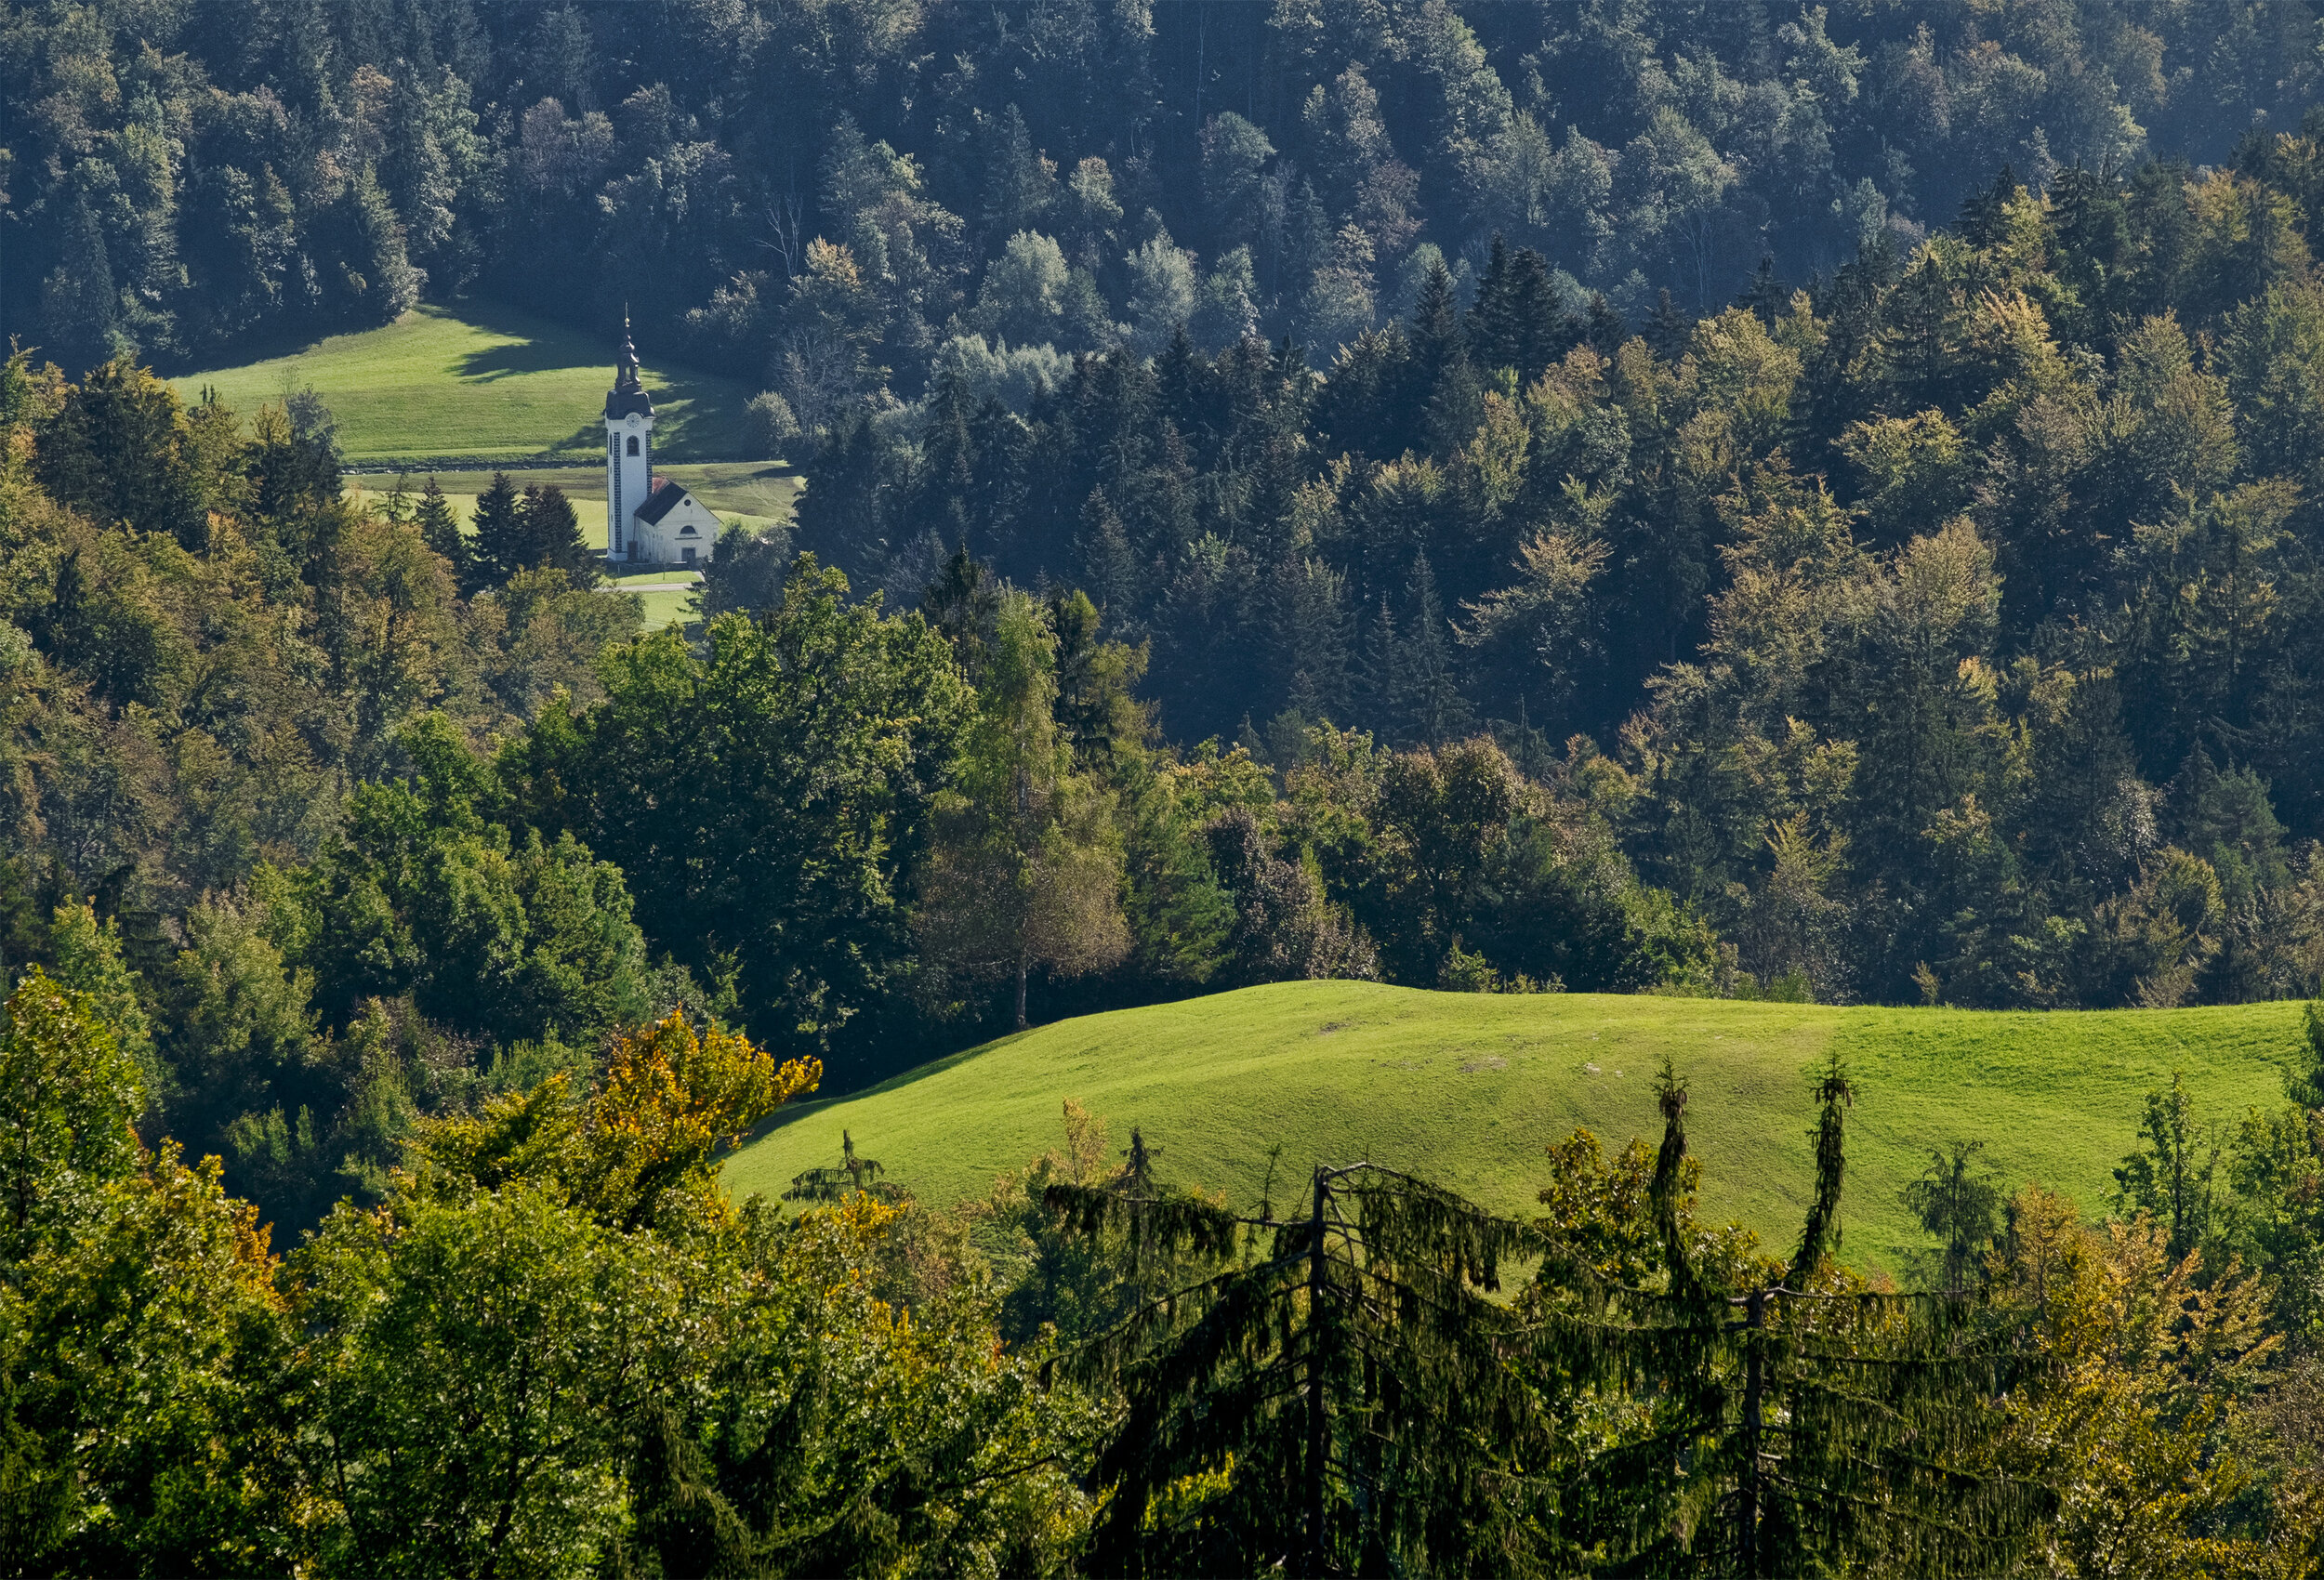
There are many editing apps available to help you add more flair to your images. Plus you can edit instantly on your phone, with no need to transfer shots to another device to edit.

The mood was enhanced on this image with the use of a phone photo editing app.

Start by cropping and straightening shots to refine your photos.

If you’re new to editing, try Snapseed. This app, available to iPhone and Android users, offers plenty of editing options including a blemish removal tool. It also features a great selection of overlays to add to shots, which change the look of your image.

Read Next: Best photo editing apps

If you want to turn your photo into a painterly masterpiece, Mextures (iPhone only) is a great introduction to layer-based editing.

An iPhone photo transformed into a painterly work of art using the Mextures app.

Or, turn your photos into a work of art with a single tap, with the Prisma app (iPhone and Android).

Some apps even magic away unwanted telephone lines, or light flare from the sun, with a single tap.

Have fun and get creative by adding mobile editing apps to your mobile photography.

A black and white filter was added to this iPhone shot for a simple edit.


20. Take Lots of Photos

Don’t let a lack of storage space on your phone prevent you from taking photos.

Take plenty of shots of the same scene from different perspectives.


The mystery of Scottish "witch" Maggie Wall

Just outside the village of Dunning in Perthshire, lies a monument. It’s a collection of stones about 20 feet high, topped with a cross and decorated with gifts left by visitors—pennies, feathers, shells, fluffy stuffed animals, and tiny tea candles. The stones bear the words in stark white lettering: “Maggie Wall burnt here 1657 as a witch.”

Maggie Wall1.jpg

Scotland was home to nearly 3,800 people accused of witchcraft between 1500s and 1700s, the vast majority of whom were women. In the end, about 1,500 were murdered as a result of witch hunt inquisitions. However, mysteriously, there is no record of a woman named Maggie Wall being tried as a witch. What’s more, there’s no record of the monument itself until 1866, though a forest surrounding the monument called Maggie Walls Wood was documented as of 1829.

There are several theories about who Maggie Wall was and why her monument exists. Some have suggested that Lord Andrew Rollo (the landowner of the area at the time) was having an affair with Maggie, and built the monument after she was executed out of guilt.

Others theorise that it was in fact Lady Rollo who erected the monument, feeling a sense of sympathy towards Maggie and women like her.

In 1663, six women from Dunning were accused of witchcraft (and three were executed), which is an alarmingly high number considering the village only had a couple of hundred residents.

The 1650s and 1660s were turbulent times in this Perthshire parish, with the witch trials coinciding with religious and political tensions.

The local minister, Revered George Muschet, was deemed unfit by church officials, but he was well liked within the village. When officials attempted to discipline the minister in 1652, they were attacked by an angry mob of local women who wanted to keep him in the church.

Some have suggested that Maggie Wall was part of this group, and that may be why she came under the wrath of the church and burned as a witch a few years later.

The accepted theory is that this monument stands as a testament to all the witches murdered in Scotland during the witch hunts as no other such monument exists. Perhaps the name was taken from the surrounding wood to represent the countless and forgotten women who were killed. Occasionally a wreath is laid at the foot of the monument, serving as a reminder of the injustices suffered by the mysterious symbolic witch, Maggie Wall.

Before You Go

This monument is located right outside of Dunning Scotland. Dunning is in Perth and Kinross. It is off of the road B8062 which you can access from the A9 highway.

Rural Life in Monochrome

Rural areas have a low population density and small settlements, also agricultural areas are commonly rural, as well as other types of areas such as forests.

Different countries have varying definitions of rural for statistical and administrative purposes……but no matter where the style of life is very similar

Rural living offers the opportunity to reconnect with nature. More trees and less traffic means cleaner air. Fields, forests, and streams make for great outdoor living and a healthier lifestyle

Advantages

  • More privacy. In the countryside there’s a good chance your nearest neighbour won’t be directly next door. You may not even be able to spot their home at all.

  • You can have a bigger garden. If you’ve always wanted to grow your own food or have more space for children or pets, this is a huge benefit.

  • You’ll be able to own pets you may have always wanted but couldn’t have owned in a city or town. Cows, llamas and horses are all examples of these. You could even keep hens and have your own free-range eggs.

  • You’ll be closer to the various wildlife of the area and to walks in areas of natural beauty.

  • City-dwellers usually suffer higher levels of stress than those who commute in for work or live and work in the country. There is a reason living and working in a city is called “the rat race”. By decreasing the number of people surrounding you, you could become more relaxed.

  • You can be fully, or semi self-sufficient. You could grow your own food. If you do decide to keep animals, you may also be able to sell produce from them (milk/eggs/honey) to create a small income.

Disadvantages

  • If you have children of school-age, they might be faced with a longer journey to school, whether they walk, take the bus or get a lift in.

  • Shopping can become an inconvenience. This may not seem all that important, but staples that are purchased a couple times a week, such as milk and bread, may be further than just a 2 minute trip down the road.

  • There may be limited job opportunities, unless you already have a job nearby or if you commute into a town or city.

  • Television and Internet connectivity could be weaker or patchy in more rural areas.

  • During the winter months, nearby roads might not be in the best shape or not be as well maintained as urban roads.

  • Trade services, such as a mechanic, are harder to find. In urban areas, if you have car trouble you can make do with a local taxi or bus until it’s fixed. Services like these are scarcer in the countryside, leaving you with limited options.

  • Entertainment and eateries may be further away, which involves more time, a higher expense and extra planning.

A Gondola Ride in Venice

Sufi Galata Dervishes

The Mevlevis are also known as the "whirling dervishes" due to their famous practice of whirling as a form of dhikr (remembrance of God). Dervish is a common term for an initiate of the Sufi path; whirling is part of the formal sema ceremony and the participants are properly known as semazens.

The Galata tekke has a long and revered history, having been founded in 1491 by a Ottoman grandee from the palace of Sultan Beyazit II. The tekke’s first şeyh(sheikh, leader) was Muhammed Semaî Sultan Divanî, a descendant of Mevlâna Jelaleddin Rumî himself.

The building you see is not the original, which burned in 1765, but its replacement, which dates from 1796 and was extensively restored during the 19th century, also between 1967 and 1972, and again in 2008.

The Galata Mevlevihanesi Müzesi is open daily except Monday from 09:00am to 16:30 (4:30pm), with last entry at 16:00 (4pm). There is a small admission fee.

Galip Dede, a renowned 17th-century sheikh of this tekke, is buried in an ornate tomb to the left as you enter from the street.

Kumbaracıbaşı Ahmet Paşa, better known in the west as Claude Alexandre, Comte de Bonneval (1675-1747), a French nobleman who converted to Islam and entered the sultan’s service as a bombardier general, is also buried on the tekke’s grounds.

Nearby is the tomb of İbrahim Müteferrika (1674-1745), an ethnic Hungarian Unitarian from Transylvania who converted to Islam and established the first Arabic/Ottoman moveable-type printing press in the Ottoman Empire in the 1720s.

Holy Trinity Church in Velemer frescos by Janos Aquila, Orseg, Hungary

The Holy Trinity church was erected in the 13th century in Velemer, County Vas Hungary .

DJI_0268 copy-1563219778804.jpg


The rectangular aisleless church, to which a tower is attached on the north facade, is aligned east to west, as typical of medieval times. While carrying elements of Romanesque style it also has some Gothic elements . The walls of the church are built of both brick and stone. It is adorned by an arched cornice, with corbels carved with human faces, representing the various sins, supporting the roof.

The frescoes in the church were painted by János Aquila of Radkesburg from 1377 to 1378.


The church was used by the Calvinist church from the mid-17th century, and was re-Catholicised in 1733. It was abandoned in 1808.
.

DJI_0266 copy-1563219777261.jpg

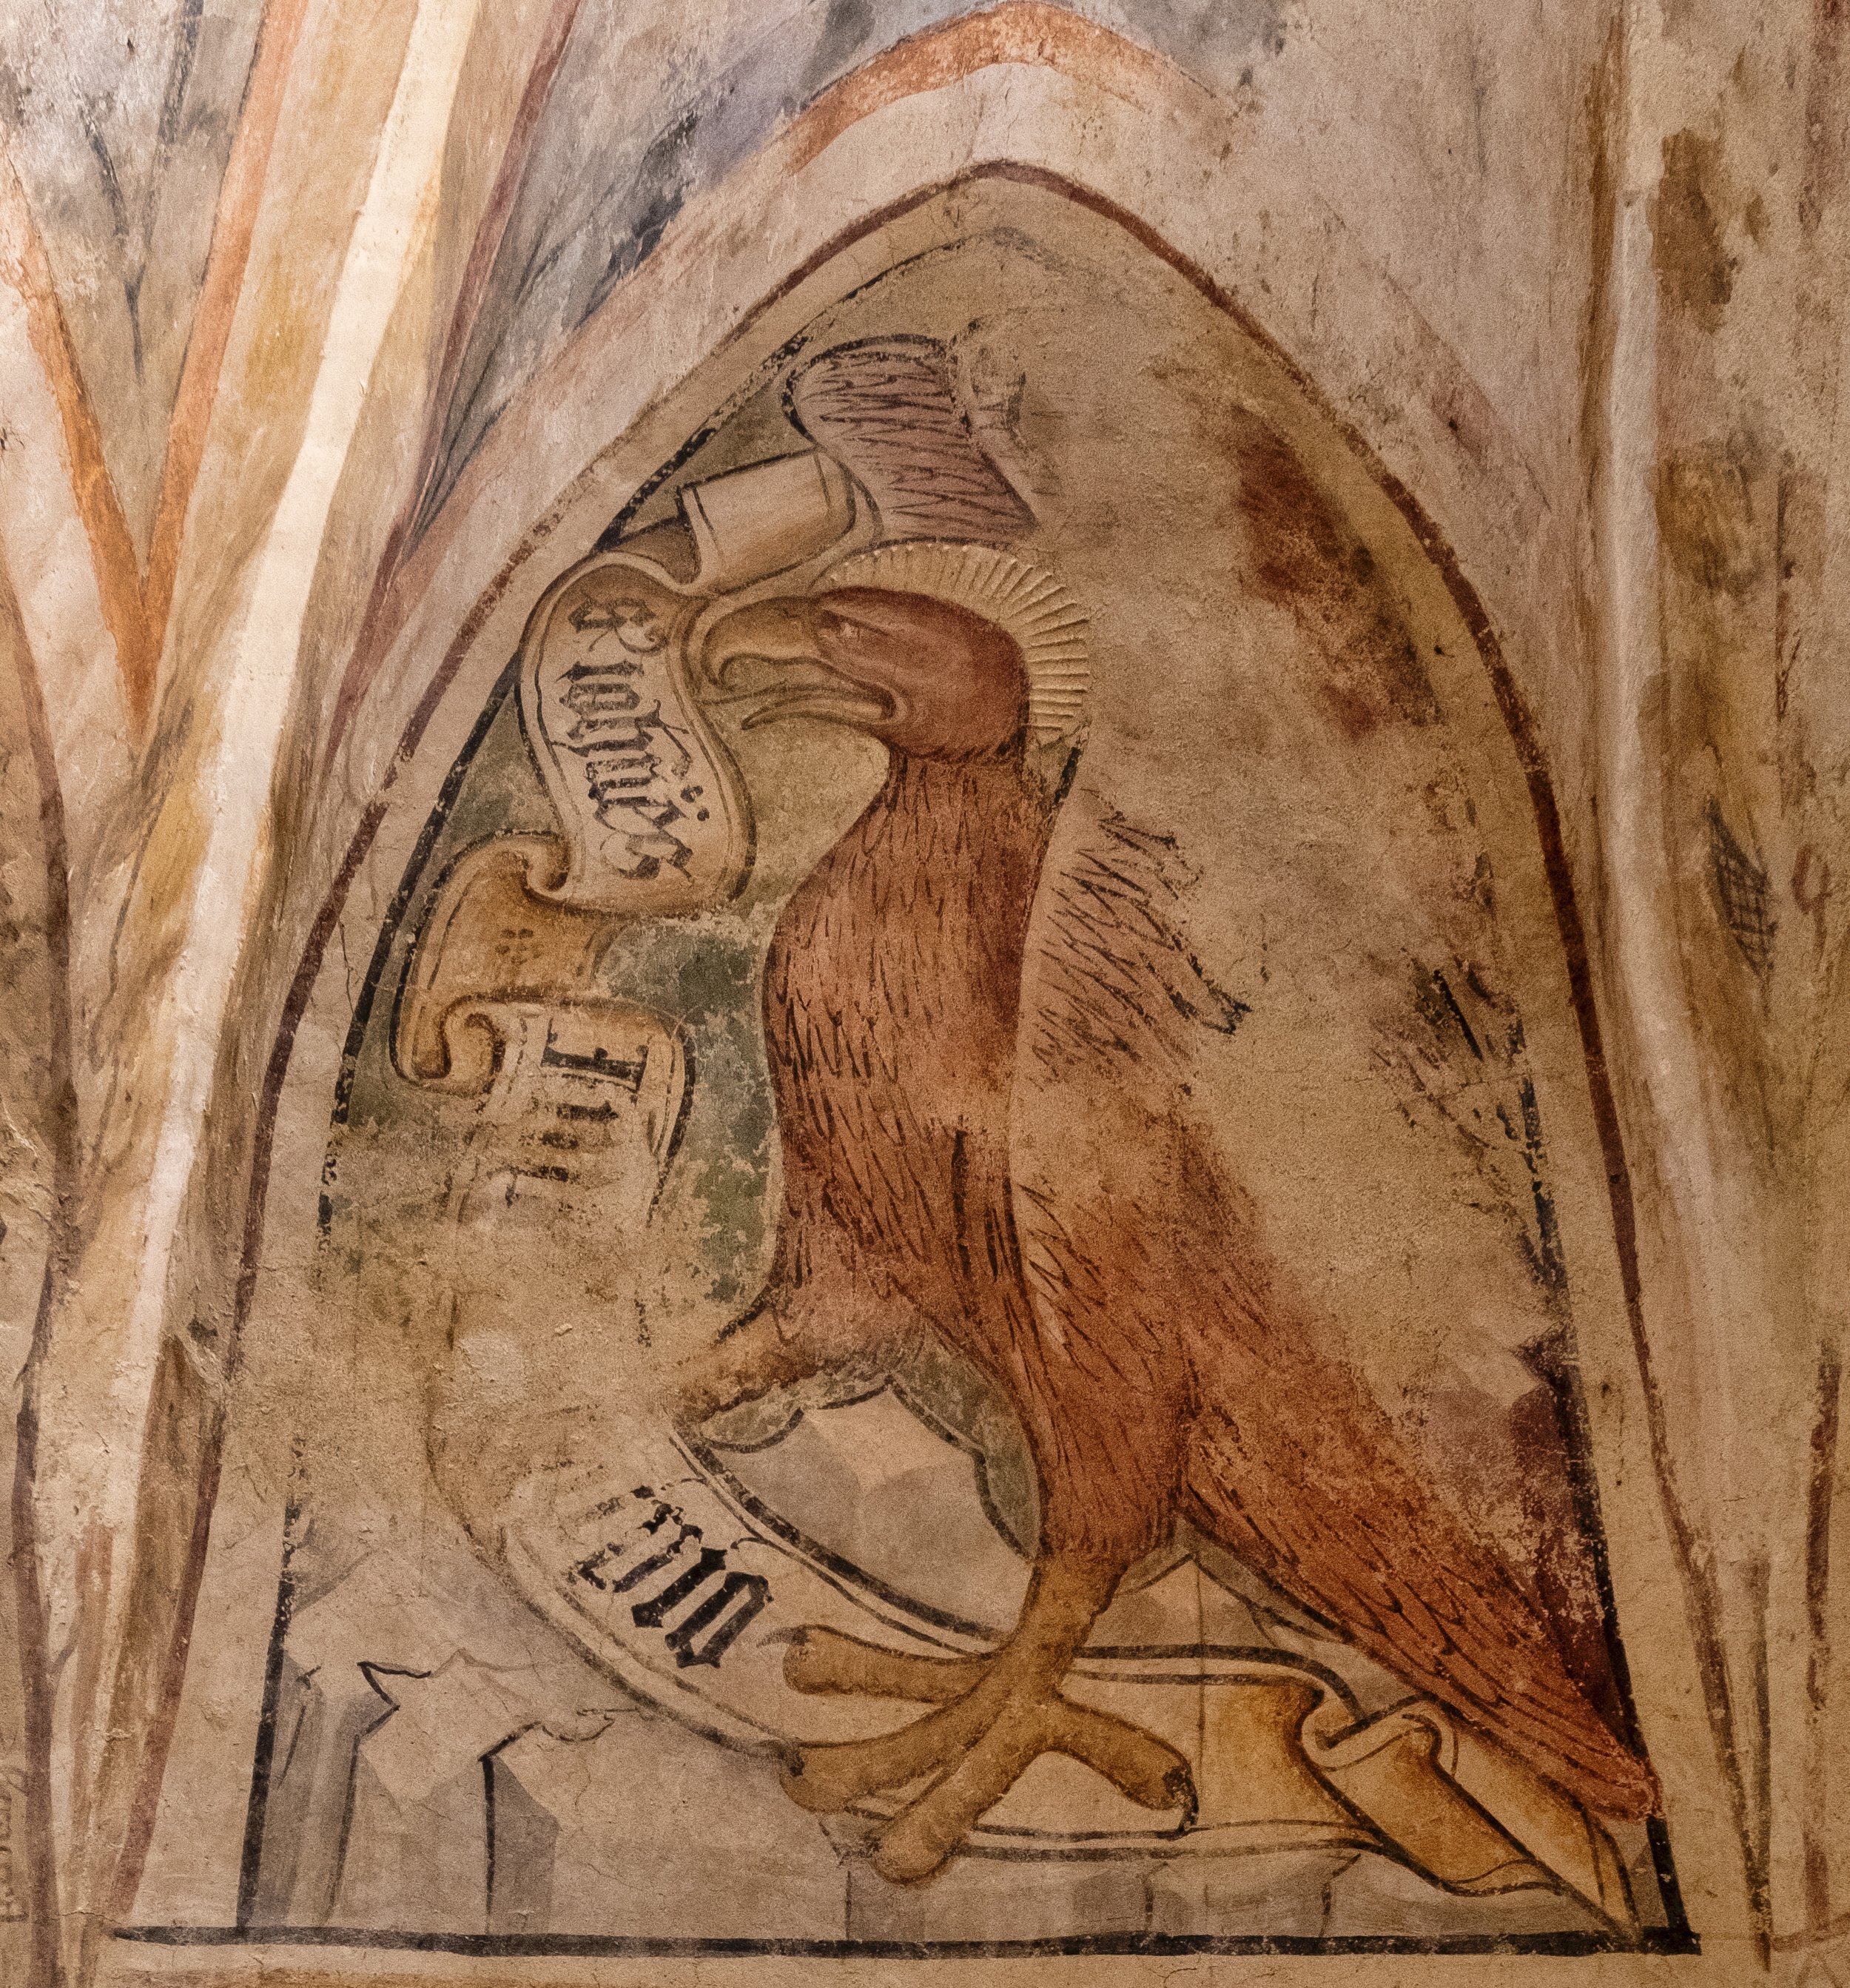
The frescos have worn over the centuries, but among the surviving fragments of the sanctuary the symbols of the four gospels are easily found - the lion representing Mark, the eagle John, the angel Matthew, and the oxen Luke. On the sanctuary's north wall, a self-portrait of Aquila himself can even be made out. The window recess of the sanctuary is decorated with floral and herbal motifs.

Above is a depiction of the Veil of Veronica with the likeness of Christ. The threefold circle in the pinnacle of the sanctuary side of the triumphal arch symbolises the Holy Trinity. The image of Christ the Judge is outside the central piece, while the images to the right and left symbolise good and evil deeds. Below and to one side, a cavalry scene can be made out, and St Anne with Mary and the child Jesus can be seen on the opposite side.

The church dedicated to the Holy Trinity (Szentháromság) and to King St Stephen (Szent István király) is located towards the southeast edge of town, away from the main road.

A Soaring Symbol: The Eagle in Aquila's Frescoes

One cannot discuss Aquila's work without noting the compelling presence of the eagle. In many cultures and religious traditions, the eagle symbolises strength, renewal, and spiritual ascension. Its inclusion in Aquila's frescoes could serve multiple symbolic purposes:

  1. Divine Connection: The eagle, with its ability to soar towards the heavens, is often seen as a messenger or intermediary between the divine and the earthly realm. Its presence in the frescoes may signify the spiritual journey from the mortal world to the divine, echoing the Christian belief in resurrection and eternal life.

  2. Personal Emblem: Given that 'Aquila' translates to 'eagle' in Latin, the artist's use of this symbol could also be a personal signature, a way of marking his work with a visual emblem that is both deeply meaningful and reflective of his own name. This interplay between the artist's identity and the symbolic imagery enriches the narrative woven into the frescoes.

  3. Guardianship and Vigilance: In Christian iconography, the eagle is also associated with St. John the Evangelist, symbolizing clarity of vision and spiritual insight. Its inclusion might suggest a thematic focus on the Gospels' messages and a call to vigilance in faith.

Deciphering the Frescoes: Layers of Meaning

Like the eagle within the Velemer church, the frescoes invite viewers to explore layers of meaning woven together with theological themes and personal stories. These artworks are more than mere decorations; they are visual sermons, teaching and inspiring those who gaze upon them.

Janos Aquila's mastery lies in blending traditional Christian iconography with local cultural motifs, creating a tapestry that speaks universally and specifically to the community for whom it was made. The frescoes serve as a bridge, connecting the earthly to the divine, the individual to the community, and the past to the present.

Reflecting on the Past, Inspiring the Future

For photographers and art enthusiasts, the frescoes offer a unique study in the power of visual storytelling. Through his use of colour, composition, and symbolism, Aquila invites us into a reflective dialogue with our spiritual and artistic journeys.

Exploring the frescoes of the Velemer church is not just an academic exercise; it's a pilgrimage into the heart of human creativity and divine inspiration. Janos Aquila's work challenges us to look beyond the surface, to find meaning in the symbols that surround us, and to appreciate the profound connection between art, faith, and life.

My post about Martjanci church is here

#Ancient_monument #Hungary #műemlék #Temple #templom

Reformed Church of Szentgyörgyvölgy

Among the Reformed churches with painted coffered ceilings in Hungary, the church of Szentgyörgyvölgy.

The Reformed people of Szentgyörgyvölgy temporarily built a mud-walled house of worship as early as 1762, then II. Taking advantage of Joseph's leniency decree, the construction of a brick church was also planned.

This - then without a tower - was erected in 1787 in such a hurry that the carpenters were said to have carved the beams from the logs brought from the forest on the cart so that by the time the permit was revoked, they would be ready for everything.

DJI_0528.jpg


Its tower was erected in 1792-93, until then a small wooden belfry stood next to the building. The church bears the marks of folk baroque style.

The walls and the tower consumed the money of the ecclesia, and it took many years for the materials needed for the interior furnishings and ceilings to be collected. Moreover, in 1805 - to this day it is not known why; probably due to the hasty foundation - the church wall was cracked, the beam holding the choir was broken. Due to lack of funds, the repair took until 1820.


On the south side of the interior of the church rises the crowned pulpit, on the other sides a porch resting on wooden pillars was built. The ceiling was assembled from 88 wooden cassettes.

The rectangular boards are decorated with lamb cloud motifs in the sky. The porch was built on three sides; its parapet consists of 20 cassettes with folk carved slats at the edges. The bottom of the galleries is also cassette-shaped (37 cassettes).

At the bottom of the galleries, we can see blue, white, black floral and star ornaments reminiscent of embroidery patterns (these are less worn and faded than the colours of the parapet and ceiling). Some panels on the parapet are carved, others are adorned with painted geometric patterns. The painting of the wooden columns mimics the pattern of the columns laid out of stone.

The gallery can be reached by a wooden staircase at its eastern and western ends. In the centre of the ceiling, on two panels, is a motif different from the other cassettes: around the flower symbolizing the Sun, the inscription: “This place is none other than the house of God, and the gate of Heaven. (Genesis 28:17). How loving are thy tabernacles, O Lord of hosts. Sat LXXXIV Sold 25 v. ”

The central big star, the biblical quotations are written around it, and the subsequent beaded decoration is surrounded by a wreath of pearl flowers. Ribbon drifts on the wreath.

The inscription on the visible sections of the tape reads: “In 1829, Officer. Scientist István Hajas painted András Patkó in his Preaching ”. At the tower end of the ceiling, in one of the cassettes on the south corner, is the name of the carpenters. Above the two exits, another large star can be seen.

The pulpit contrasts with the simple interior image with its dark brown colour and baroque shape. It consists of two parts: the actual pulpit and the crown are both carved and painted. The lower edge of the crown was sawn out of plank; it hangs bell-like ornaments.

Zois Palace and Križevniška in Ljubljana

A friend of mine and a great photographer Blaž Gutman recently showed me an interesting image of the area dating back late 1700! This woke up in me the desire to find more informations.


ZOIS PALACE

The Zois Palace in Ljubljana was built in the second half of the 18th century with the merging and partial rebuilding of older houses on the Breg between today's Križevniška Ulica and Zoisova cesta. 

IMG_20200808_094119.jpg

Baron Michelangelo Zois (1694-1777), the father of Žiga Zois (1747-1819), bought a house on the Breg on the corner of Nemška (today Križevniška) Street in 1728, which became the first home of the Zois in Ljubljana. In the early 1960s, he bought three smaller houses on the then Nemška Street, and in 1765 Erberg's house on Breg - a large building that was in the 16th century. built as a city warehouse. Next to Erberg's house, on the corner, along the city wall, stood the house of the abbot of Bistrica - the so-called "Bistrica court", which together with the church of St. Lawrence and part of the defensive walls were bought by Žiga Zois in 1793.

He had the church and the wall demolished to gain space for a garden, he annexed the house of the abbots of Bistrica to his estate and by 1798 had united all three buildings with a single façade. The facade is designed in the spirit of classicism, strict and somewhat monotonous, without any special architectural decoration. On the ground floor and on the first floor were rooms for trade and storage of goods, on the second floor had Baron Žiga Zois his living quarters and the famous cabinet with a rich library with about 4000 books and a famous collection of minerals in which was ok. 5000 exhibits. 

An old drawing can be seen here http://www.dedi.si/dediscina/335-zoisova-palaca-v-ljubljani

An old drawing can be seen here http://www.dedi.si/dediscina/335-zoisova-palaca-v-ljubljani

Renovation of the facade in 1938 spoiled the visual image of the original facade, as due to the thick layer of new plaster, the window frames are sunk into the wall and therefore less pronounced. The main decoration of the stone ground floor is a monumental portal made for the city warehouse building by Abondio Donino in 1589, but it was in the 18th century. processed. The key of the original portal with the city coat of arms is today built to the left of the main entrance. To the right of the front door is a bronze portrait bust of Žiga Zois, made by Mirsad Begić. In the courtyard of the palace is a built-in tombstone of Baron Žiga Zois, brought from the abandoned Ljubljana cemetery near the church of St. Christopher. Zois Palace is today a multi-apartment house with private apartments and smaller shops on the ground floor. The palace is ok. in 1780 it became one of the most important social centres, where Slovene intellectuals and artists who worked in the spirit of the Enlightenment gathered. The so-called Zois circle was formed, which included Anton Tomaž Linhart, Valentin Vodnik, Jurij Japelj, Jernej Kopitar, Blaž Kumerdej and others. As a widely educated patron and member of the Enlightenment, Žiga Zois was one of the most prominent co-creators of intellectual life in Carniola in the late 18th and early 19th centuries. Although he also engaged in literary work and translated foreign literary works into Slovene, he is mainly credited as the initiator and supporter of Slovene literary design and linguistic activity. Even after 1797, when he no longer walked out of the house due to paralysis (he moved around the apartment in a wheelchair, which he constructed himself), he remained socially active and active in various fields of science from mineralogy, metallurgy and geology to zoology and botany. . Just before his death, in severe financial distress, he sold the palace with a library and a collection of minerals to his nephew Karl, but he wanted them to continue serving Slovenian science in the future.


Templars

Križevniška ulica, which used to be known as Ribiška, is one of the oldest streets in Ljubljana. Between 1167 and 1200 the Knights Templar had a stronghold here, later superseded by the Teutonic Order. The Spanheim noble family, who set up the administrative centre of their estates in Carniola in Ljubljana in the 12th century, founded the monastic church of Mary, Help of Christians here, and alongside it a monastic house with a hospital and school for the education of poor children.

The Knights Templar were a famous Christian military order of the Middle Ages. Although they’re gone (except in the occasional mystery novel) their buildings are still around. In Slovenia, their legacy remains in the old Monastery Church and the area known as Križanke. The name is the first clue. However, even though Križanke means crossword puzzle in Slovene, the name owes its origins to the word Križar, which is crusader. The crusading knights, in fact, put up a post there back in 1167 and ran it for about 50 years, until the Teutonic Knights took it over.

Screenshot 2020-08-08 at 15.27.54.png
Booking.com


Güssing Castle in Austria

The castle was first documented in 1157 and was built on an extinct volcano. The castle in Güssing is the oldest in Burgenland. After several changing hands of ownership, the castle finally came into the possession of the Hungarian magnate Batthyány family, which has shaped the castle and city substantially.

burg-gussing-645238_1920.jpg


A trip to the castle is an absolute must to anyone visiting Güssing. A walk through the castle museum is worthwhile and to finish off in the castle wine cellar restaurant which offers a spectacular view of the whole area around Güssing. Another major attraction of Güssing is the Franciscan monastery. In recent years it has become the destination for many pilgrims, especially from Hungary, because the church is the shrine of the Blessed Ladislaus Batthyány-Strattmann.

After a day full of learning about history and admiring the castle walls, head across the Austrian border to Mjus World for some first-class pampering in their spa.

IMG_20200718_164558 copy2.jpg

Castle Grad in Prekmurje - Slovenia

Castle Grad is located in the stunning Natural Park Goričko in village Grad. The castle stands on a steep hill of basaltic tuff above the Grad settlement.

According to old tales, the Knights Templar began its construction. Over the course of eight centuries, a large pentagonal castle structure was build, which is today considered one of the largest baroque castles in Slovenia.

Following attacks by the Turks, peasants and rebellious farmers, the castle got its baroque image with multi-level arcade corridors, a castle chapel and a bell tower. Elements of other periods, from Romanesque, are skillfully included in the castle complex and reflect the wealth if its owners. 

Castle Grad

Castle Grad

The exterior around the castle was once magnificent; an English garden with trees and plants from different parts of the world. The interior of the Castle Grad and the huge inner courtyard were once the pride and joy of its noble residents.


Some effort has been put towards reviving the mighty castle into its old glory, but the job is far from done. Some of the smaller rooms have been arranged into museum rooms and are dedicated to pottery, herbalist and other crafts.

The wine cellar is open for wine tastings. Three rooms in the Castle Grad have been transformed into luxury hotel rooms and the bravest guests can spend a night or two in a prestige castle.

The inner courtyard is now arranged into a nice terrace – perfect for a snack break or cup of coffee. Special events are also organized here and healing Energy Spots have been located at some points around the courtyard of Castle Grad.

The partly renovated castle might not seem like a perfect trip, but Castle Grad is really something special. I do not know if it is the healing energy or just an imagination, but you will have a hard time leaving this castle once you see it.

You will want to explore the rooms of the castle, searching for knights and beautiful princesses. The views over the amazing nature of Goričko and the resting atmosphere will fill you up with energy and you will start wondering just how amazing it would be to stay in this castle.

Confused about your Portfolio?!?!?

Some of the most frequent questions I get from photographers are how to organize the portfolio and what work to include and how many images,

Deciding what work to showcase can be a challenge, so here are some tips to get you started: 

  1. Choose just ten images that you know will make you stand out. In the future feel free to create more galleries but for now just select ten of your best pieces.

  2. Think of this as your highlight reel. This is your chance to make a great first impression.

  3. If you can, try looking at your work through the eyes of a prospective client, employer, or photo editor. What jumps out at you? It can also be helpful to select pieces you’ve received praise for in the past. 

  4. Try to distance yourself from your work, criticise it, and do not be self-opinionated and just believe you are the best!

  5. Still not sure what to include? Ask for a second opinion! Enlist a trusted friend or colleague and get their honest feedback.

If you would like to schedule a Portfolio review check here

My Favourite Fujifilm JPEG Settings

One of the reasons I fell in love with the Fujifilm X-Series was because of the great jpeg processing software that was placed into every camera. I shoot with an XT-3, I am afraid I do not like the latest XT, and I prefer shooting instead with my Leiucas or Sony!

I tend to shoot nowadays mainly in jpg,m I know many people only shoot RAW, and that is absolutely fine of course.  This article will hopefully help the ones of you that do shoot JPG or that want a starting point for JPG settings of your own.


Fujifilm JPG Settings

To create your own JPEG settings, go to Edit/Save Custom Setting in the IQ section of the menu.  From here you can save up to seven different settings.  To make it even easier to switch between settings, you can change one of the FN5 buttons to ‘Select Custom Setting.’  In this way, you can quickly and very easily change presets.

I like to title my Custom Settings with names that I will recognise fairly quickly. 


Colour Fujifilm JPEG Settings


Velvia Landscape

For landscapes, if I like a punch picture I often use Velvia which really brings out the colour in every scene. Velvia is one of my fav Film!

  • Dynamic Range: 100

  • Film Simulation: Velvia

  • Grain: Off

  • WB: Auto +1 Red

  • Highlight: -1

  • Shadow: +3

  • Colour: +3

  • Sharpness: +2

  • Noise Reduction: -1

_DSF9252.jpg


Astia Countryside

One of my favourites right now it is the one I use most of the time living in the countryside

  • Dynamic Range: 100

  • Film Simulation: Astia

  • Grain Off

  • White Balance (WB) Auto +1 Red

  • Highlight -1

  • Shadow +2

  • Color +1

  • Sharpness -1

  • Noise Reduction: -2

DSCF1631 copy.jpg


A day in the City

The Classic Chrome. This is the one that I switch to for street photography. 

  • Dynamic Range: 100

  • Film Simulation: Classic Chrome

  • Grain: Off

  • WB: Auto +1 Red

  • Highlight: 0

  • Shadow: +2

  • Colour: +3

  • Sharpness: +3

  • Noise Reduction: -2

DSCF2533.jpg


Portraits Pro

My favourite for portraits with muted tones and super gentle on skin

  • Dynamic Range: 100

  • Film Simulation: Pro Neg High

  • Grain: Weak

  • Highlights: -1

  • Shadows: +1

  • Colour: -2

  • Sharpness: +1

  • Noise Reduction: -2

3DS_5818 copy.jpg


Monochrome Fujifilm JPEG Settings

Acros I

I simply love Black and White I shot as well with a Leica Monochrom and this is the setting I like

  • Dynamic Range: 100

  • Film Simulation: Acros Red

  • Grain: Off

  • WB: Auto +1 Red

  • Highlight: -1

  • Shadow: +3

  • Sharpness: +1

  • Noise Reduction: -1

3DS_3372 copy.jpg


Acros II

Another black and white setting with Acros a bit more gentle and subtle

  • Dynamic Range: 200

  • Film Simulation: Acros

  • Grain: Off

  • WB: Auto +1 Red

  • Highlight: +2

  • Shadow: +2

  • Sharpness: +2

  • Noise Reduction: -2

Canaletto Views -08 copy.jpg

Portrait

It’s a little softer, less aggressive and because it uses the Green filter on Acros it’s more pleasing for portraits on the skin tones .

  • Dynamic Range: Auto

  • Film Simulation: Acros + G

  • Grain: Off

  • Highlights: -1

  • Shadows: +2

  • Sharpness: +1

  • Noise Reduction: -1

arti2.jpg


Berengo Gardin

This is probably my favourite custom setting at the moment.

I’ve called it Berengo Gardin to honour the great Italian photojournalist Gianni Berengo Gardin

L1000947 copy.jpg
  • Dynamic Range: 100

  • Film Simulation: Monochrome + R

  • Grain: Strong

  • Highlights: 0

  • Shadows: +2

  • Sharpness: +1

  • Noise Reduction: 0


Post Processing

I mainly use Photoshop but my favourite piece of Software is produced by Skylum and is Luminar Neo.

It has a powerful engine for higher performance and flexibility. It also packs exciting and innovative tools that let you fulfil your vision.

Channel your creativity with the infinite possibilities of the new Layers feature. Relight an image that lacks lighting sources based on image depth.